Overall Set Report – Three Nights of Filming

At the end of all our shoot dates we acquired sufficient footage to create our music video. Looking back one thing I would change would be the number of days spent shooting. We filmed on three separate dates. One outdoor shoot and two studio shoots. I think we could have easily gotten away with just doing one day in the studio and just being well organised. Especially seeing by the last day everyone’s enthusiasm had dropped a little bit.

To recap the purpose of our outdoor shoot was to capture footage of the ‘witches’ running through the bush in the night. In terms of equipment we were well prepared with a Canon 5D, 70D, a mix of lenses, tripods, 3 portable LED light panels, some torches and a homemade reflector. The various lighting gear was paramount in the night-time shoot and allowed us to shoot at night. My main regret is not lighting the scenes more, both for dramatic feel and to avoid opening the aperture too much. As this led to difficulty in keeping all our shots in focus and it this shows when reviewing the footage.

For the first shoot we all adapted to our roles quickly. Andrea directed, Ella filmed, Jenny was in charge of the projection shots and I lit the scenes. We automatically set up dynamic that would continue for the next two shoots.

Our second shoot was in the studio. I was excited for this one but also a bit weary as I don’t think any of us had much experience working in the studios. It was fantastic to have that level of control though as opposed to the outdoor shoot. The first thing we had on the list was to get footage of the leads singing with the projections of the leaves we had shot the night before on their faces. We had a lot of trouble with the projected footage in terms of calibrating it so it matches with what the 5D was shooting on in terms of frame fate, shutter speed and frequency. We played around until we minimized the flicker as much as we could. Fortunately the projection of the leaves on Mo and Emma worked perfectly, particularly because it would only be visible for short amounts of time. It ended up being quite effective with the warm torch-light illuminating the leaves matching the bright orange hair of the singers.

After getting a few more shots of the lead singers we called the extras in. Originally we were planning on using the smoke machine for some of these shots but after testing it once it filled up the entire room for about 30 minutes so we found it impractical. Not to mention we were worried that if the smoke escaped the studio it would set off the fire alarms.  We primarily shot the extras dancing, as well standing in a witchy circle and staring down the barrel of the camera creepily. By now we had figured out how to connect the camera to the large LCD television in the studio and we used this as a monitor so we could all see things more clearly. At the time we probably should have been more weary that what we saw on the television wasn’t necessarily what the footage would come out like in terms of color and brightness etc. In saying this, it definitely helped having that monitor. The dance scene turned out quite dynamic with all the women wearing black with the black background with Mo and Emma standing out with their bright orange hair.  This shoot was the efficient and most succesful of our three filming dates.

The third and last shoots purpose was primarily to get shots of Mo and Emma singing the song. We ran through the song multiple times both on black and white backgrounds. Personally I thought the white didn’t work to well but the black looked great. Furthermore, we obtained some more shots of extras in a tableau style shot. I think this could have worked a lot better if we gave them more stage direction and created more movement within the frame. To wrap up our three days of shooting we decided to have some fun and shoot some cameo shots of Andrea which mostly involved her smashing grapes on her face. It was a bit of a laugh but it actually looked really good.


Exhibition Post

Screen Shot 2015-10-22 at 7.50.30 pm

I set out to document the opposition of the planned building of a mosque in Bendigo, specifically by the anti-Islamic group the United Patriots Front. Instead of covering it like a news/current affairs program I wished to create something more personal, which reflected my views as someone who grew up in Bendigo.  This issue was all over the media but the stories weren’t expressing the views of Bendigo locals. Through this short documentary I showcase my personal perspective on the protests therefore I did the voiceover myself.

I choose this for my short film as it was rare for such protest to happen in Bendigo and I wanted to experience what it is like to shoot this kind of event as I’m interested documentary films.  Although we had learned using the Sony EX3 throughout the semester I decided to use a DSLR camera due to its size and portability as I had to film in populated crowds. The first protest was more intense and mobile then I thought it would be and I often had to set up a shot in seconds and as a result some of footage is shakey and has soft focus. Furthermore, for the second protest I needed a lens with a higher local length as to capture a better shot of the UPF leaders speaking as it was a struggle to physically get closer. I was not used to shooting in this type of environment in these circumstances and the result is not perfect but I have learnt a lot.

It was easy to compose the perfect shot when practicing in the class room however this was definitely a challenge to meet on site. This project came with a lot of difficulties for instance the 2nd protest in Bendigo in which I filmed wasn’t until very late in the semester, delaying editing. Furthermore, my Premiere project actually broke at one point and I was forced to start over. In addition to this you may notice the documentary lacks interviews. For the most part I was too intimidated to interview at the second protest after asking one UPF personal and receiving verbal abuse. The result of this documentary isn’t what I originally set out to make. It’s interesting how ideas and plans change as you get closer to deadline.

Ultimately Film3 has been a worthwhile studio in which I’ve gotten a lot of technical hands-on experience. As a result next time I film something I will be more aware of all the things that can go wrong. It’s been a good semester in which I’ve learnt a lot and met some great people.

Edit – Take 2

After troubleshooting for hours trying to recover my project I decided to start my project again. I didn’t want to waste anymore time trying to get the première project to work incase it never did. This pushes my progress back although I still have time to finish a screener and hopefully the full mini documentary. I should work quicker this time anyway as I am more familiar with the direction I am taking. The doco will explore my personal thoughts and feelings on the United Patriots Front’s invasion into my hometown. Therefore my voiceover is personal and emotive and not expository like a ‘voice of god’ type of recording. As its from my point of view I can say pretty much whatever I like and am not required to be unbiased in my investigation. Not that any media really is..


Spinning Wheel of Death

Currently sitting in an edit suite attempting to open my premiere file for my documentary. It won’t load, I just keep getting the spinning wheel of death. I think it may be related to the large size of the file as I imported alot of footage. I’m getting quite fustrated but I’m sure I’ll get it working eventually. I hope anyway… If not I’ll just have to start again. Either way, I’ll get it done.

Spinning wheel of death


Premiere Keyboard Shortcuts

I don’t use a lot of keyboard shortcuts for editing with Adobe Premiere. I think learning to use shortcuts will speed up my editing process and result in more fluency with the software. I do use some shortcuts for basic and generic functions such as:

  • CMD+S  –> Saves current project
  • CMD + N  –> New Sequence
  • CMD + T –> New title
  • CMD+I –> Import media
  • CMD+X –> Cut
  • SHIFT+CMD+Z –> Redo
  • CMD+C –> Copy
  • CMD+V –> Paste
  • C –> Razor tool
  • V –> Selection tool
  • A –> Track select tool
  • P –> Pen tool
  • Z –> Zoom tool
  • B –> Ripple edit tool
  • Return –> Render

A neat shortcut that I learnt today is the Play Around shortcut which is SHIFT + K which automatically plays a couple of seconds of video from your timeline and then back to the point you were at. It’s a great way to have a quick look at what the footage is looking like.

Another handy shortcut and feature I learnt is CMD + SHIFT + E which exports a frame as an image which could be handy if I want to show someone what I’m working on or to create a thumbnail.

A very simple shortcut which I am surprised I haven’t really used is pressing the arrows keys to move between edit points on the time line.

This exercise of going through Premiere keyboard shortcuts has resulted in me learning new techniques and quicker methods of editing. I will be using more keyboard shortcuts in the future as I edit videos.


Color Grading Exercise

I took three clips from the documentary I am currently working on and colour graded them in a few different waysSIGN ORIGINAL 
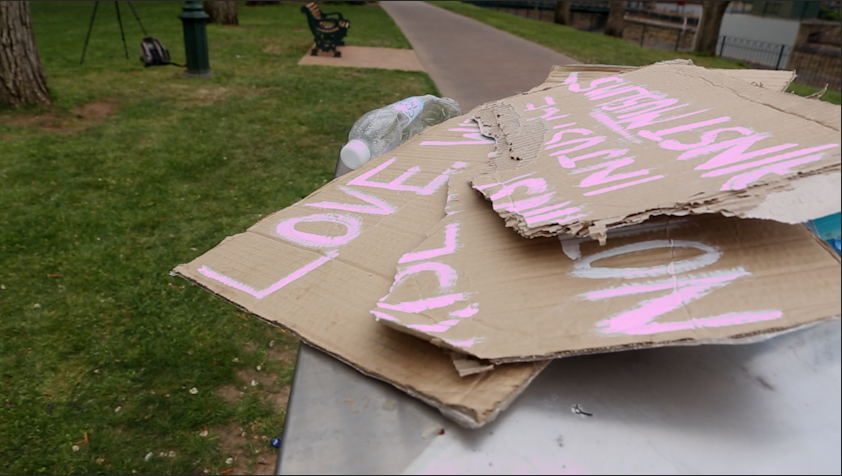
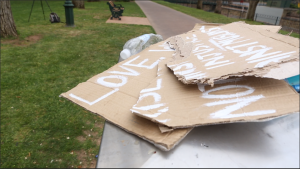
each. Firstly I have this sign in which was torn up and thrown in the bin at the UPF protest.

This is the original image.


Screen Shot 2015-10-12 at 5.09.53 pm

For this colour grade I made the shadows a blue hue while changing the midtowns and highlights to a warm yellow/orange colour tone. I changed the input levels of black and white to create a greater contrast. I changed the tonal range to make the reduce the highlights purely to the white paint on the cardboard and feathered the midtowns and shadows together to reduce a sharp line on shadow. In addition I saturated the warm mid-tones and the blue shadows to create this nice cool cinematic grading.


Screen Shot 2015-10-12 at 5.10.00 pm

This image is pretty similar to the original. Once again I gave the shadows a blue tone as well as the midtowns this time and dragged the highlights towards to pink. I changed the tonal levels to create a greater contrast. The tonal range was changed as to isolate the writing as the only highlights. The highlight saturation was then boosted to 200% saturation and the shadow at 50% as an attempt to make the painted words stand out.


Screen Shot 2015-10-12 at 5.10.08 pm

I isolated the highlights to the paint with the tonal range and then saturated the highlights fully with the colour pink and lowered the master saturation down to 80%. Once again I made the black blacker and the white whiter with the input controls to create a greater contrast. And issue with this colour grade is that not all the paint is turned pink, due to it being in a shadow. If I wished to make it pink it would cause the brightest parts of the bin to be changed to that colour also.

SPEAKER ORIGINAL

This is the original image of a UPF leader speaking at the Bendigo rally.

Screen Shot 2015-10-12 at 5.09.29 pm

For this colour grade I made the shadows blue while making the midtowns and highlights an orange hue. I feathered the shadows and midtowns together using the tonal range slider. Once again I created a contrast with the black and white inputs and desaturated the image to 80%.


Screen Shot 2015-10-12 at 5.09.20 pm

This is similar to the image above except I added more black and less white with the input slider. Also I created a wider range of highlights when feathering the highlights and mid-tones with the tonal slider. Furthermore the image is desaturated to 50%.


Screen Shot 2015-10-12 at 5.09.38 pm

For this image I simply desaturated it completely to make it black and white.


STRAYA ORIGINAL
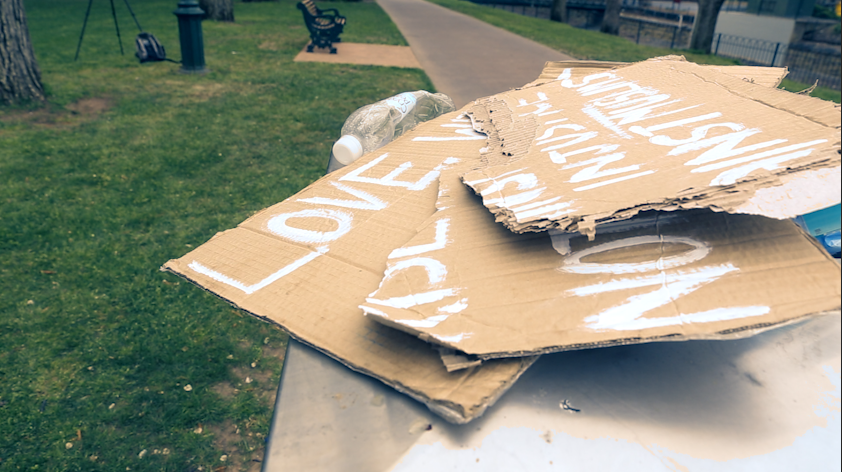
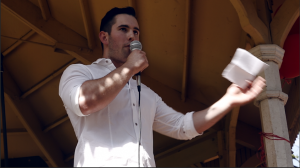
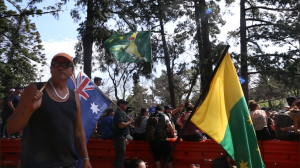
This is screenshot from the original video of anti-islamic supporters bearing Australian flags at the UPF rally.


Screen Shot 2015-10-12 at 5.08.21 pmOnce again I made the shadows blue and the midtowns and highlights a warm yellow-orange tone. I saturated the highlights to create that warm yellow glow in the sky. I created a significant contrast with the black and white input levels. I made it so the highlights were mostly the sky as well as some reflections off peoples skin, and limited the shadow. I then raised the master saturation levels to 120%. 


Screen Shot 2015-10-12 at 5.08.00 pm

This colour grade was mostly obtained by greatly desaturating the mid-tones and shadows while doubling the saturation of the highlights.

Shooting the 2nd Bendigo Protest

I ended up being able to grab some equipment from the tech desk in building 8 as some people didn’t come to pick up their bookings. I obtained a 6D with a 20 – 70mm f2.8 lens, a Rode shotgun mic and used my tripod. In hindsight I would of gotten a lens with a higher focal length as it was hard to get close to the speakers at this event. It was very different to the last protest in Bendigo, where a wider lens was ideal as I was in among the action. This reassured to me the idea that every situation has different ideal equipment in terms of filming it.

The day didn’t start too well as I missed the bus into town and worried I’d be late. Luckily my brother came around and drove me into town where the protest was held. To my worry I got to the place where it was supposed to be held and there was no one there. Well, except one UPF bogan who told me that everyone had already marched onto Rosiland Park. The UPF had leaders speaking on a stage with their supporters surrounding them, with a barrier of police then surrounding them. The anti-racism groups the Socialist Alliance and No Room For Racism where counter protesting on the other side of the creek, with the police blocking the bridge so there wasn’t any real clashes. I didn’t get much footage of the counter protestors as they were gone within less than an hour of the UPF Rally beginning. For that first hour I didn’t want to go around to the other side of the creek as I didn’t want to miss the start of the UPF rally. Turns out the counter protestors had started early.

Standing in the intense sunny heat and filming extreme right winged racist wasn’t incredibly enjoyable but I got some good footage. Unfortunately I didn’t capture any good interviews in which I planned too. I somewhat regret this now but at the time I felt intimidated by members of the UPF. They knew I wasn’t ‘one of them’ and was swore at  and given the finger a couple of times. In hindsight I should have worn a racist Australian singlet to blend into the crowd. I almost interviewed Radio & TV personality John Saffron at one point but someone stole him from me.

After the protest the UPF dispersed and I hung around for a bit. I captured these three peaceful christian counter protestors holding up signs about love and acceptance be abuse by UPF supporters. Not only did they yell terrible things at these poor people, they grabbed their signed and ripped them to pieces aggressively. It disgusted me to watch and was tempted to do something about it but there really wasn’t anything I could do. Except film.

The shoot was semi successful although I won’t really know the quality of the footage and whether I have enough until I run through it all in the edit suites. I’m booked in today so hopefully I make a good start on the editing stage.

Over and out,

Luke

Different Cameras have different sensor sizes

Last week Robin talked about depth of field, focal length and sensor size. The three things that control depth of field are aperture, focal length and distance from the object you are filming. A shallow depth of field isn’t better than a deep depth of field it just depends on the filmmakers desired effect.

In class Robin set up three cameras a Canon 5D DSLR, Sony EX3 and a Sony 7Z all the same distance from a particular object. All three cameras were framed for a MCU on the same subject yet they were all at different focal lengths. Why? This is due to the different sizes of the sensors in the cameras. The DSLR was at 80mm because it had a large sensor whereas the EX3 was at 20mm as it had a significantly smaller sensor. The Z7 was at an even lower focal length, due to its even smaller sensor. This is something to think about when choosing the right camera and lens for a situation.


Equiptment hurdles

The protest is this weekend where I plan on getting majority of my footage for my short documentary. Originally the protest wasn’t planned to be so late in the semester but then it was moved to a later date. I tried to book a 7D and a shotgun mic for this weekend two weeks in advance but they were already booked out. I would use the EX3 but it wouldn’t be practical for the situation I intend to film. This is in addition to the fact I’ve already filmed cutaways and the previous protest with a DSLR camera. I’ve been asking around so hopefully I am able to get my hands on a decent DSLR and a compatible shotgun mic.

Bendigo Cutaways

Here is a small video of some of the cutaway shots I captured in Bendigo.

https://drive.google.com/a/rmit.edu.au/file/d/0B4xPXyVvunuSREFhOTVob0lJakU/view?usp=sharing

I got footage of the site where the mosque will be built, general shots of Bendigo and shots of different religious buildings such as the Catholic Cathedral and the Buddhist Joss House. The shots aren’t perfect and even if I don’t use them all it was good practice. I’ve learnt that I need to be careful with focus as sometimes it may look OK through the camera but then I see it on the big screen and its a bit soft. Furthermore I made the mistake of not using a tripod alot of these shots which was due to me stupidly leaving it in my dads car.

For this I used a Canon 7D. I decided to use a DSLR because for recording the protest I’m going to need something that is small in size and portable as I’m going to be moving around through large crowds. So I used it for the cutaway shots too for continuity purposes.