Week 11 – What more can a remote do? Video

How did you author the video you recorded for upload to Instagram?

Like most other posts I have made, the video was taken using my iPhone 8 and it’s rear camera. This time, because of Instagram’s limited video editing options, I decided to edit the video in iMovie that’s been on my fire for ages, the phone could have even came installed with iMovie. Firstly, I muted the original audio because all that you could hear was a bunch of birds making noise, not ideal. But instead of having it just be quite like previous posts, I added in some music, which iMovie lets you choose from your own music on iTunes or the soundtracks they offer. I choose to use a song from my own library that I felt would repeat nicely and wasn’t too intense.

Becuase I wanted the video too look like it was going back and forth, I had to use another app though to reverse the clip. The app was called ReverseVid and all you had to do was selected the video you wanted to reverse and it did the rest. Then back in iMovie I put the two clips together. Then in Instagram all I did was add the ‘Lark’ filter at 70% to the video.

How did you publish the video you recorded for upload to Instagram?

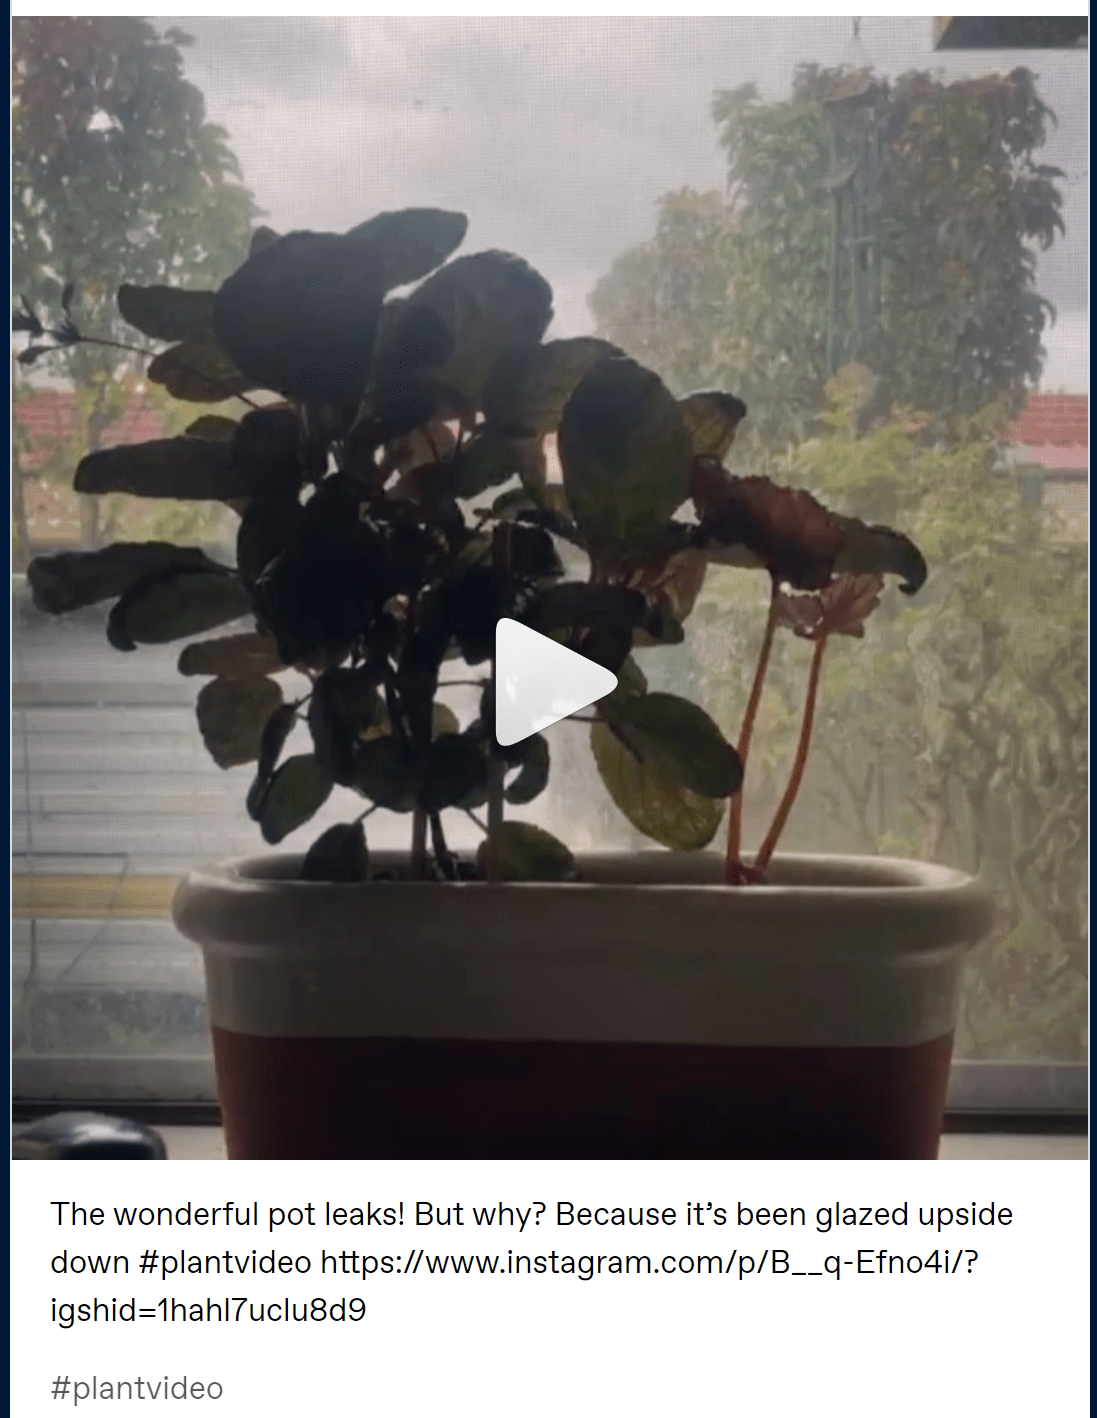
iMovie offers you the ability to post directly to Instagram, but doesn’t give you many options to control the post, so I opted to post it myself within Instagram. To be consistent with its related image post, I also added the geo-location tag “stay at home” a tag which doesn’t actually link to any location, but acts rather as a separate caption. I have realised captioning a post is by far the most difficult part, to say something relevant yet interesting can be hard. In the end, I captioned the post “a remote may no be just for one thing. Pausing my movie caused the volume on my Mac to go up and down. I didn’t expect that. Sometimes it even makes it play music expectantly”.

How did you distribute the video you published on Instagram to other social media services?

Similar to the previous post I wanted to see what posting directly to other platforms was like, so I did not use Instagram builtin cross platform sharing option. The first thing I did was copy the caption so that I didn’t have to type it out each time and potentially get it incorrect. On Twitter the first thing I did was paste my caption then moved on to adding the video, which the only editing twitter allows you to do it trim the clip which I didn’t need to do. Uploading the post was slightly slower than on Instagram, taking about 1 or 2 minutes rather than almost instantly on Instagram. Twitters version of the video was also noticeably more blurry than the one uploaded to Instagram and the audio was automatically muted, I don’t know if this is something I could change but it was not apparent how.

On Tumblr, the first thing I did was select that  I wanted to upload a video and then select from my own device. Once selecting the video, the main difference I noticed was a button that said “this is my original work, or I have permission to post this” that had to be selected before posting, which both Instagram and Twitter did not have.

Again I pasted in my caption, and pushed post. The first time I did this I had no idea where my post went and couldn’t find it so I assumed it didn’t post. Doing this again, everything worked fine. Like Twitter, the video was automatically muted and I had no idea how to change this setting for the post, or if it was just a personal setting specific to individuals.

Week 11 – What more can a remote do? Photo

How did you author the photo you recorded for upload to Instagram?

At this point I might be repeating myself a bit here, again I used my iPhone 8 to take the photo using the rear camera. Although I did take the photo using the square setting, so that the image was already cropped to a square. I didn’t use the flash of the camera because it gave the silver a glare that wasn’t appealing, instead I paced it near a window so that it would get some nice lighting.

My editing within Instagram has become somewhat the same; using the ‘Juno’ filter at 50%, putting the contrast up a bit, decreasing the warmth of the image, adding an orange hued highlight and a navy hued shadow at 30% this time. I have learnt that you can decrease or increase the amount this ‘colour’ setting is added, in last weeks post I didn’t use it because I though it was too much and made the image look worse; but if you touch the little coloured dot again you get a sliding bar that allows you to change it.  A little hidden but I appreciate the feature, but I would have liked to known about it earlier. Instagram’s editing is a bit limited with a lot of features or affordances hidden or somethings are just unnamed, like the sliding bar below, I don’t know if it reduced the hue, saturation or even transparency of the colour. Where as apps like lightroom label everything, I know what every thing I change is going to do.

How did you publish the photo you recorded for upload to Instagram?

For this image I only had one image to choose from so I used that one. The reason for this is because my phone’s storage is filling up and instead of taking a bunch of images to then choose only one, I just tried different framing options until I got one that I liked and simply took one photo. To try something new this week, I decided to add a location to the post before uploading but not wanting to add my own location I looked at the options Instagram suggested. Selecting the first and probably most relevant option “stay at home” with no actual location linked to it. Lastly, the caption this image I captioned “A simple remote for an Apple TV, what more could it do? Nothing much surely.” and no hashtags for this image.

How did you distribute the photo you published on Instagram to other social media services?

For the majority of my previous posts to distribute them to a different platform I simply used the options Instagram offered by flicking a switch. But as I’ve mentioned in previous posts, this just results in simply linking back to Instagram, especially on Twitter where the image isn’t even visible it’s just a link. This time I wanted to try something different, so I saved the edited post off Instagram and decided to manually post them on different platforms myself.

On Twitter this was easy and I preferred the outcome of this method rather than allowing Instagram to do it for you. This time the image was embedded into the post so it could be seen rather than just a link.

Tumblr had a similar outcome to the twitter post, the image was embedded in the post with the caption accompanying it. Although to save time, this process could have been done through Instagram was similar results, only this time the post does not link back to the Instagram account. Which could be a negative if you are trying to get more views or followers on your Instagram.

The process to upload the image on Twitter and Tumblr was pretty similar to uploading an image to Instagram itself. Although because twitter is more text focused you are prompted to add a caption first then link in any media in this case the image. Tumblr offers more options in posting, first asking what type of content you would like to post and after selecting the photo option you are then asked if you would like to upload the image from your device or off the internet. Although Tumblr and Twitter do no offer the same ability to edit an image that Instagram offers.

Week 10 – Wonky Pot Video

How did you author the video you recorded for upload to Instagram?

Again like the related photo, for this video I used my own iPhone 8 to capture it. I initially used one of  Instagram’s other apps Hyperlapse to capture the image in a time-lapse manner. For this particular video I knew I would have to plan when to take it, because it had to be taken when the plant was watered and then began to leak. Again for this I muted the audio so that I didn’t have any unwanted noise in it.

When editing the video, because Instagram doesn’t allow you to alter settings like you can with images, I was left to only select one filter. In the end I choose the ‘Sierra’ filter at 50% because it gave the video a sort of orange hue that the other images slightly had and also a slight darkened vignette that decreased some of the high exposure of the background. I didn’t trim any of the video, it plays how it was recorded. Although I did realise you could choose a cover shot to display when the image is not playing. I choose to have something similar to the image related to this video.

How did you publish the video you recorded for upload to Instagram?

I was planning to post the video directly from Hyperlapse to Instagram but I left my phone idol for too long and the app reset itself. But luckily it auto saved the video, which I was then able to import into Instagram anyways but without getting to experience what posting directly from Hyperlapse was like. I choose not to redo the video because at this point the water had been cleaned or soaked u back up by the plant.

The video plays automatically for the only reason being that I am yet to figure out how to set it otherwise, I am quite new to posting videos to Instagram only having done it a few times. Regardless of that, I captioned my video “The wonderful pot leaks! But why? Because it’s been glazed upside down” to tie into the last post. Lastly, I simply used the hashtag #plantvideo which Instagram suggested to me after I typed #plant and I felt was fitting.

How did you distribute the video you published on Instagram to other social media services?

I have learnt that Instagram now saves your preferences to post to other platforms, I no longer have to remember to flick those switches. So it was basically automatically posted to the linked Tumblr and Twitter accounts. But I’ve learnt from last time and my hash-tagging is no longer platform specific. You can see the caption and link to the Instagram post on Twitter below.

Also you can see the video directly on Tumblr, though the Tumblr post you can even see the cover image I chose to use because the video does not plat automatically.

Week 10 – Wonky Pot Photo

How did you author the photo you recorded for upload to Instagram?

For this post unlike the previous two I used my own iPhone 8 to take the photo, which in comparison to the iPhone 11 lacked some quality and additional features to play around with but I was familiar with it. Using the rear-facing camera again because it provided the easiest means of achieving the shot I had in mind. When taking the actual photo I used the iPhone’s touch to focus feature to get the plant and pot in focus rather than the background; but this provided a problem as I had to choose to either have the plant be in focus and the image slightly washed out or have the background’s exposure reduced but have the plant almost completely dark. I knew this was because of the back-lighting of the photo, but wanted it to be positioned on a windowsill which this was the only one in the house.

I worked around this once the image was taken it was quite washed out because I chose to have the plant in focus. So when editing the image, inside Instagram, I firstly brought the contrast up by 50 to increase the definition between the background and foreground. Then to make the image slightly tie back to the aesthetic qualities of my previous posts, I turned down the saturation, made the highlights an orange colour, increased the fade setting, and increased the warmth by 38. It would be nice if Instagram allowed users to save the settings they regular use as a filter of their own to speed up this process. Lastly, I added the ‘Juno’ filter at 50% to the whole image, in an attempt to make it visually appear like the last. With my limited experience editing on Instagram alone, I was quite happy with how it turned out, even if I wouldn’t classify it as perfect.

How did you publish the photo you recorded for upload to Instagram?

With this image I only took roughly 3 or 4 images in total, which made the curation process quite quick and easy. Each of the four images just differed in how exposed the image was, ranging from the plant being completely dark and a normal background to the background being completely white and the plant being decently normal. In the end I decided on the 2nd high exposure shot, where the background was quite light but the plant still had detail, which I thought I would be able to work with when editing.

The caption, I’ve learnt is a hard thing to come up with. I ended up deciding on the caption “what could possibly be wrong with this wonderful pot? The answer will be revealed soon…” to keep with the theme of surprising design and getting potential viewers excited to see the reveal. Also I chose to use the hashtag #plantsofinstagram, a hashtag I often see friends tag their plant related images with.

How did you distribute the photo you published on Instagram to other social media services?

Learning from last time, I remembered to flick the switches that allowed Instagram to share the image on my linked Tumblr and Twitter accounts. Which is pretty simple and easy if you remember to do it, which I have struggled to do just out of habit of not doing it.

Posting to Tumblr from Instagram is probably my preferred option out of posting to Tumblr and Twitter, because Tumblr actually posts the image whilst Twitter only shares a link to the image. Which I think doesn’t really share the image, because no one gets a preview of it, they have to be willing to click the link to find out what it is or only rely on the caption. Below you can see what I mean of the seemingly boring and unimpressive sharing on Twitter.

The post on Tumblr can be seen below also. The only weird thing Tumblr did was included the hashtag in the caption and in the hashtag area, making it appear twice.

This is were I also encountered the issue with hashtags, if you use a hashtag specific to Instagram like I did with #plantsofinstagam and then share the image on other platforms like Twitter and Tumblr there might be an issue with that. Tumblr or Twitter audiences might think its a bit weird that you used #plantsofinstagram on a different platform. So it becomes apparent the thought you would need to put into hashtags and which platform you choose to share on.

Week 9 – Deceptive Candle Video

How did you author the video you recorded for upload to Instagram?

For this video likewise to the photo it accompanies I captured it using my sisters iPhone 11 and its rear-facing camera. Although I did use Instagram’s sister app Boomerang to record the video so that is a short clip that appears to be looping back and forth. The video only used one clip, but I believe Boomerang works by capturing various single images and compiling them together into one video.

Again, I used the editing options available within Instagram; this time being limited to choosing one of Instagram’s filters rather than being able to adjust the saturation and the tint of  the shadows/highlights. Due to this constraint I chose to use the ‘Lark’ filter at 100% because I wanted to video to match the visual style of its related image and this was the closest I could get without the ability to change the aforementioned individual settings.

Regarding the audio, I don’t know if Boomerang records audio but when I watched the video back I didn’t hear anything. But just to be safe I muted the audio to prevent any unwanted sound.

How did you publish the video you recorded for upload to Instagram?

I retook this video a few times before deciding on one to use, but due to Boomerangs nature the previous discarded attempts were deleted, so I was only left with my finial decision. Going straight from the Boomerang app to being guided into Instagram, I captioned the video “The swift change from a delightful pattern to complete darkness”. For the video, I chose not to include hashtags but instead chose to again make use of the tagging function and tag the brand of the candle.

How did you distribute the video you published on Instagram to other social media services?

This time I remembered Instagram offered cross platform distribution within the posting settings so I took advantage of that. It was as simple as flicking a few switches and logging in to the respective accounts (if you can remember your password that is).

This time when the post was shared to Twitter it was accompanied by the posts original caption as well as a link back to the original post on Instagram. As you can see below. It also traditionally states that the post was made through Instagram rather than from an iPhone or computer browser.

Tumblr also sees a different layout when posting directly from Instagram’s post page rather than using the ‘share to’ option later. The post likewise to twitter features the whole caption from the original post and a link back to the Instagram post.

Week 9 – Deceptive Candle Photo

How did you author the photo you recorded for upload to Instagram?

For the authoring of this particular image I used my sisters iPhone 11 to capture the image on the rear-facing camera. Due to the new nature of the phone, the image and camera quality was good; although I did try to use portrait mode to blur the background of the image to no success (it probably didn’t recognise that the candle was meant to be the subject). I did move quite close to the subject, as zooming in made centring the image quite hard and shaky.

After capturing the image, I used Instagram’s own setting to edit the image. Choosing to use their ‘Juno’ filter at roughly 60%, as well as making the highlights tinted an orange colour, the shadows tinted a navy colour, and reduced the saturation; overall to achieve a washed-out and pale aesthetic. It was a new experience for me to use the editing software native to Instagram as I am used to personally using Lightroom. Instagram provided a more simplified editing process but I would have enjoyed it more if they afforded users the ability to alter the hue, saturation and tint of specific colours.

Also while among Instagram’s posting options I chose to use their multi-image post option, in order to show the before and after type reveal of the candle, fitting in with my chosen theme of surprising and hidden design features.

How did you publish the photo you recorded for upload to Instagram?

To publish this image I first had to decide which image to use, as I had taken a few images of the same thing with different angles, distances from the subject, and poses. In the ended I chose the image that was most centred and overall most aligned/ straightest because it looked visually appealing. The caption I chose to use for this image was “In need of a surprise during these boring times?!? Swipe to see the hidden design of this deceptive black candle” in an attempt to make the post appear more interesting than it actually is with the first image just being a lone black candle, as well as enticing possible viewers to utilise the swipe function Instagram affords. Additionally, I also used Instagram’s tagging function to tag the candle brands Instagram to further network the image.

How did you distribute the photo you published on Instagram to other social media services?

To further distribute this image I posted the link to the Instagram post on twitter because I thought that the swipe function might not work on Twitter and it would be better to simply link back to the Instagram post. The tweet can be seen below.

Additionally, when initially posting the image I forgot Instagram offers user the ability to post on other platforms Instagram, because it is not a feature I regularly use. When attempting to go back and fix this error the closes thing Instagram allows users to do is use the ‘share to’ button to share the link of the post. Because of this I chose to distribute the link though Tumblr, which can be seen below. Tumblr embeds the image into the post, although making the image appear to be a video with a play button that when clicked just redirects to the Instagram post. Tumblr also shortened the original caption to “surpri…ptive black candle” and automatically uses the #Instagram.