
My Process for Colour Masking
Through my exploration of the importance of colour in films, I have decided to focus on the use of ‘masking’ in Adobe Premiere CC. Masking allows you to define a specific area in a clip that you want to blur, cover, highlight, apply effects, or color-correct. I have used Masking for the purpose of colour enhancement as well as adjusting contrast and brightness levels. The process I have used has been documented in this post with a 1,2,3 step photo explanation.
First of all, in order to control sections of colour within the clip I split the clip into 8 sections to show the individual positions of colour alteration. Step 1 shows the raw beginning of the footage and what it looks like before any colour alerations have been made.To start masking:
1. Select the individual clip and go into effect controls. A series of effects will come up i.e. Presets, Audio Effects, Audio Transitions and Video Effects. Go into Video Effects and then into the Colour Correction Section. You will then drag Brightness & Contrast into the Effect Controls Panel as well as the Change Colour section.

2. From here I then focused on three pillows that are the same colour. Using the eye dropper tool, you then select the colour of the pillow so that when you add your masks that specific colour is the one that changes. You then create individual masks that cover that object within that Change Colour section. All masks under this category will be the same. You can adjust the mask using the tools so they wrap around the specific object, and don’t interrupt the colour of any other object. You create as many masks as you need to appropriately cover that colour


 3. You drag a new Change Colour into the Video Effects control centre and create a new colour adjustment for another object within the frame. Now focusing on the blanket behind thesubject, there will be a lot more masks as there are other objects in the way. You want to cover the blanket as much as possible without overlapping the other objects, i.e. the book in her hands, the pillows and the wood frame.
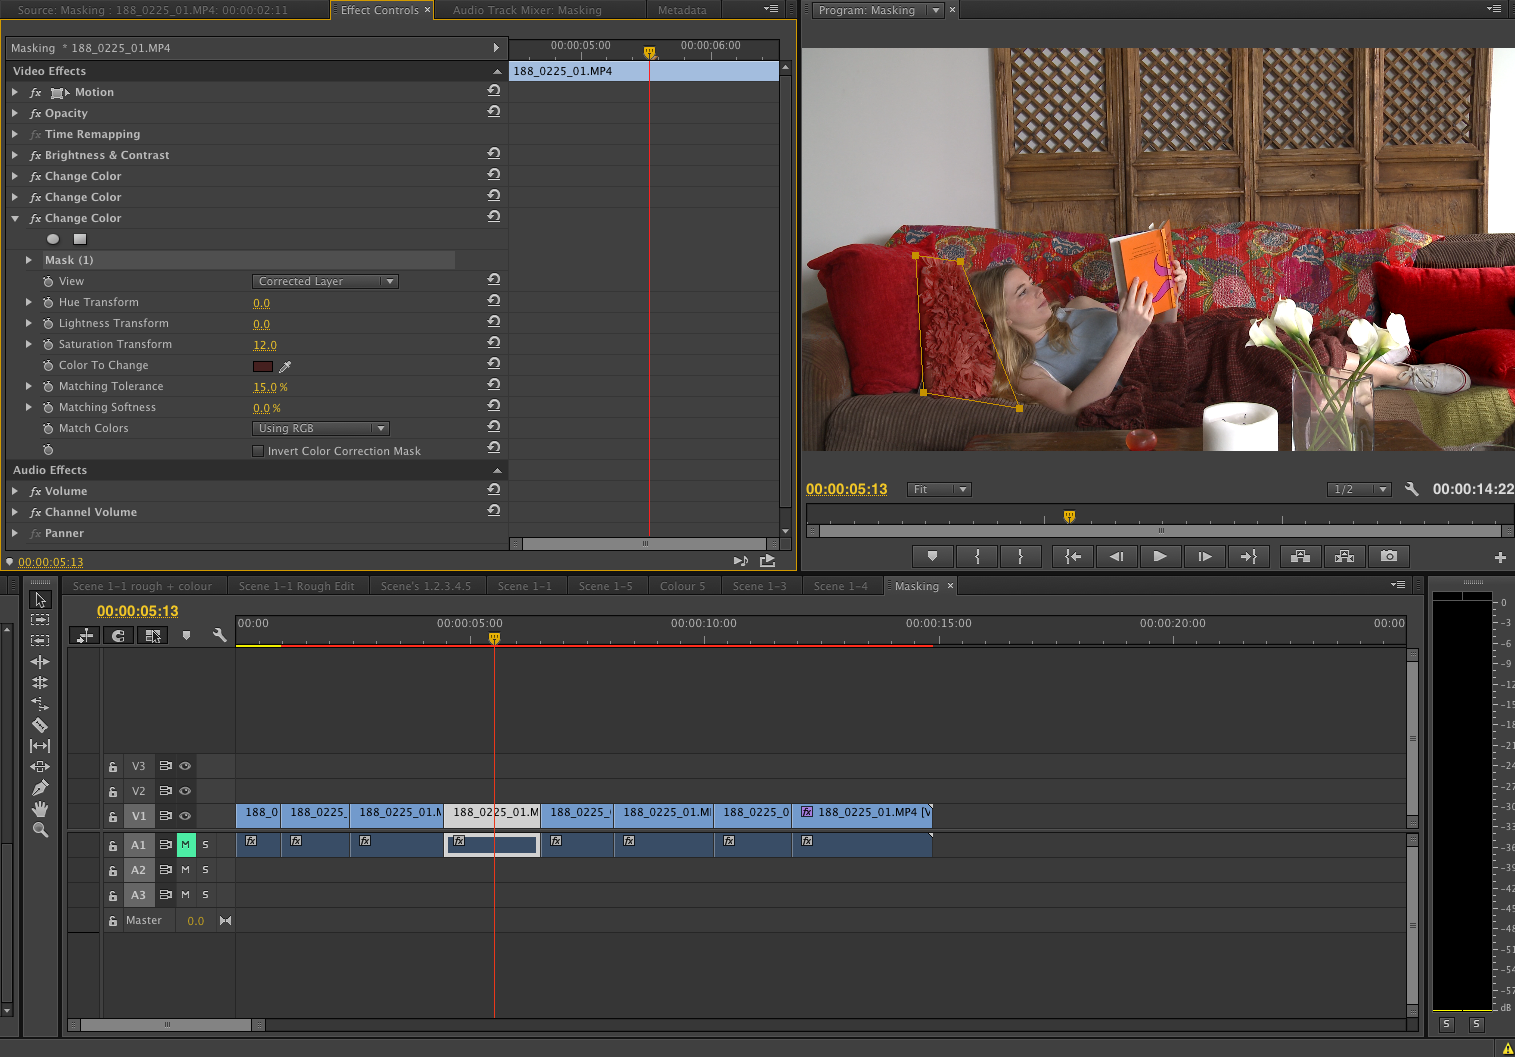
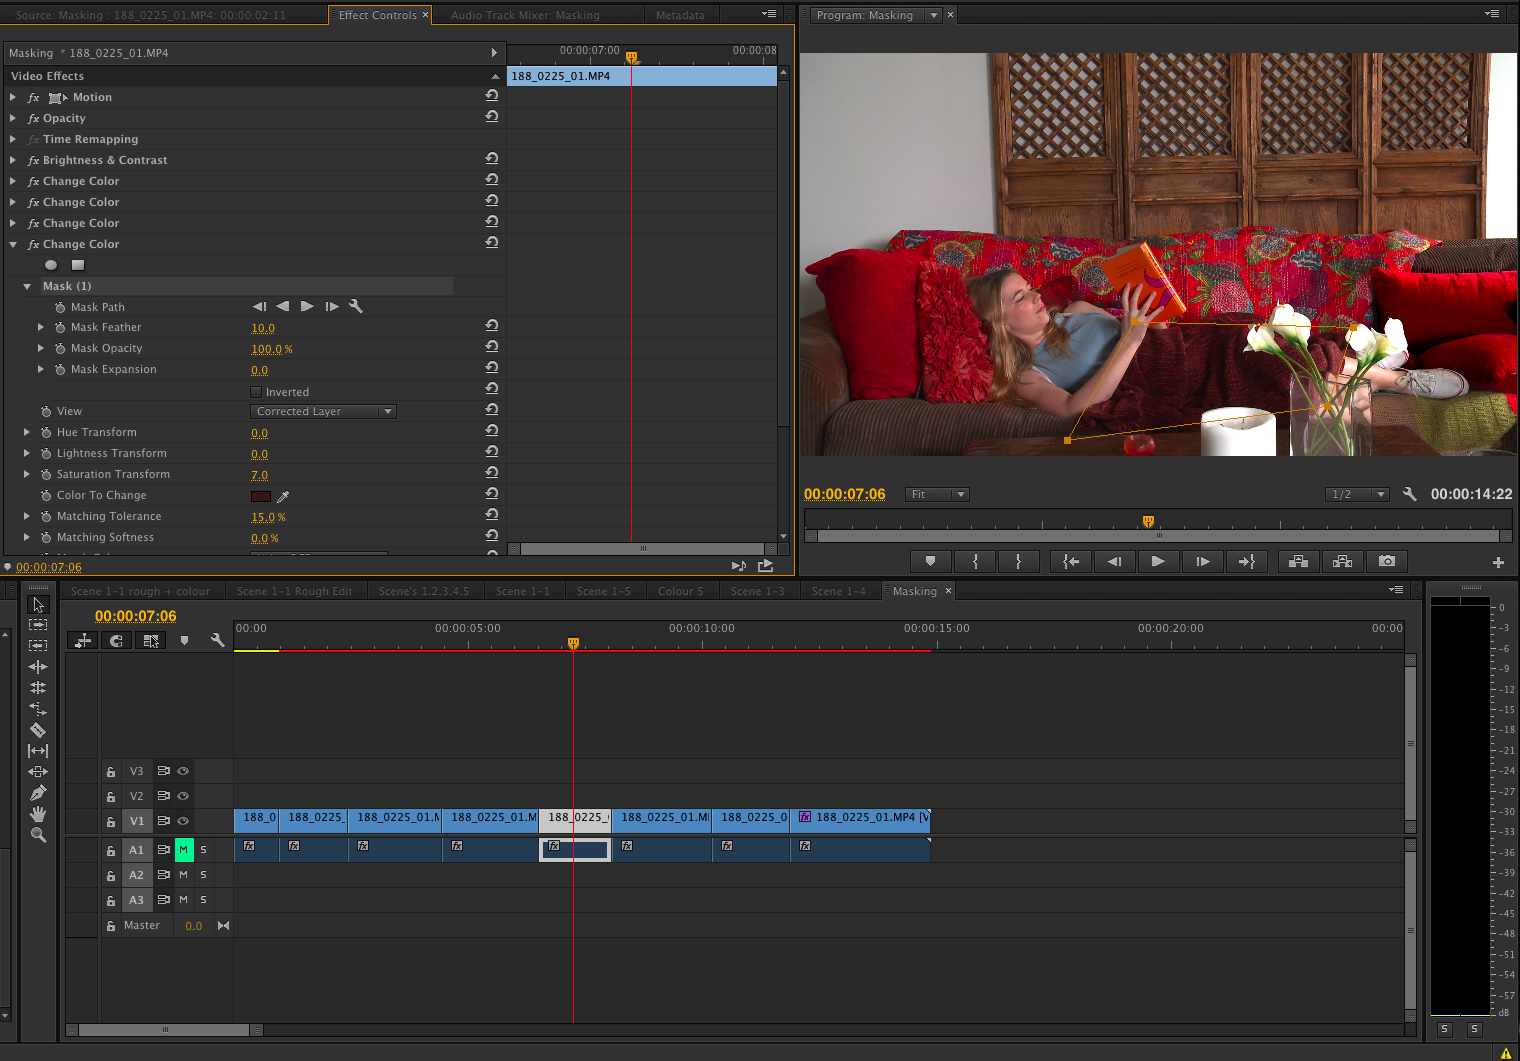

When masking you need to take into account character movement and that you need to cut a clip and edit separetely if the subject moves around as you don’t want them walking into a mask that will effect the way they look. For example. with the blanket behind the subject, When she stands up I had to cut the clip so that I made sure her face didn’t turn red when she stood up as she covered the blanket are.
https://helpx.adobe.com/premiere-pro/using/masking-tracking.html