
tuesday
How to do a gif into the blog 😛
Upload Images from Your Computer
- Go to Posts -> Add New or Pages -> Add New, or open an existing post in editing mode.
- Place your cursor where you would like the image to appear, then click on the Add Media icon above your post/page editor:

3. Simply drag and drop your files into the box that appears, or click Select Files to choose a photo from your computer to upload. Please keep in mind that the drag and drop uploader only works in browsers with HTML5 upload support such as the latest versions of Chrome, Firefox, or Safari. Other browsers will still show the Select Files button or the basic browser uploader form.
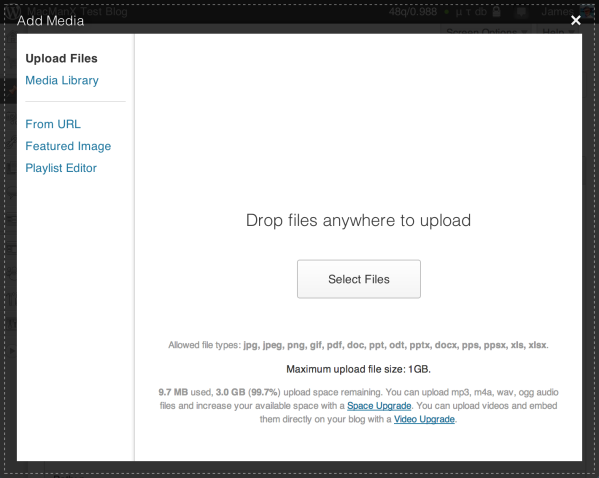
- Once the uploading/crunching process has completed, you will be given the option to edit some settings before inserting the image into the post/page.
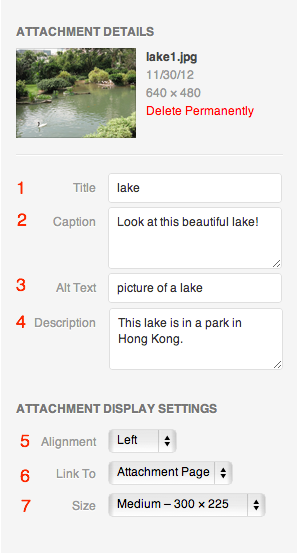
. Title – The title displays on the image’s attachment page.Note: The title added in this field does not display as a tooltip (when a mouse is hovered over the image). To add a tooltip title, edit the image after inserting it into the post, and add your tooltip wording to the Title field.
2. Caption – Image caption displayed directly underneath the image.
3. Alt Text – The text displayed when the image is not available. This is the text seen by search engines and screen readers.
4. Description – Full image description or other information to accompany the image on its attachment page.
5. Alignment – The position of the image within your post or page. See this page on image alignment for more information.
6. Link to – The URL/web address to which the image will be linked.There are three choices:
- None will remove the link completely.
- Media File will link the image to its original, full-size version.
- Attachment Page will link the image to its attachment page.
7. Size – The size of the image.
- Click Insert into Post when you’re done adjusting the image’s settings.
http://www.mediafactory.org.au/networkedmedia/marketplace/buy-a-how-tos/
thanks internet! http://en.support.wordpress.com/images/

[…] html. I generally would use really basic code and had no control over image size or anything. it’s thanks to this post written by my mate moose. what a cool guy, now I can use the terrific features he taught me to link incriminating facebook […]