my method of working part 10 – soundtrack trials

This particular track we focused on pacing. Since the shot itself is a non-stop tracking shot we marked the pacing through specific sounds in the track with specific frames. For instance, there is a consistent beat that coincides with a particular frame (a wide shot of the room that then tightens into a shot that only frames the two lamps and the chair with less headroom etc). I found this to achieve a very poetic effect that assisted in matching the intensity of the music. Similarly, the music itself changes from that of an eerie ticking clock to a high pitched screechy sound (this happens simultaneously with the tight framing on the couch so it establishes an abstract kind of narrative progression). We also saturated the colours to create more of an environment that looked a bit imaginative ( so that the audience could register that something didn’t seem right or all that natural)…

Link

working on a few more 🙂

my method of working – part 9


Here we are after another meeting… J


Daniel and I experimented with particular details of the shot. The last take I updated had a strong bluish hue as we attempted to balance out the yellowish tones. Currently attempting to feather out the black circle as it blends it much more smoothly with the warmth of the room. The issue now that I am dealing with is how I can balance that black circle as it encloses on the frame I don’t want to have that effect whereby the audience is totally aware that this take was edited, rather some subtlety that makes you feel uneasy after watching it. To make someone feel anxious, in my opinion, is a much greater feat than to suddenly shock them. And that anxiety is left with them for a much longer period than the bang which simply exists in the moment of its happening.


We’ve chosen to work with the clips that have a little bit of a dip as opposed to a direct and clear pathway as we zoom into my face. Robin mentioned that the dip was more suspenseful as the viewer cannot totally predict where the camera will end. Initially I thought it would be effect that the camera movement was so predictable because it was a subtle technique, however, I’ve come to realize that I can be more liberal with that movement and it could enhance the suspense.


Meanwhile we are experiment with alternative soundtracks and their cohesiveness with the pacing of the camera movement…

Breaking down walls…

After my discussion with Robin today I’ve realized that you can’t just stop once you’ve had a mental blockage. This may be a little on the philosophical side but you never stop learning in life. Likewise, I think it’s all too arrogant to believe we have fulfilled all of the knowledge about a particular thing. I’ve already chucked out the idea of montage as a component within my shot; focusing on the movement of my tracking shot for suspense. However I did not recognize the possibility of such suspense through an entire lack of movement of the camera. Robin mentioned this – and it really resonated with me- that everyone thinks of the long take as a movement shot. Why so? Perhaps we fear the still shot. Do we fear the fact that everything is cut so quickly nowadays that we’ve trained our minds to only perceive film through a lens of camera movement… ? Robin suggested I try to experiment with this. I agree as I think a great push for inspiration lies in the simple process of comparison and juxtaposition. What I mean by that is if you are trying out a certain technique, try to invert that technique and analyze the comparisons… they may just inspire you that little bit more…

Ughhh What happens now??

So I’ve been thinking and thinking and thinking… what am I meant to learn from my exercise? What’s the next step. And that’s when it hit me….what I learn is whatever I want to learn..what I choose to do next is entirely up to me to decide. It won’t reveal itself and suddenly illuminate my mind…I foolishly thought that when developing this concept… I assumed I would film this project and have the perfect inspiration for what to do next.

I needed a direction. I wanted to understand what the long take means to me. I think I ignored a very important factor, that is: the soundtrack. Throughout this semester I’ve come to realise how much I am passionate about creating a soundtrack that synthesizes with the visual information to produce an atmosphere as opposed to a clearly defined narrative. So this is my next step. I am continuing to experiment with the soundtrack. I know I came into this semester with a proposal about the transition from innocence to insanity, however I want to turn my attention now to the ‘suspense’ genre. I want to see the limits I can push with different paced soundtracks in conjunction with the same long take. Since I have approximately 20 takes to choose from I am experimenting with the different takes as each take has slightly different pacing.

The take Linked here experiments with a new eerie track, focusing on suspense building up to a climactic/sudden cut to black as accentuated by the soundtrack accompanying. We experimented with filter colours on the outskirts of the frame, suggesting something is dangerously enclosing in on the girl (presenting her as vulnerable for most of the long take).


Reflections on the final product

Before I begin reflecting I want to actually define what I believe the process of reflecting itself to be. For myself, reflecting starts at comparing the work produced with the goal you had in mind. In order to do so one must clearly establish their goals in measurable terms so that if attained, they are satisfying and if not attained one can determine what particular factors were unsatisfying.

According to this definition I will reflect upon the final product. The goal I had established for myself was to explore the long take and its effect with very little movement within the frame. To  this end I am highly satisfied. Let me explain. I did not set myself such a goal that if I were to stray from it things would be disastrous. Rather I established for myself a exploratory goal whereby I can still define the successful and unsuccessful elements.

What I love about this take is that, on its own, I feel it delivers the message I am trying to articulate. In the same way, it suggests that it is part of a larger whole. Therefore I feel it has satisfied that sense of being a unit itself. The smoothness of the pan and the track encourages a heightened awareness of the accompanying soundtrack. It is the soundtrack here that establishes a progressive narrative: First we hear the sound of a baby crying (suggesting new life being born), then a flat-line on a heart beat monitor ( alluding to the death of the mother after childbirth), children’s laughter ( the innocence of being a child), car crashing ( death of loved ones – innocence being snatched away) , and finally funeral bells. Beneath these audio tracks is an eerie soundtrack, which seeps insidiously between the separate sounds creating a chilling ambiance. The reason I added this eerie track beneath it is to foreshadow the girl’s transition from innocence to literally losing her mind.

Interestingly the chandelier was never intended to be in the shot. In fact, it proved greatly disruptive as the crane was all too close to hitting it. We then decided to work with our issues instead of dismissing their potential importance. We chose to frame the chandelier in a CU before panning down to reveal the rest of the room. This worked so greatly and I am so glad we chose to work with it because it created a greater depth of field that gave the take a much more dynamic aesthetic.

The focusing is probably something I feel we could have worked better with.  We actively chose to have the background out of focus whilst the chandelier was in focus, and then focus pulled to have the the couch be in focus – since we were panning in that direction – making the couch and the girl (myself) the foreground. We certainly had difficulty managing to adjust focus whilst the camera was panning and tracking so that is something I would like to further experiment with (Having a camera moving around with the focus changing because I feel like we only ever practice that focus pull when the camera is steadily mounted on a tripod).  The focus however worked well because the girl came into focus throughout the track and came back out of focus when she was staring at the camera. Even though that loss of focus meant that the intensity of her staring at the camera was lessened, it gave her a sense of vulnerability (figuratively alluding to the fact that she is losing herself amongst this chaos).

I would love to have had an even slower take that lasted longer but it was very difficult to keep the camera steady on the crane which was mounted on the tripod that wasn’t as heavy weight as we wanted. The solution then -for future purposes-  would be to get a heavier weight tripod that could hold the crane more stable so as to attempt a slower shot. The warp stabilizer worked well in post. I overcame the fact that you couldn’t have the warp stabilizer effect and duration effect on the same clip by simply nesting the clip.

… still in the process of reflection… will keep you updated 🙂


Shooting Day!

Film Shoot…CHECK.

Boy did it take longer than it expected. But boy did I learnt a lot.

We started at 1pm on the dot. Here is a breakdown of the day:

1.  cleared the room ( 1.00 – 1.15)

2. set up tracks (1.15 – 1.20)

3. set up Dolly (1.20 -1.25)

4. Set up tripod (1.25-1.50 – due to complications with plate)

5. Attached Crane ( 1.50 – 2.05)

6. set up lights (2.05 – 2.15)

7. discussed the breakdown of filming (2.15- 2.45)

8. shoot -> Put SD card in laptop and analyze ->shoot  (2.45-5.00)

9. Pack up put equipment in car (5.00 – 5.45 )

* Firstly I was given a lighter tripod than I had ordered. However I know that I should have checked the equipment before taking it home to ensure everything was correct. Due to the lightness of the tripod our crane was causing an imbalance which was evident when watching the shots that we had filmed. However we combated this best we can, with the knowledge that we can use a warp stabilizer in post editing.

* Setting up took much longer than we had anticipated. I need to recognize how long it takes to set up each element in the shoot. This time I had only set aside 30 minutes to set up equipment. In fact, it took us approximately 1 hr to set up the equipment. I acknowledge this and take it on for future shoot schedules.

* Lighting was probably the element we experimented most with. We tried opening the curtains behind the central character so as to deepen the field (there are trees beyond the outside window), however this was a major issue with the lights as I underexposed the interior in favor of not over exposing the exterior. I then attempted to even this out using the blonde and diffusing it so that it wasn’t too harsh on the interior in a way that grossly contrasted with the natural light outside. Every which way I attempted, I was unsatisfied. We decided it best to close the curtains so as to best manipulate the interior lights. We did however open the front door which sheds light to the left of the frame, and balanced this out with the blonde place on the right side of the camera (we diffused the harshness of the light by facing it up to the wall and letting that reflection fill the room). This worked well in terms of creating a smooth balance that looked both natural and still emphasized the warm temperature I wanted.

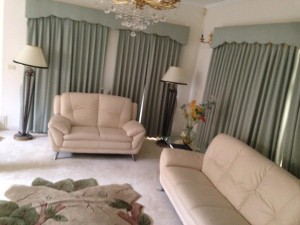
* The room worked perfectly for what I had envisioned. The production design itself just came together so well. The couch functioned as the central point which was encased by the curtains. The frame was balanced on each side by a tall standing lamp, which accentuated the ‘homey’ atmosphere. The colour scheme worked really well to establish that atmosphere, with the range of cream, subdued green curtains etc.

*The costume choice contrasted well with the cream couch and really established the girl both within the composition of the frame and thematically in relation to the concept. I chose this particular dress because the design itself is quite childish (therefore alluding to the childishness in her). At the same time the red colour reminds me of both blood and love and adulthood (older women wear red lipstick etc). So we have this beautiful synthesis between the  innocence of her childishness and the intensity of life experiences.

* In terms of the movement I decided it appropriate to do very little of it. I wanted the shot to speak for itself without having to intervene with my actions within the frame. I chose to simply look to the right of the frame whilst slightly tilting my head to the right. This had the effect of making me look like I were thinking about something. As the camera neared my face ( about a metre away) I slowly rotated my head and straightened up to look directly at the camera lens as it tracked closer and closer to me. This result was a most eerie effect as though the girl (myself) had been constantly aware of the camera’s presence but only chose to reveal it at the point which she turns to face the camera.

* With the knowledge that we were adding sound in editing we were able to verbally direct each other through the take. This was less important for me as it was for Daniel (who was panning the camera) and Mina (who was controlling the crane and track). Mina  had to inform Daniel exactly when he was about to bring the camera to the eye level and Daniel had to guide Mina for the speed of the tracking shot based on his constant focus adjustments.

Currently in the post-production production… working on the warp stabilizer as the movement was not of perfect smoothness due to the heaviness of the crane. Unfortunately you cannot slow down the speed and have warp stabilization so its proving to be a bit of a challenge to get the length of the take I want. Currently trying to figure it out. Will update soon….

🙂
My method of working pt 8… Lighting research

Last Friday I had decided I would use LED panels for my project but after consideration and some research into the advantages and disadvantages of alternative film lights I’ve decided it best to use a Blonde (2000w) because it still has great strength when diffused so that I can establish that warm lighting that I intended on.

The drive behind the warm lighting choice is that this location should feel like home and thematically it makes sense that the lighting be warm so as to literally accentuate the figurative warmth of the home environment. I will also have a red and a blue gel so as to slightly alter the colour temperature depending on the natural lighting on Saturday.

Below I’ve written a basic pros/cons list including the Red Head, Blonde and the 2k Fresnel :


Red head

  • Advantages – Strong, good if you have a smaller space because it doesn’t have wide projection.
  • Disadvantages – because it doesn’t have a wide projection it wouldn’t function well as a fill light in a room. Even if you were to diffuse it using a white board the light would be too soft (particularly for the warmth I want to achieve).

Blonde – 2000w – it’s very hard but you can diffuse it

  • Advantages – stronger than red head (2000w vs. 800w), therefore when diffused still has a powerful effect. I can put a blue gel on it to cool it down (full, half, quarter)
  • Disadvantages – you need a power circuit, just need to ensure nothing else is plugged in

2k Fresnel with lens

  • Advantages – still strong output, clean beam of light
  • Disadvantages – has a lens so its not the same output as the Blondie, extremely hot, high power requirement


Today’s epiphany: Each film light has advantages and disadvantages and its so important to recognise the difference between them so as to choose the correct light for your particular project. Also, its important to remember that you can do so much more with the lights than you initially think at face value. For instance, you could diffuse the light using boards on a c-stand. Synonymously, you could completely reflect the light off a wall if it is too strong. You could use gels to change up the temperature. I guess what I’m saying is that the basics include choosing the light you want. Then, if need be,  narrow down exactly what it is you want using the extra elements such as the boards or gels….

🙂


my method of working part 7 (Location stuff …)

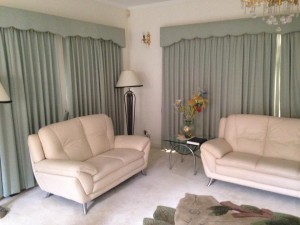
I’ve attached a few photos so as to elaborate on the location/set of my project.  As previously mentioned we are filming in my living room. This particular room is the most elegant room in my house, you know, that one you can’t enter unless the queen visits. For this reason and many others i think it is the perfect location.

Firstly, it’s dimensions are :  4m x 2.5 m  with a  height of 2.75 m (meaning it is long enough to get a decent tracking shot and high enough to fit the crane above the dolly and tripod)

Secondly, the design/colour palette: the room looks homey and even with the natural lighting of the day has a warm tone of colours including cream, green, yellow, red etc. The wide cream coloured couch perfectly contrasts with the red dress I will be wearing so as to emphasise the subject of the frame. The lighter shade of green that drowns the background curtains frames the couch symmetrically, with one lamp on each side of the frame. There’s a subtle eeriness about this. It is almost too symmetrical. I am reminded again of Wes Anderson’s work where his symmetry in fact works to also emphasise the elusiveness of the world within the frame. I want to achieve the same effect but so subtly so that in hindsight, after the scene is viewed, the audience can look back and realise everything seemed too perfect .

Thirdly: Logically, we are in the middle of autumn therefore to  film outside is a risk I am not willing to take. For this particular project I want the comfort of knowing I can manipulate the extraneous variables more easily so that I can focus on my particular goal. Here the lighting is much more in my hands. I am ensure the dolly and the tracks are on dry ground (if wet the tracks could move, more dangerous for equipment and those holding it).

11215936_10204379413589975_357611485_n11262336_10204379413429971_1714888126_n

11267645_10204379404109738_447807434_n11251407_10204379403189715_621549964_n

Friday’s class – attempting to mimic the crane …

Last Friday I got the opportunity to undertake my own exercise as relevant to my upcoming project. Luckily I was assisted by a great group of four. I decided it a great opportunity to trial the use of the tripod on the dolly. Since I didn’t have a crane, I was simply going to attempt a tracking shot however after telling the team about my plan, Polly suggested we lower the tripod as we pan up to mimic the movement of the crane before we track closer to the central subject. GENIUS. I honestly never thought of that. Its great how you can share an Idea with others and they find alternative methods of achieving the same goal. I once heard the saying, “6+3=9… but so does 5+4”. That really stuck with me because their are countless methods of achieving the same objective and the only way to explore which is the most successful is to systematically alternate between methods.

After having attempted the lowering of the tripod I can safely say it does not work for the smoothness I want to achieve. The gradual lowering of the tripod using one person on each leg was difficult because each individual moves at their own pace so the result is a jarring movement that is eliminated by the crane. It’s good, however, that I experienced  this process because it eliminates the possibility of using it for smooth takes.