Website Post

When I began scribbling ideas for my investigation in week 7, I had an idea of what I wanted my final product to look like even though we were told many times that a final product was not necessarily encouraged or required.

Some things I told myself I wanted to improve on was my directing skills, audio+visual editing skills, cinematography, and also communication skills since I would be contacting strangers. I think I have somewhat improved in all these aspects, apart from sound editing which I will go into later.

From an ‘administrative’ point of view, it was difficult to schedule times with each participant, let alone reach out to them. I contacted three actors from starnow, and two of them responded to my project and were happy to help, although we were not able to meet up a second time to film more refined footage. The shootings went well, but one thing I should take note of is the clarity and assertiveness of my instructions. Sometimes I found myself unable to tell the participants to re-redo an action because I felt I didn’t have the right to since they were helping me out. Looking back I do regret that I was not directive enough.

With my cinematography, rather than saying I’ve improved, it would be more accurate to say that I’ve tried a lot of new things that I probably would not have done in the past. I tried heaps of different camera movement, exposure changes, focus pulling, zooming, to the point I would probably say I overcompensated for the lack of movement in everything else I’ve done at RMIT.

In terms of editing, the main thing I focussed on were visuals. To be honest, I completely ignored sound editing because I was too concerned with the images. I noticed that I hadn’t done any substantial sound editing in week 11 or so, and tried to make a soundscape for my frictional experiment but I was unhappy with it so I just deleted it. That’s how I came use my friend’s piano piece for ‘Vertovesque’ – it was much better than what I tried to do on garageband.

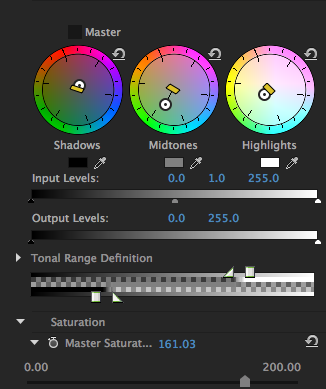
From my first and failed attempt at editing montage up until now, I tried my hand at applying video effects several times. I dabbled in things like blurring, transitions, colour grading, and stabilising. Once, I tried applying a blur to the background of a video and it was the most frustrating, complicated, and time-consuming process ever. It legitimately took me 2 weeks to apply the video effect to a 7.5 second shot and the result was relatively subtle for something that, for me, took so much effort. It is highly likely that I didn’t do it in the smartest way though as I rendered the footage almost frame by frame. I learned out how to stabilise videos with the warp effect because my footage was too shaky so I guess that something good came out of that shaky camerawork.

The works that are representative of my research are all unrefined, test shootings that I would have liked to developed on. Given the chance, I probably would in the future. The videos do feel unsubstantial to me especially since they are meant to represent my investigation, and honestly it’s quite weird to not have something ‘final’.

Research works:

https://drive.google.com/drive/u/1/folders/0B67RnNkkCddvNm9ycXowSDNoQ0U

Collaboration Post

During the course of Film 3, there were multiple times where we worked in groups, collaborating on either group work or an individual work. For me, collaboration occurred mostly during the exercises we were given in our tutorials. In the first couple of weeks, since everyone was still learning how to use the equipment, the exercises were based more on practicing how to operate the camera and sound devices and I found my experience from The Scene helpful in these situations. For once I was useful.

After the technical things were dealt with, the focus moved onto framing, composition, focus, and ‘directing’. It was probably week 5 where we went off in groups to film something individually but in groups. This was when the communication skills were really put to use because we had to convey our ideas to one another and work out the best way to film it. At times we would review the footage and give each other feedback which is always helpful, and probably one of the best things about working with others.

When it came time to do our investigations/research I had to collaborate with strangers at the time – Nenad and Vivian. Both of them were willing to do what I asked of them, and understanding when technical difficulties occurred. Renee was also generous enough to help me with my audio. We would also communicate in the edit suites and help each other out with small, but potentially time-consuming, technical issues.

Actually, this semester I found myself collaborating with less people. It may be due to the nature of documentary or, at least the type I was going for, but I only worked with two other people at one time. Still, the shoots worked out quite well and I guess this is because it’s easier to co-ordinate and schedule a smaller group of people.

I think the bonuses of working with others are obvious – there are more heads thinking, we can exchange ideas, give feedback to each other, help each other with technical issues, work faster, give each other moral support – the list goes on. Pitfalls would just be scheduling and co-ordinating times, meeting places, equipment – the boring stuff.

Week 12 Crisis

It’s week 12.

Since it doesn’t seem like I will be able to schedule another filming with the participants before the end of the semester, I will have to look for other ways of exploring montage.

Some things that I associate with montages: manipulation of time, passing of time, non-sequential images, abrupt changes, eclectic, archival/found footage, discontinuity…

I think it might be interesting if I were to parody Glen Gould’s documentary. Instead of however many short stories his documentary had, I could do something like 22 takes of pianist Priscilla Luu (she’s the one who provided me with the frenetic music in my ‘frictional experiment’). Priscilla is a friend who I’ve known for many years now, and there are some ‘contrasting’ aspects to her which could provide that ‘shock’ at each cut. It’s late in the game to be starting something now, but at least I will have this idea mentally saved for next time.

Also, since I hadn’t colour corrected Nenad’s and Vivian’s videos I went back to them and tried colour grading them. But I’m not sure if it was for the better or worse. With Vivian’s video, it was a bit more straightforward because I think the lighting was more consistent, and even the colour scheme of her shots was easier to work with. In comparison, the colours present in Nenad’s shots were all over place and the exposure as well, so made it harder to maintain a similar look for each shot.

In one of Nenad’s shots, he was overexposed and I tried to tone it down by bringing the brightness down but it didn’t turn out as well as I wanted. Underexposed shots can pass as looking stylish, but when they are overexposed it’s hard on the eyes. Now I have a constant fear of overexposure.

Frictional experiment

With the footage I shot around my house on the weekend, I produced two videos.

I was initially just aiming to produce a mini self-portrait, but by accident I created a murder scene out of my house. I think this was mostly to do with the dramatic background music, it made the shots look like some documentation of murder evidence. So then I tried putting some softer background music against my shots and also took out some shots that gravitated towards the horror genre and the result was definitely less intimidating. Not sure if I would call it a documentary about myself though as my presence is mostly absent apart from the fact I’m holding the camera.

For the editing, I kept the shots in the same order that I shot them just because I tend to dart all over the place and I think it’d be more interesting than arranging them in an orderly fashion. It’d also be interesting to see whether people realise I’ve gone all over the place especially considering they won’t know the structure of my house. So in the end, I think this was just more of a montage/editing exercise. I did make use of music in this video, but I wouldn’t say I focussed on it enough to consider it a sound editing exercise.

After showing the video to a few people and also screening it during class, people pointed out towards the end of ‘Vertovesque’ that the lightning flashed in sync with the music. This was half coincidence and half on purpose. During the edit, I arranged the footage before I put in background music because I wanted the music to accompany the footage and not the other way around. After I finished arranging the footage, put the music in and watched the whole thing I realised that the piano notes matched the way the lightning flashed at the end and decided to keep that rhythmic edit.

People may wonder why I didn’t make use of more rhythmic editing seeing as it is suitable for such a video, but personally I think if it is overdone the audience will become accustomed to it and the video will begin to be predictable. In order to surprise the audience, I decided to just make one part sync up the piano notes. Furthermore, the majority of the shots are quite similar in length, slowing down just a little in the middle before picking up again. I purposely elongated the last two shots to build suspense. The second to last shot is somewhat of a ‘feint’ as nothing really happens, then the last shot appears to be an almost an identical shot until the ‘punchline’ right at the end.

As for ‘Less murderous’, it was simply an attempt to make my house feel ‘nicer’. I changed the music, and took out some of the night shots, or lingered on them for a shorter time. My friend commented that most of the shots that I kept were okay, but the shot of the altar basked in red-light was still out of place and too spooky for the concept I was going for. While I do agree with what she said, at the same time I wanted to stay true to the nature of my house. And seeing as that altar has such a presence in my household, I decided to keep the shots in there despite its contrasting quality.

More than anything, I think these two videos are very strongly based on visual and sound, for visual and sound’s sake. Of course, the shots were filmed around my house, chosen and framed by myself, and so it is personal yet it probably doesn’t fully reflect my personality as much as it does my house. So rather than a self-documentary, maybe I’d call it a documentary on my house ? Actually, it might even pass as a drama in which my house has a split personality and is the protagonist and antagonist hahaha.

https://drive.google.com/open?id=0B67RnNkkCddvRG1xaDk2NFdwdE0

Week 11 Crisis

It’s week 11 already I haven’t done much since the shootings on week 8.

I was meant to shoot last weekend, but something came up for the other party and so those plans fell through. Now I am wondering what I can do without a subject. Well the easiest option is to make myself the subject it seems. I took to my nifty iPhone 4 for the filming and just shot things around my house. Was that the best device I could use? Probably not. But I wanted to do something right then and there, and it was the only thing I had handy so I just went for it.

For this self-documentary, I want to make it about me but I don’t want to have myself in it – I don’t even want to narrate it. Not sure if it’s possible, but if the shots are indicative enough of the kind of person I am, paired with the right music it might work. The only thing is, the combination of stuff around my house is quite weird. I guess I am a weird person though. But then again everyone thinks they’re weird. In any case, this is just a test, I’m not sure if anything will come out of this but it’s better than sitting around and waiting for something to happen.

Keyboard Shortcut Exercise

A while back we were introduced to some keyboard shortcuts that could be used in Premiere Pro. I haven’t revisited that document just so I can test what I remember. Also, I pretty much only used the really obvious shortcuts like copy, paste, and export media, so all of the shortcuts introduced were new.

Cmd N – new sequence

Cmd B – new bin?

V – hand tool

C – razor tool

P – pen tool for audio editing

I, O, and comma – in, out markers, and comma will insert clip into sequence

Cmd K – cuts the clip at the point where the playback marker is

JKL – back, pause, forward

To expand the audio channels, another method I remember is to press on the audio tab and scroll down.  Still fiddly though.

Disclaimer: some of these are probably wrong, I will check the next time I’m in the edit suites.

Update: Most of these are correct, but the JKL shortcuts are actually used like scrubbing backwards, forwards, or pausing. Not going backwards or forwards to the end/beginning point of each shot – this is done by using the up and down arrows.

Colour Grading Exercise

   Control Image:

Ne Control

Attempt 1. For my first attempt at grading this image, I pretty much just eye-balled it. I didn’t think too much about where the indicators on the wheel were directed towards, and I focussed more on the how the image looked . I tried working out the different layers of the image, and which wheel would affect which layer so I could get a better grasp on which portion of the image I was affecting with each turn and pull of the colour correctors

Ne ControlNe Graded 1 Screen Shot 2015-10-09 at 11.43.53 am

Attempt 2. For my second attempt, I tried to amp up the colours and make them more vibrant. So I tried to make the green more green by pulling in that direction for the mid tones and I also adjusted the saturation a bit.

Ne ControlNe Graded 2Screen Shot 2015-10-09 at 11.44.28 am

Attempt 3. Here, I wanted to make Nenad and the blue of his jacket stand out more so I pulled towards the blue. Upon reflection, I think it would be good to combine the last two attempts.

Ne ControlNe Graded 3Screen Shot 2015-10-09 at 11.44.53 am

Attempts 2 and 3 combined

Ne Combo 2 and 3Ne Combo 2 and 33

Image 2

Viv Control

1. In contrast to my first attempts, I tried to be more systematic with these ones. To make Vivian look “cold”, I pulled all towards the blue hues. More than cold, she ended up looking rather sickly.

Viv Graded 1Viv Grade 1

2. Then I wondered what would look opposite to cold, so I pulled in the opposite direction and here, she definitely looks like she has more colour. Still, something seems off in this one.

Viv Graded 2 Viv Grade 2

3. Finally, for my last version I decided to be a bit more dramatic since I think I was pretty sedate with the colour manipulation in the first two. I think even in the control image, the colours are already quite vivid and bright so I wanted to make it darker and a bit more dull. I pulled towards the pink because I was curious how it would look, but it actually turned out more normal than I expected. I also played with the brightness and contrast so that Vivian’s hair and glasses would be more black and I think the increased contrast makes it look more drama-esque.

Viv Graded 3Viv Grade 3

Control Image

Screen Shot 2015-10-12 at 1.35.46 pm

Screen Shot 2015-10-12 at 1.36.31 pm

For these images, I used the same process as for the second set. One thing I realised though, is that the shadows here have also been coloured. Since I pulled all the colour wheels to  blue, everything has a bluish tone even the crevices of the t-shirt.

Screen Shot 2015-10-12 at 1.36.22 pm
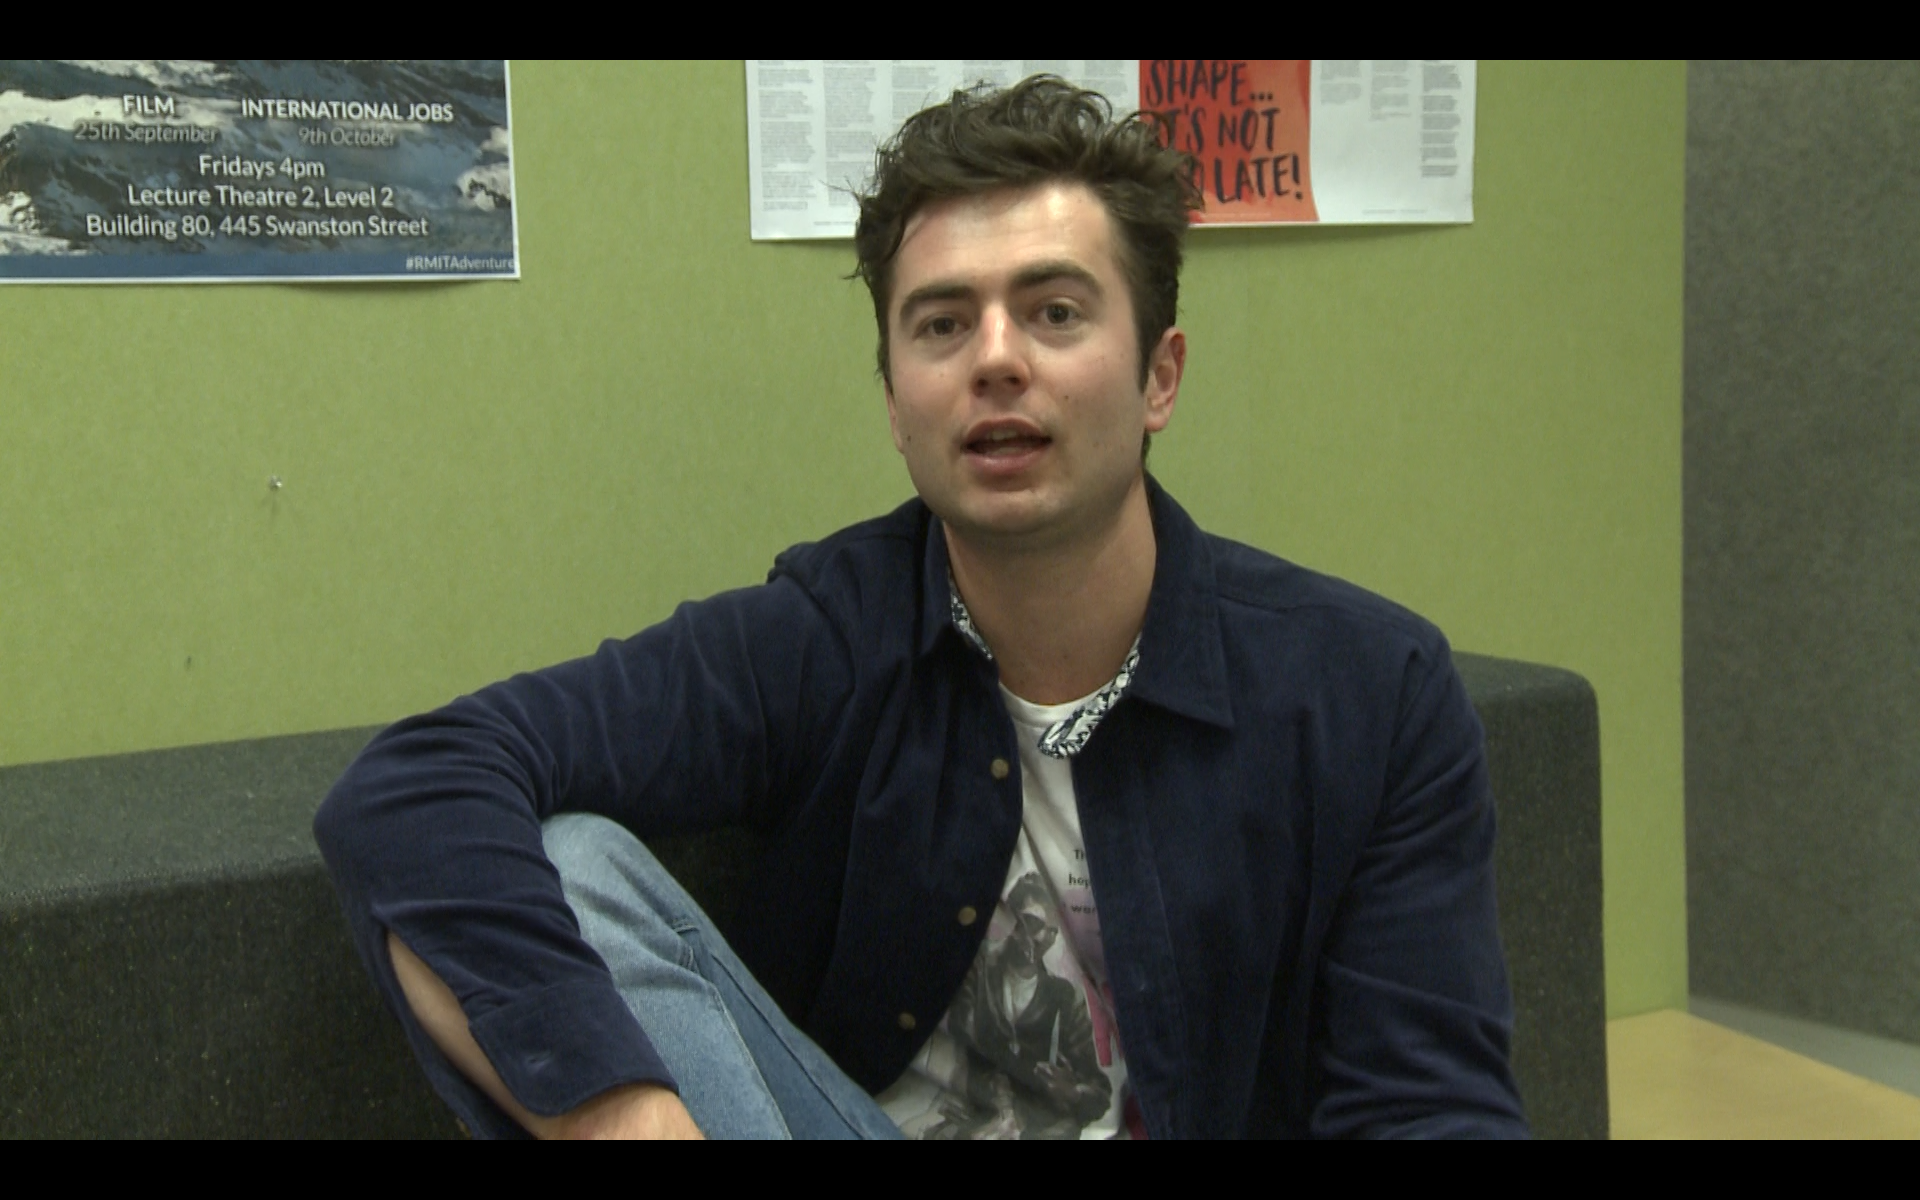
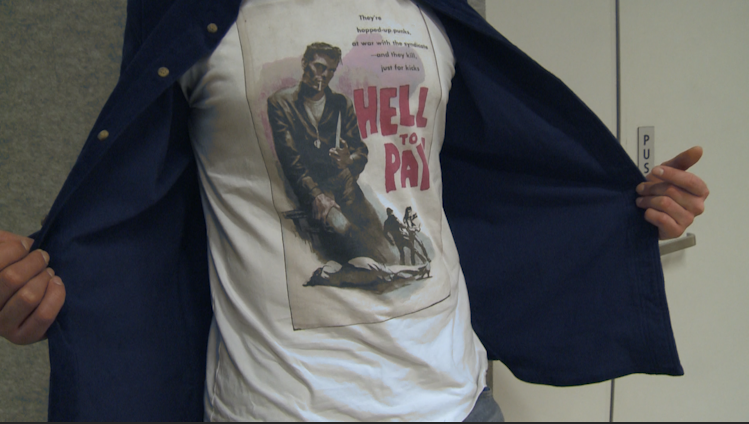
For this version, I wanted to accentuate the reddish hues on his t-shirt so I pulled the mid tones towards the red, keeping the shadows and highlights towards blue.

Screen Shot 2015-10-12 at 1.36.07 pm
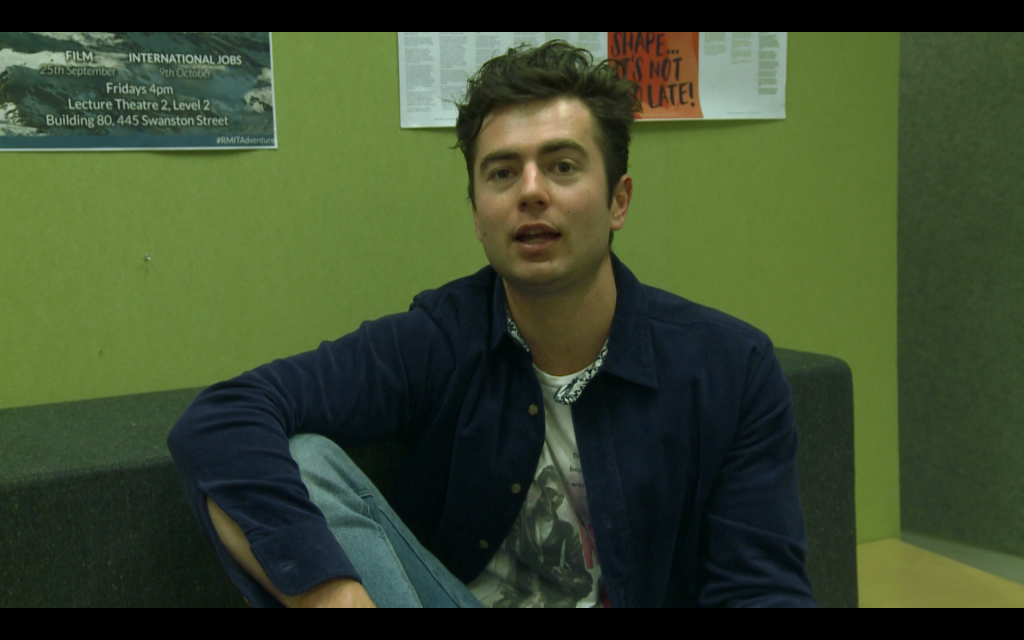
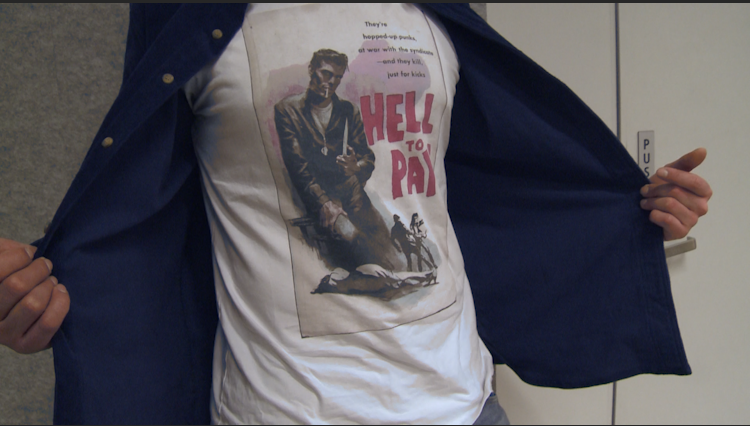
For this last one, I combined what I did in the previous two but made it more subtle by dragging it out less. Somehow, it actually looks a lot more blue than in the first one where I dragged out the colour towards blue by quite a lot.

Segaji//Doyle Deconstruction

What I’m going for – Segaji Video Production

Rather than isolate one of their videos, I’ve viewed them and analysed them as a whole and inevitably their style is quite eclectic. What I’ve noticed from the body of their work is that their documentaries tend to cover artist who’s work is more “physical”. They’ve covered people who paint, design, DJ, snowboard, create architectures. I guess for these types of videos the visual content is more straightforward, they capture the artists’ works – their paintings, garments, accessories, CDs, buildings, snowboarding items…etc, the types of things to they as part of their work – eg. waxing of the snowboard, dipping a brush into ink and painting a wall, or simply what they have – snowboarding gear, CDs, gramophone, DJ mix set.

When they cover a person who does something less tangible for example sing or act, they try capture something in relation to the subject’s speech. For example, one time the subject was talking about their visit to Korea and they shot electricity lines, Korean rooftops, some of the plants that were around. Another time the artist was talking about some of the lyrics in his songs and they shot a tank of fish which I think was meant to represent selfishness. Most likely the problem with my shoots will be that the subject is not really reflected in the content of the my footage.

What I’m not going for:

This is a scene from the film Hero by Zhang Yi Mou, the cinematographer for this film was Christopher Doyle. It’s a mostly a martial arts sequence with bursts of dialogue here and there.


– Music: pattern – quiet, loud, quiet. Soulful voice overlayed and interjected with drums > somewhat matches with the movements of the characters, as their strikes become more intense as does the music. Definitely accentuates the more suspenseful portion of the fight, and “makes way” for dialogue

– Sound effects: swords piercing through the air, cries during combat – probably wildlines, the leaves rustling,  the wind blowing against the fabric, the leaping and jumping of the two against trees and the ground, overall the sounds present are all relatively loud though the atmosphere somehow reads as less chaotic to me

– Colour: mostly orange and reds, already vivid from the beginning but the set is “dyed” an even deeper but striking red by the end. Conjures up emotions associated with red – love, passion, frustration, and in this case blood

– Camera: I feel as though there isn’t an angle which hasn’t been used in this scene. The whole duel is made much more dramatic by the dutch tilts, zooms, wide-close-wide shot pattern, the slow-motioned movements, as well as the occasional suspension of action

Post-editing Reflection

While editing and even just looking through the footage, there were a lot of things I would have changed about the way I filmed certain shots and or did differently.

Obviously the lighting and location that I chose was more convenience’s sake. But I’m glad I at least moved from different spots within the location so that the subject were filmed with different backgrounds.

For Nenad’s shots they were definitely too shaky, and then for Vivian’s shots they weren’t shaky because I used a tripod  but there was a lot of fiddling with the zooming and panning. I think it may be because I filmed these interviews both on the same day. Compared to Nenad’s shots with a lot of movement, I probably thought there wasn’t enough movement in comparison so I decided to fiddle with the panning and zooming. Also the shot size and positioning were pretty much all the same mid-close up, and they were sitting for pretty much the majority of the time. If I had shot more transition shots, I guess I wouldn’t have had to use their sit-down talking shots.

I think the next time I should use the tripod for most of the filming and keep hand-held to a minimum otherwise it will be too disorienting to watch. Especially since there were a lot of ECUs and CUs in succession, it just became a bit too much especially in Nenad’s one, more so than Vivian’s. Vivian’s one was definitely more comfortable to watch just because I actually had some locked off shots of her.

Also with the zooming that I did in both, I think I’d zoom in once or twice as a maximum. And I’d definitely rather track in than use the manual zoom on the camera, although if I were to do just a slight, slow zoom it might not be as dramatic. I think it’s the same with my pull focus shots as well, I think I shouldn’t do as many as I did just because it can be a little uncomfortable to watch.

For Nenad’s last shot, I did a something like a dutch tilt. Actually I can’t remember how I did it because his face is almost parallel to the borders of the frame, but it was surprising not as wonky as I thought it would look. So I quite liked that shot. Also with Vivian’s shot where she looks straight into the camera, I liked it as well. The background is plain, and she is just positioned in the middle of the frame with the camera looked off but I think it was a nice simple shot among all the other random shots I had of her.

During the edit, I decided to edit the montages differently. For Nenad, I chose to section our talk and use on-screen text to make the sections more apparent. On the other hand, for Vivian I didn’t use any on-screen text and just sectioned off each segment with a cut. I think because of this, Vivian’s montage ended up looking more ‘raw’ and documentary-like whereas Nenad’s one looked more like an interview.

All in all, I think it was good experiment. To be honest, I kind of chucked everything away when I was filming which may or may not have been a good thing. But because of that I was able to really just do whatever I wanted with the framing, exposure, cam movement, focus, and even zooming (which I didn’t really like the aesthetic of but at least now I know).