
Alas, the end of another semester is here. It’s been a rather enriching journey with ups and downs. Certainly, not how I would have thought this whole studio would pan out, but I’m glad I took on this learning voyage along with my fellow “true to form”-ers.
At week #6, I conceptualise the idea of experimenting the idea of colour in post-production that constructs a cinematic image and how it plays with emotions, feelings, and to a certain extend, the time and place of the film. Below is my documented experiments, reflections, rants, inspiration, and just jotting down thoughts and events that may have took place over the course of the weeks leading up to week #13.
Scroll all the way down to view the “final” delivery video.
*final is in inverted commas, as there’s never a real FINAL version. My mentor from my internship company used to say, as long as you have the project file with the raw footage somewhere in your computer or on the server or even up in the cloud, anyone from clients, to directors, to bosses, can retrieve it and ask you to make a new cut, version, grade, or anything out of it again.
True to Form – Finalising Ideas – Week #6.1
We are slowly approaching the middle of the semester, and we should be finalising on ideas or concepts that we would like to research and explore for our final assessment.
So far, I have decided to focus on achieving the cinematic look with the use of colour grading and applying different aspect ratios. Next week will be quite a big week as we will be pitching our ideas to a panel (and Paul), and see what feedback, comments, criticism, advice we can get from the guest lecturers. Personally, I’m pretty nervous, as there are so many aspects and factors to making an image cinematic. There is lighting, composition, DOF, production design, make up, costume, the whole list goes on. I guess, I would mainly focus my research and experiments with the use of colours and also applying different aspect ratio to see how it will affect the image as a whole.
Currently, after going through several weeks of practices with the camera, sound recording equipment, and just having a feel of shooting on set, I have confidence in taking on the next step which is to come up with a simple narrative or plot for my experiment to take place. This would definitely comprise of brainstorming ideas for location, cast, crew and so on. I may even collaborate with a fellow studio mate, someone who is exploring a different field, however, using the same medium or reference to exhibit his/her findings/experiments. This could be achieving the cinematic look, but exploring lighting, sound, or cinematograhy, or even something more refined such as, writing, genre, or visual effects.
The road is long, and the light at the end of the tunnel, is not even peering through yet, but I believe that with time, and certain amount of experiments, I would be able to uncover what I have set out to explore, or even pick up a few things along the way. At this point, like Paul has mentioned many times before, the main goal is not to shoot a short film or anything of that sort, but a series of shots to represent what we are exploring. With that, I hope to establish a folio of shots, where I can look back upon and reflect easily, like how I would do so looking back at an old drawing or painting I did during kindergarten.
True to Form – Collaboration Situation – Week #6.2
In this week’s tutorial, we gave short pitches of the person sitting next to us on what they intend to do for their final assessment and area of research. Coincidentally, I was grouped with a fellow “True to Form-er” who was thinking of exploring the uses of sound design and foley in a particular sequence as well as the movement of camera going through walls done in Adobe After Effects. I gave some thought, and decided that it would be a good opportunity pairing up together to shoot a sequence of shots that could exhibit and experiment our respective areas of research. Me exploring the uses of colour and the letterbox, and him the uses of sound design, foley and camera movement in After Effects.
2 heads are better than 1? Might be a little too early to say, but I am pretty excited for this collaboration, as I believe we can cover more ground and be exposed to more challenges in our development in becoming filmmakers. However, collaboration comes with a new set of obstacles that should be addressed at the early stages, before the entire process begins. Issues such as, commitment, scheduling, working habits and ethics, should be discussed thru in order to accomodate each other. So far, we’ve discussed several topics and ideas to incorporate both our field of interest, and it’s looking pretty good.
Only time will tell how this partnership would pan out, but I remain optimistic with this approach. Putting myself in a scenario where we have to work with people in the industry where we don’t really have a choice, unlike the present, where we are given the option to fly solo or work as a team, or as pairs of our own preference, that is probably a privilege not everyone has, especially when you’re new to the industry.
True to Form – You’ve Gone Off Pitch! – Week #7.1
On Tuesday, we gave our (3 minutes) pitch to a panel, and gathered some advice, suggestions, feedback, and comments. Unfortunately, almost majority of us went over the 3 minute mark and those with first names starts with letters towards the end of the alphabet, had to, well…stick to our 3 minutes plan, and receive our comments in the form of an email instead of face-to-face. Which isn’t really bad thing, as it could be a little intimidating to some.
I’m not sure about my studio mates, but I tried timing myself to keep my pitch 3 minutes short. What I did was to play a song roughly 3 minutes long and started talking to the computer with my notes in front of me. Once the song hits its last chorus, I would wrap it up, and try to finish it before the song ends. Out of all the attempts, I didn’t manage to finish my pitch before the song ended, however, I would say I managed to keep it under the 4 minute mark?
More often than not, most of us tend to digress and go off topic while presenting to an opened audience. Others, try to rush through everything just to get it done and over with, getting rid of that built up anxiety leading up to the actual presentation. While some, could just wing it through having ample experience talking in front of a crowd or just plain God given talent.
I know this blog post has nothing related to my experiments or film related for that matter, but I believe that how you portray yourself and conduct presentations, whether to multi-national companies or to little focus groups, really affects the results of your initial intend of why you’re giving the presentation in the first place. Spacing out, using pause fillers, large unnecessary hand movements, are tell tales or little barometers of your level of preparedness, as you start to assemble your one man army against the crowd of 3 or 3000.
Since my name starts with the letter ‘S’, and so happen ‘S’ is somewhat close to the end of the alphabet, I was the second last to present, and hence I got the email treatment oppose to the face-to-face comments. Looking forward to what the panel has to say, and more so, to the much needed easter break, and what’s to come ahead after that. Happy holidays.
True to Form – Who, What, Where, When, How?! – Week #7.2
Upon coming back from the much needed Easter break (which went by like a breeze), we were tasked to do planning on little A5 sheets of paper. One piece representing one part of a 3 part week schedule. I guess it’s good to pen down everything in order to see the bigger picture, and we’re not limited to the 13-15inch laptop screens we swear by using them.
Right from the get-go, it was a little hard coming up with plans and ideas. Not sure if it was the combination between the lack of sleep or not meeting my daily dose of caffeine, but I had trouble penning down ideas that contributes to the progress of the final assignment. I am definitely not one who has the capabilities of thinking on the spot and pouring out ideas onto pen and paper. Ideas usually come to me while I’m doing something completely unrelated, like walking from place to place, preparing dinner, taking a shower…(you get the idea). Hence, I would store these ideas in a memory bank somewhere in my brain, and churn them out into the little A5 paper that Paul was referring to.
Though ideas are stored in that internal memory bank, they still have to be put into hard copy in order to place them into context and a timeline so that they can be executed in a timely manner. And somehow when I think of an idea, it would lead me to thinking of another, that may or may not be related to the original spawning concept. These ideas then spark more research on the topic, which then leads to generating more ideas. Seems like a never ending loop of questions and answers, and more questions.
Therefore, I’ve decided to tame my loose control of thinking, and curating them into categories of “Who, What, Where, When, Why and How?” Once placing ideas into this “Bins” on those A5 sheets of paper, I realised that organising and scheduling seem much more simple. I decided to approach the weeks into 3 parts, A, B, and C, just as how Paul suggested.
Part A – would be proposing a “challenge” for that particular week, also reflecting on findings or shots or just basic research materials, to see how it can be incorporated to the following week’s challenge.
Part B – would be generating ideas on how to tackle the “challenge” posed in A.
Example, Challenge: Recce, and scout for locations for shooting experiments.
Equipment needed for shooting experiment? Generate shot list? Test shots? Location recce shots?
Part C – Post-production on test shots, editing, grading, possibly layering music.
And then back to part A where I reflect on the findings. Of course, along the way, there would be other challenges and questions popping up such as, how to operate a DSLR while tracking or following subject? Pulling focus on DSLR? Shooting in RAW instead of the heavily compressed h264 format… Little kinks and bumps that should be ironed out by the end of each week to improve as a filmmaker.
True to Form – Wall to Wall – Week #7.3

My landlord isn’t gonna be too happy bout this, but I’ve sticked the little A5 sheets of paper on my “Idea Wall”, to see everything as a whole big picture.
I know you can’t see much from the image above, but the pieces of paper on the left arranged in a grid are organised by week, so each row represents a week, and each column is a part, so it starts from Week #7 part C. And continues onto the next row, Week #8 part A, and so on. Pardon the chicken scribbling handwriting. This is still in it’s preliminary stages, and it’s just going to get more messy from here, or at least I’d like it to be.
The other pieces of paper on the right are running ideas for experiments such as, locations, plots, narratives, general ideas of what is going to take place. All these to target the “Who, What, Where, When, Why, and How?” posed in my previous post.
I believe that as the weeks go by, and as the wall gets plastered with more and more bits of paper, my concept and idea of filmmaking would be clearer and a little bit more defined, as compared to when we first started in week #1 of the semester. This however, does not serve as a gauge or some sort of measuring tool, to see how much I’ve learned, but more as an aid to check my progress and to see if I might have left any stones, rocks, or boulders unturned.
True to Form – Contrast/Correct/Grade – Week #8.1
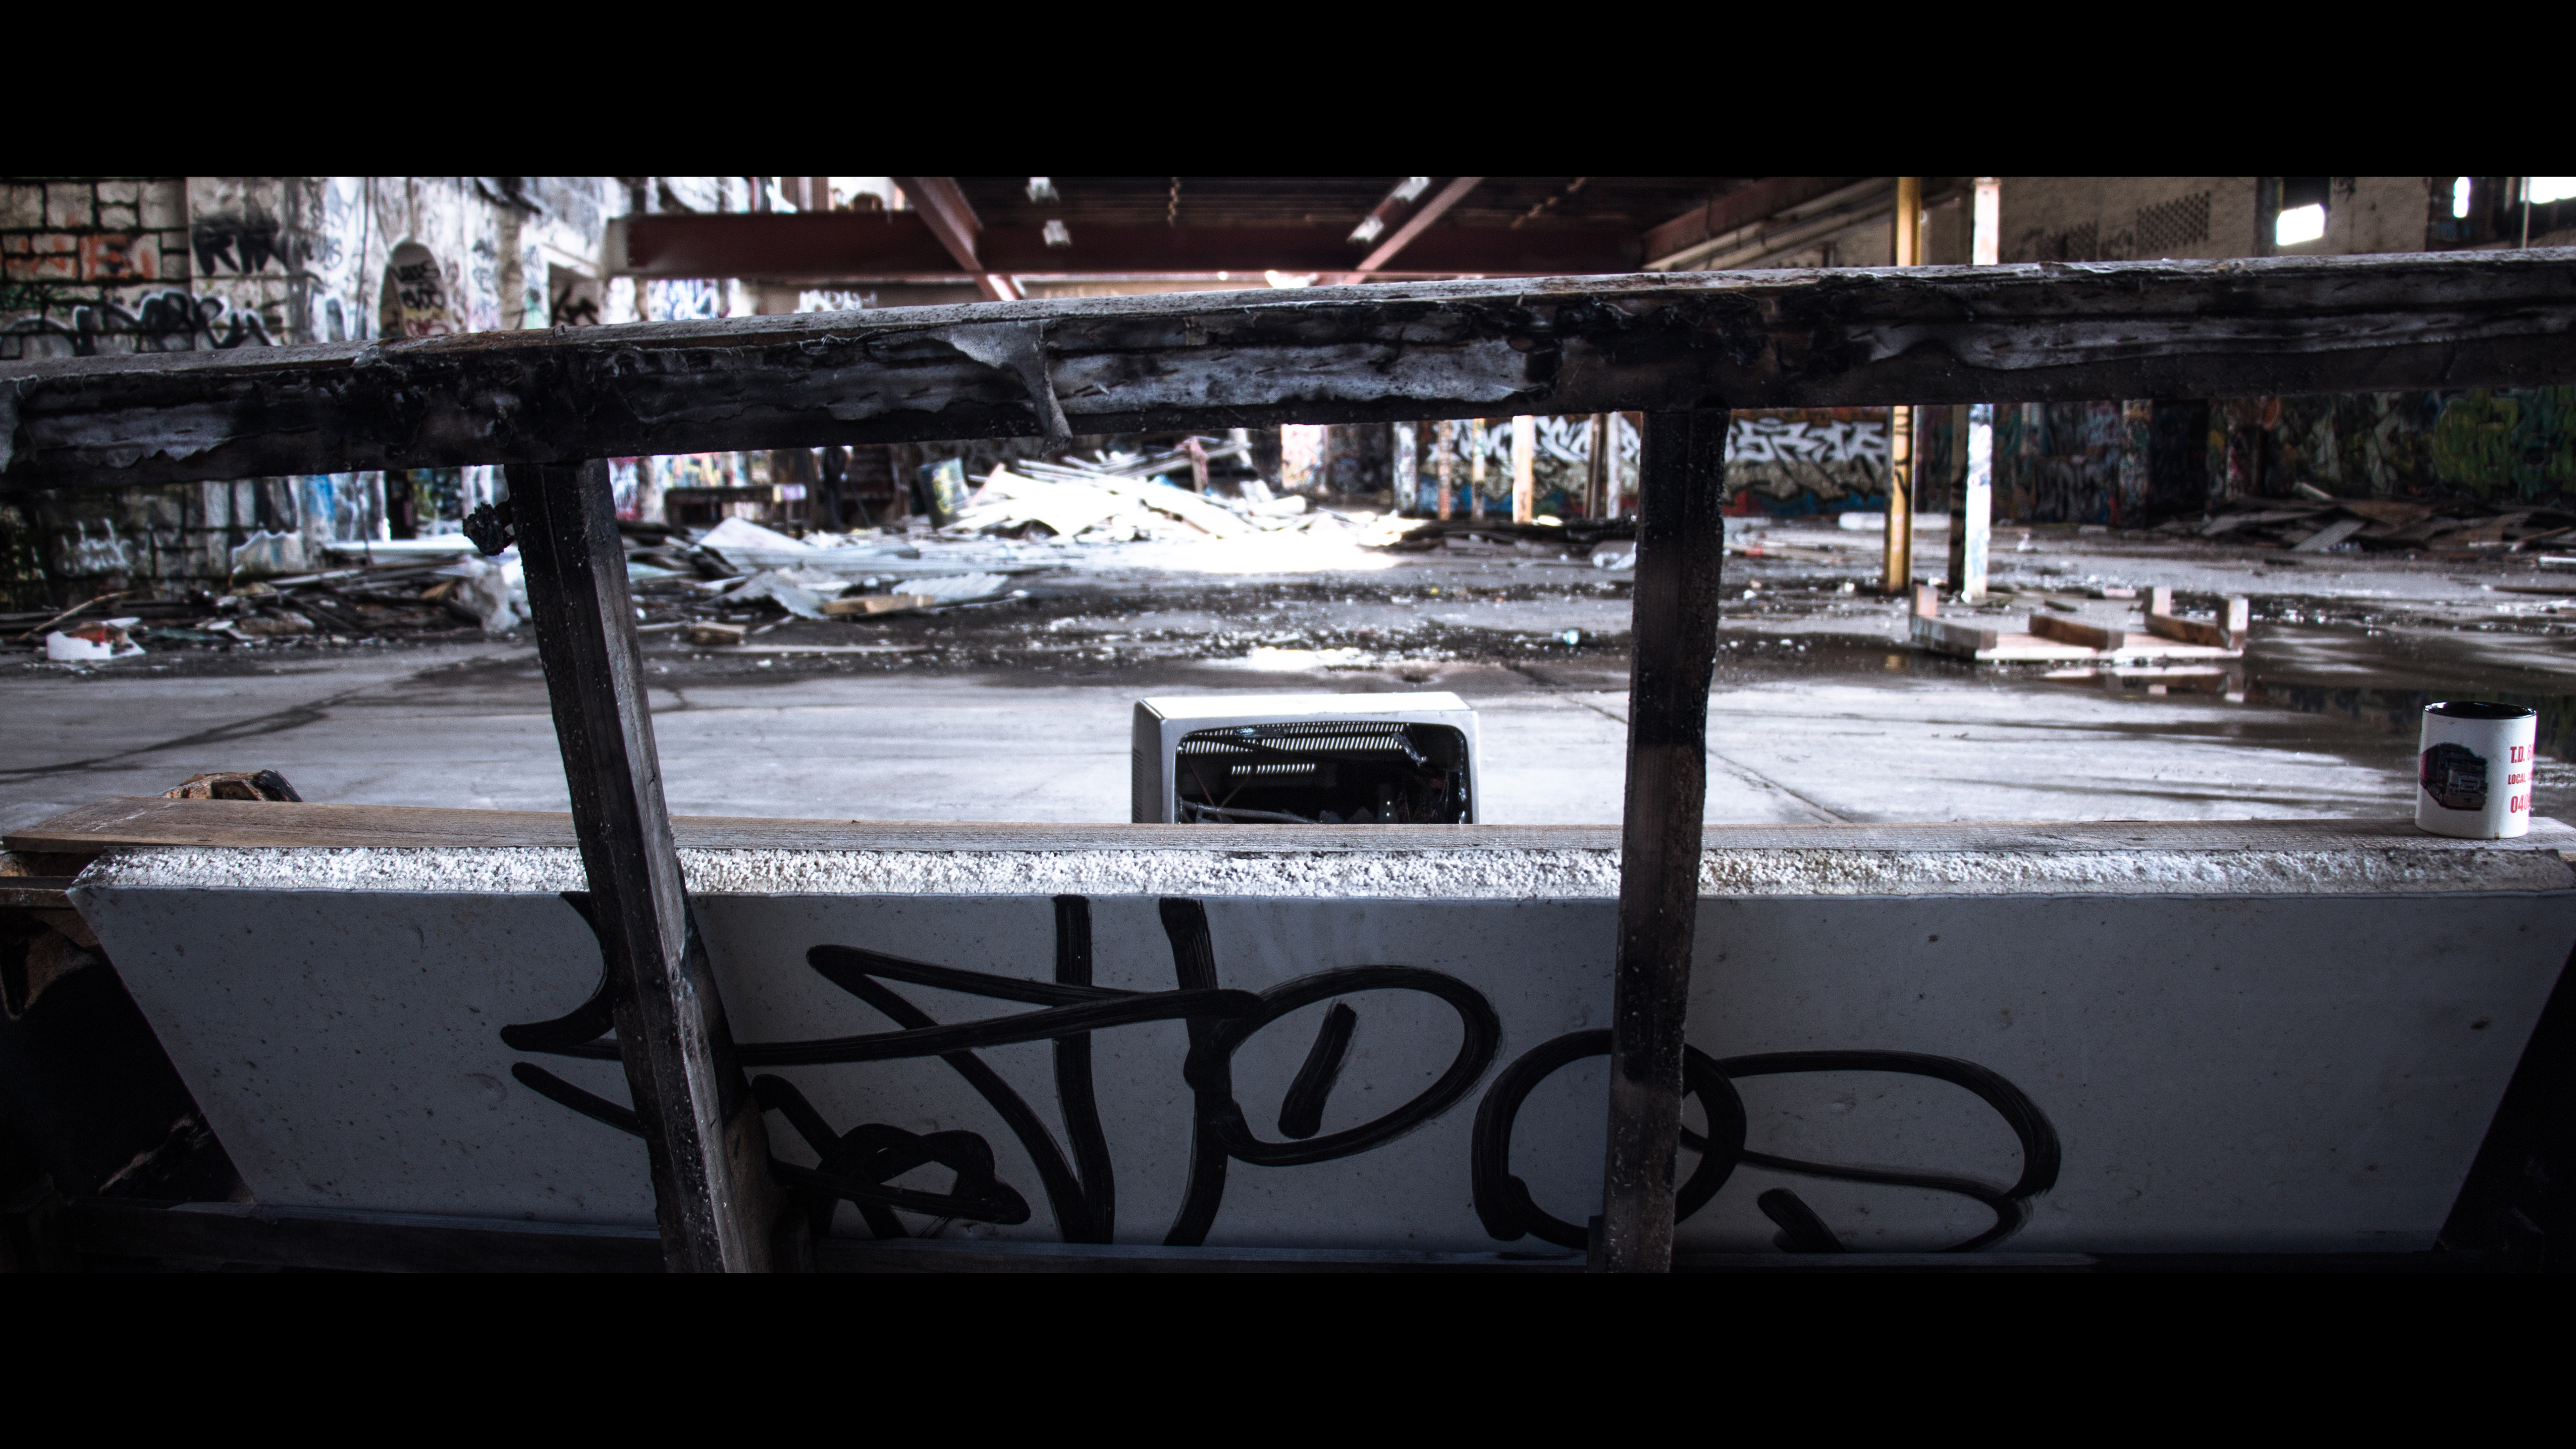
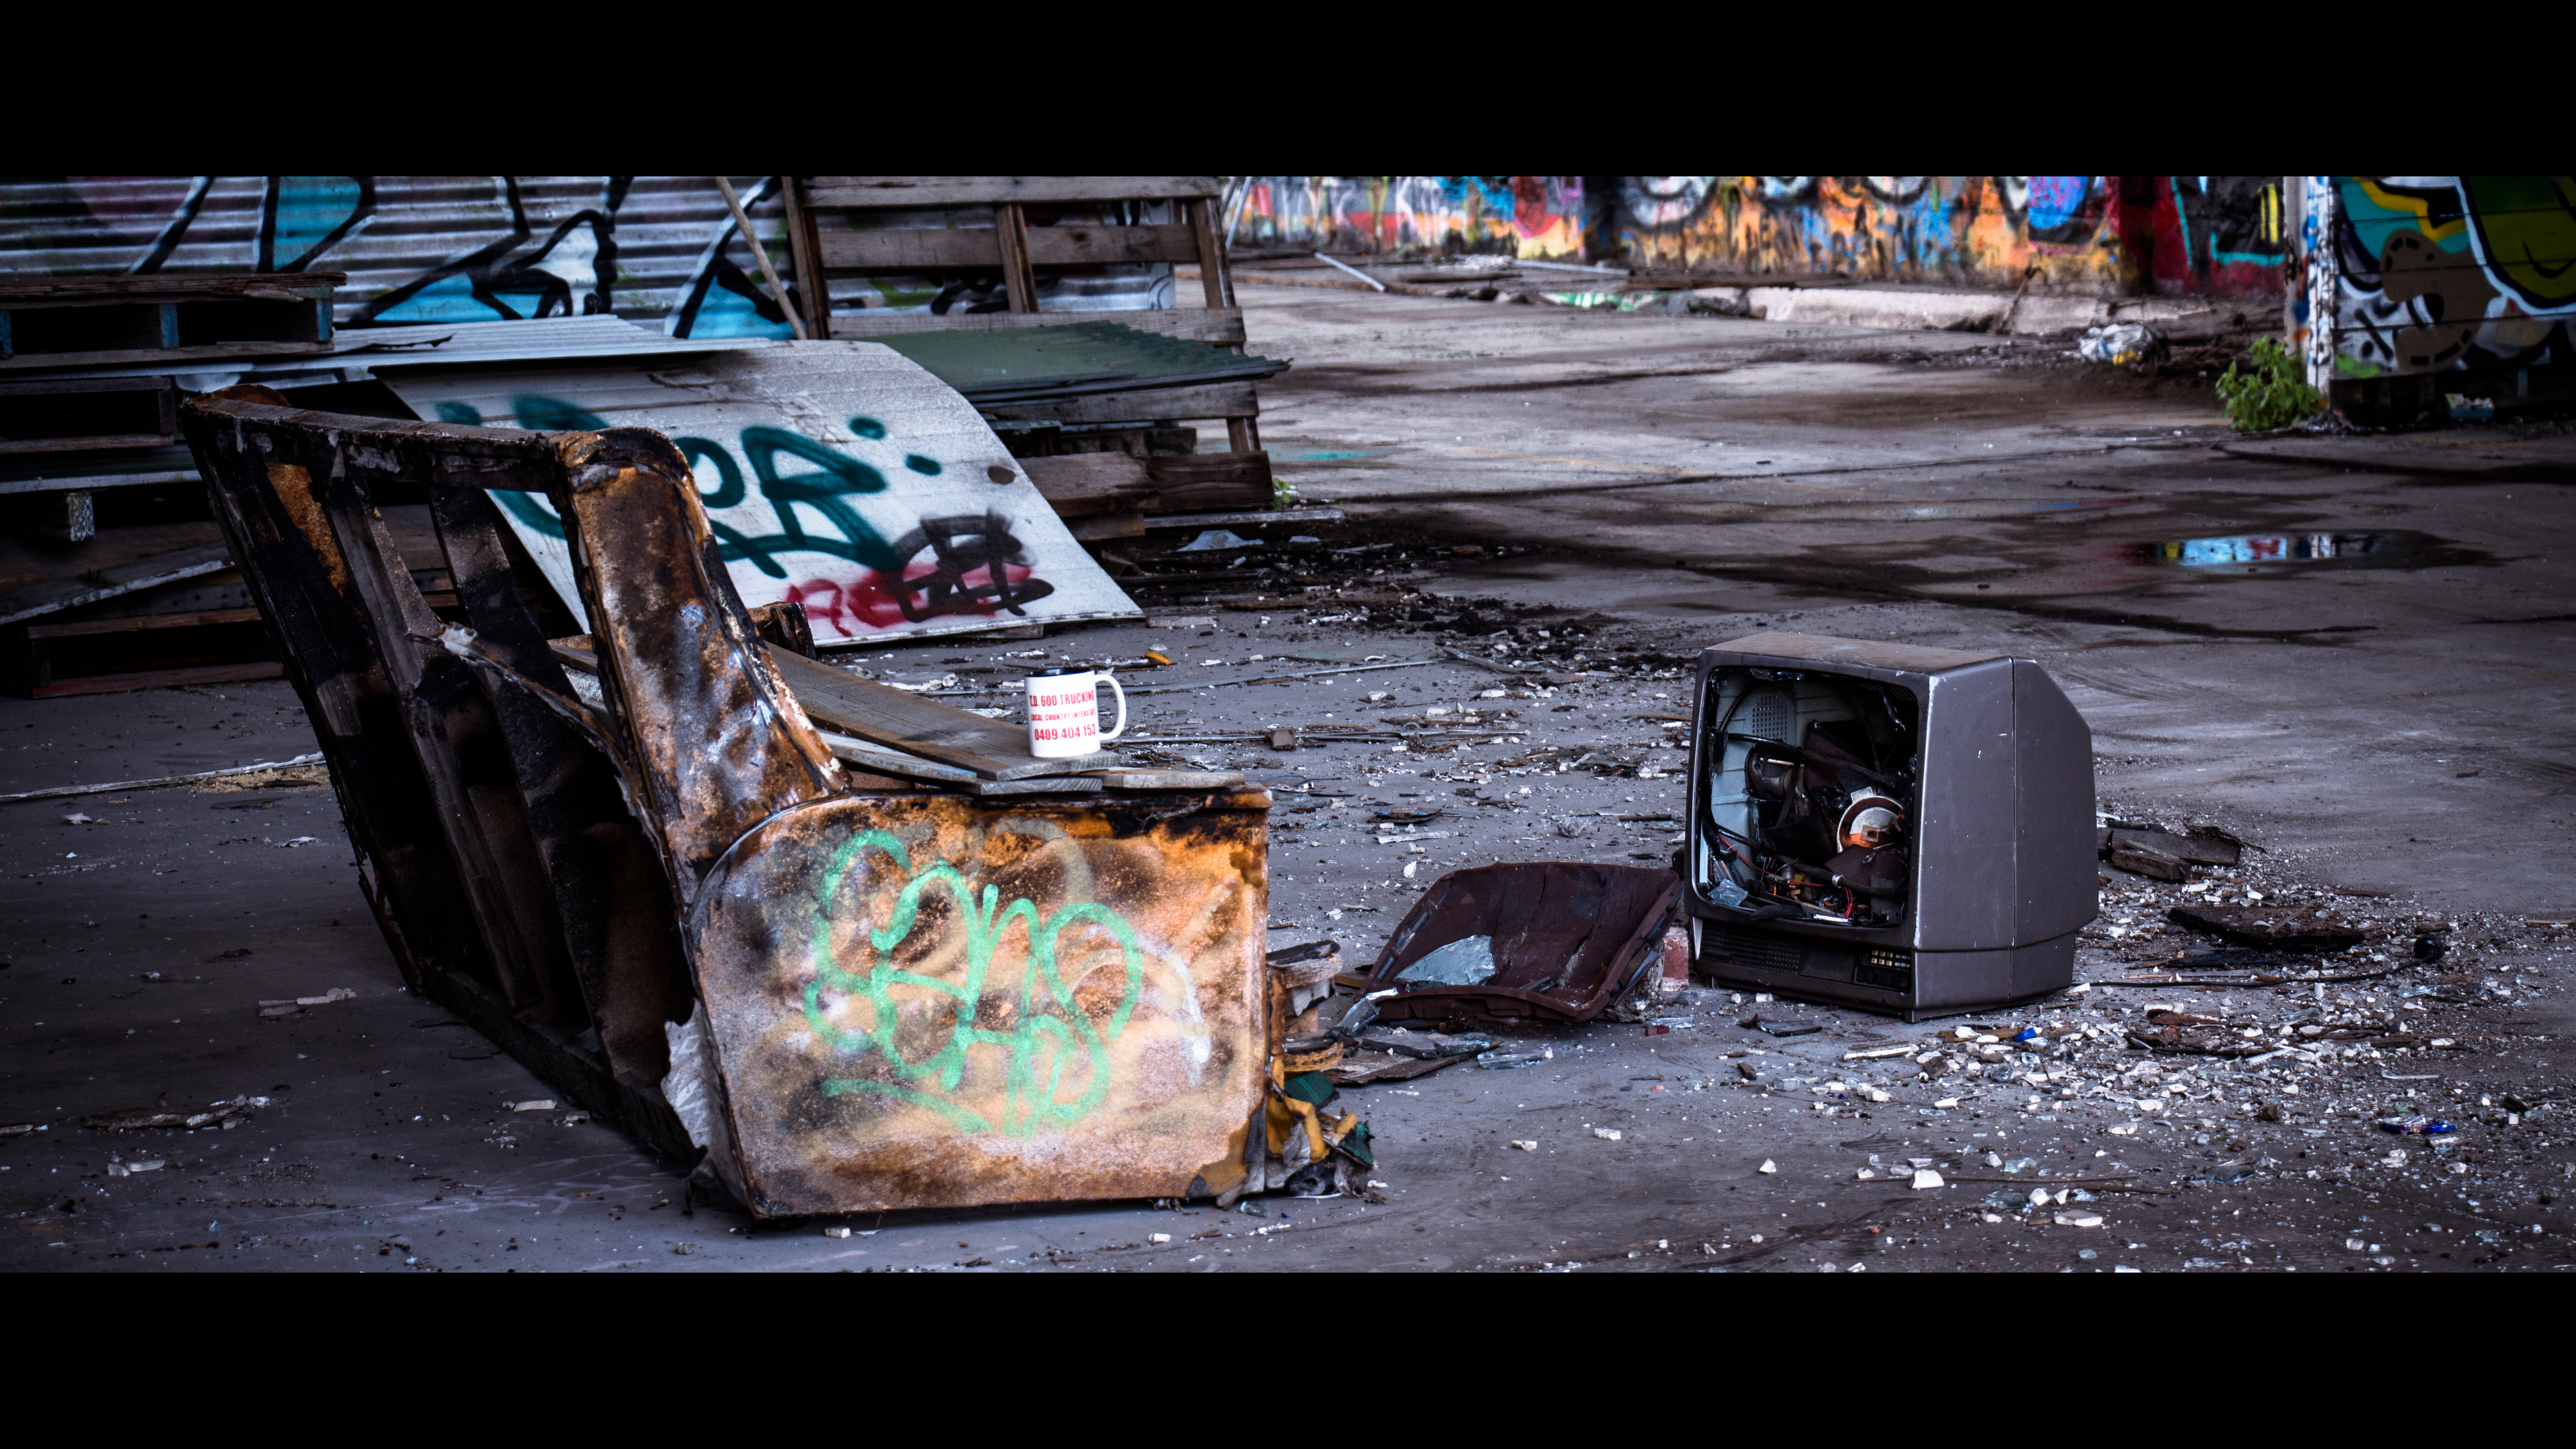
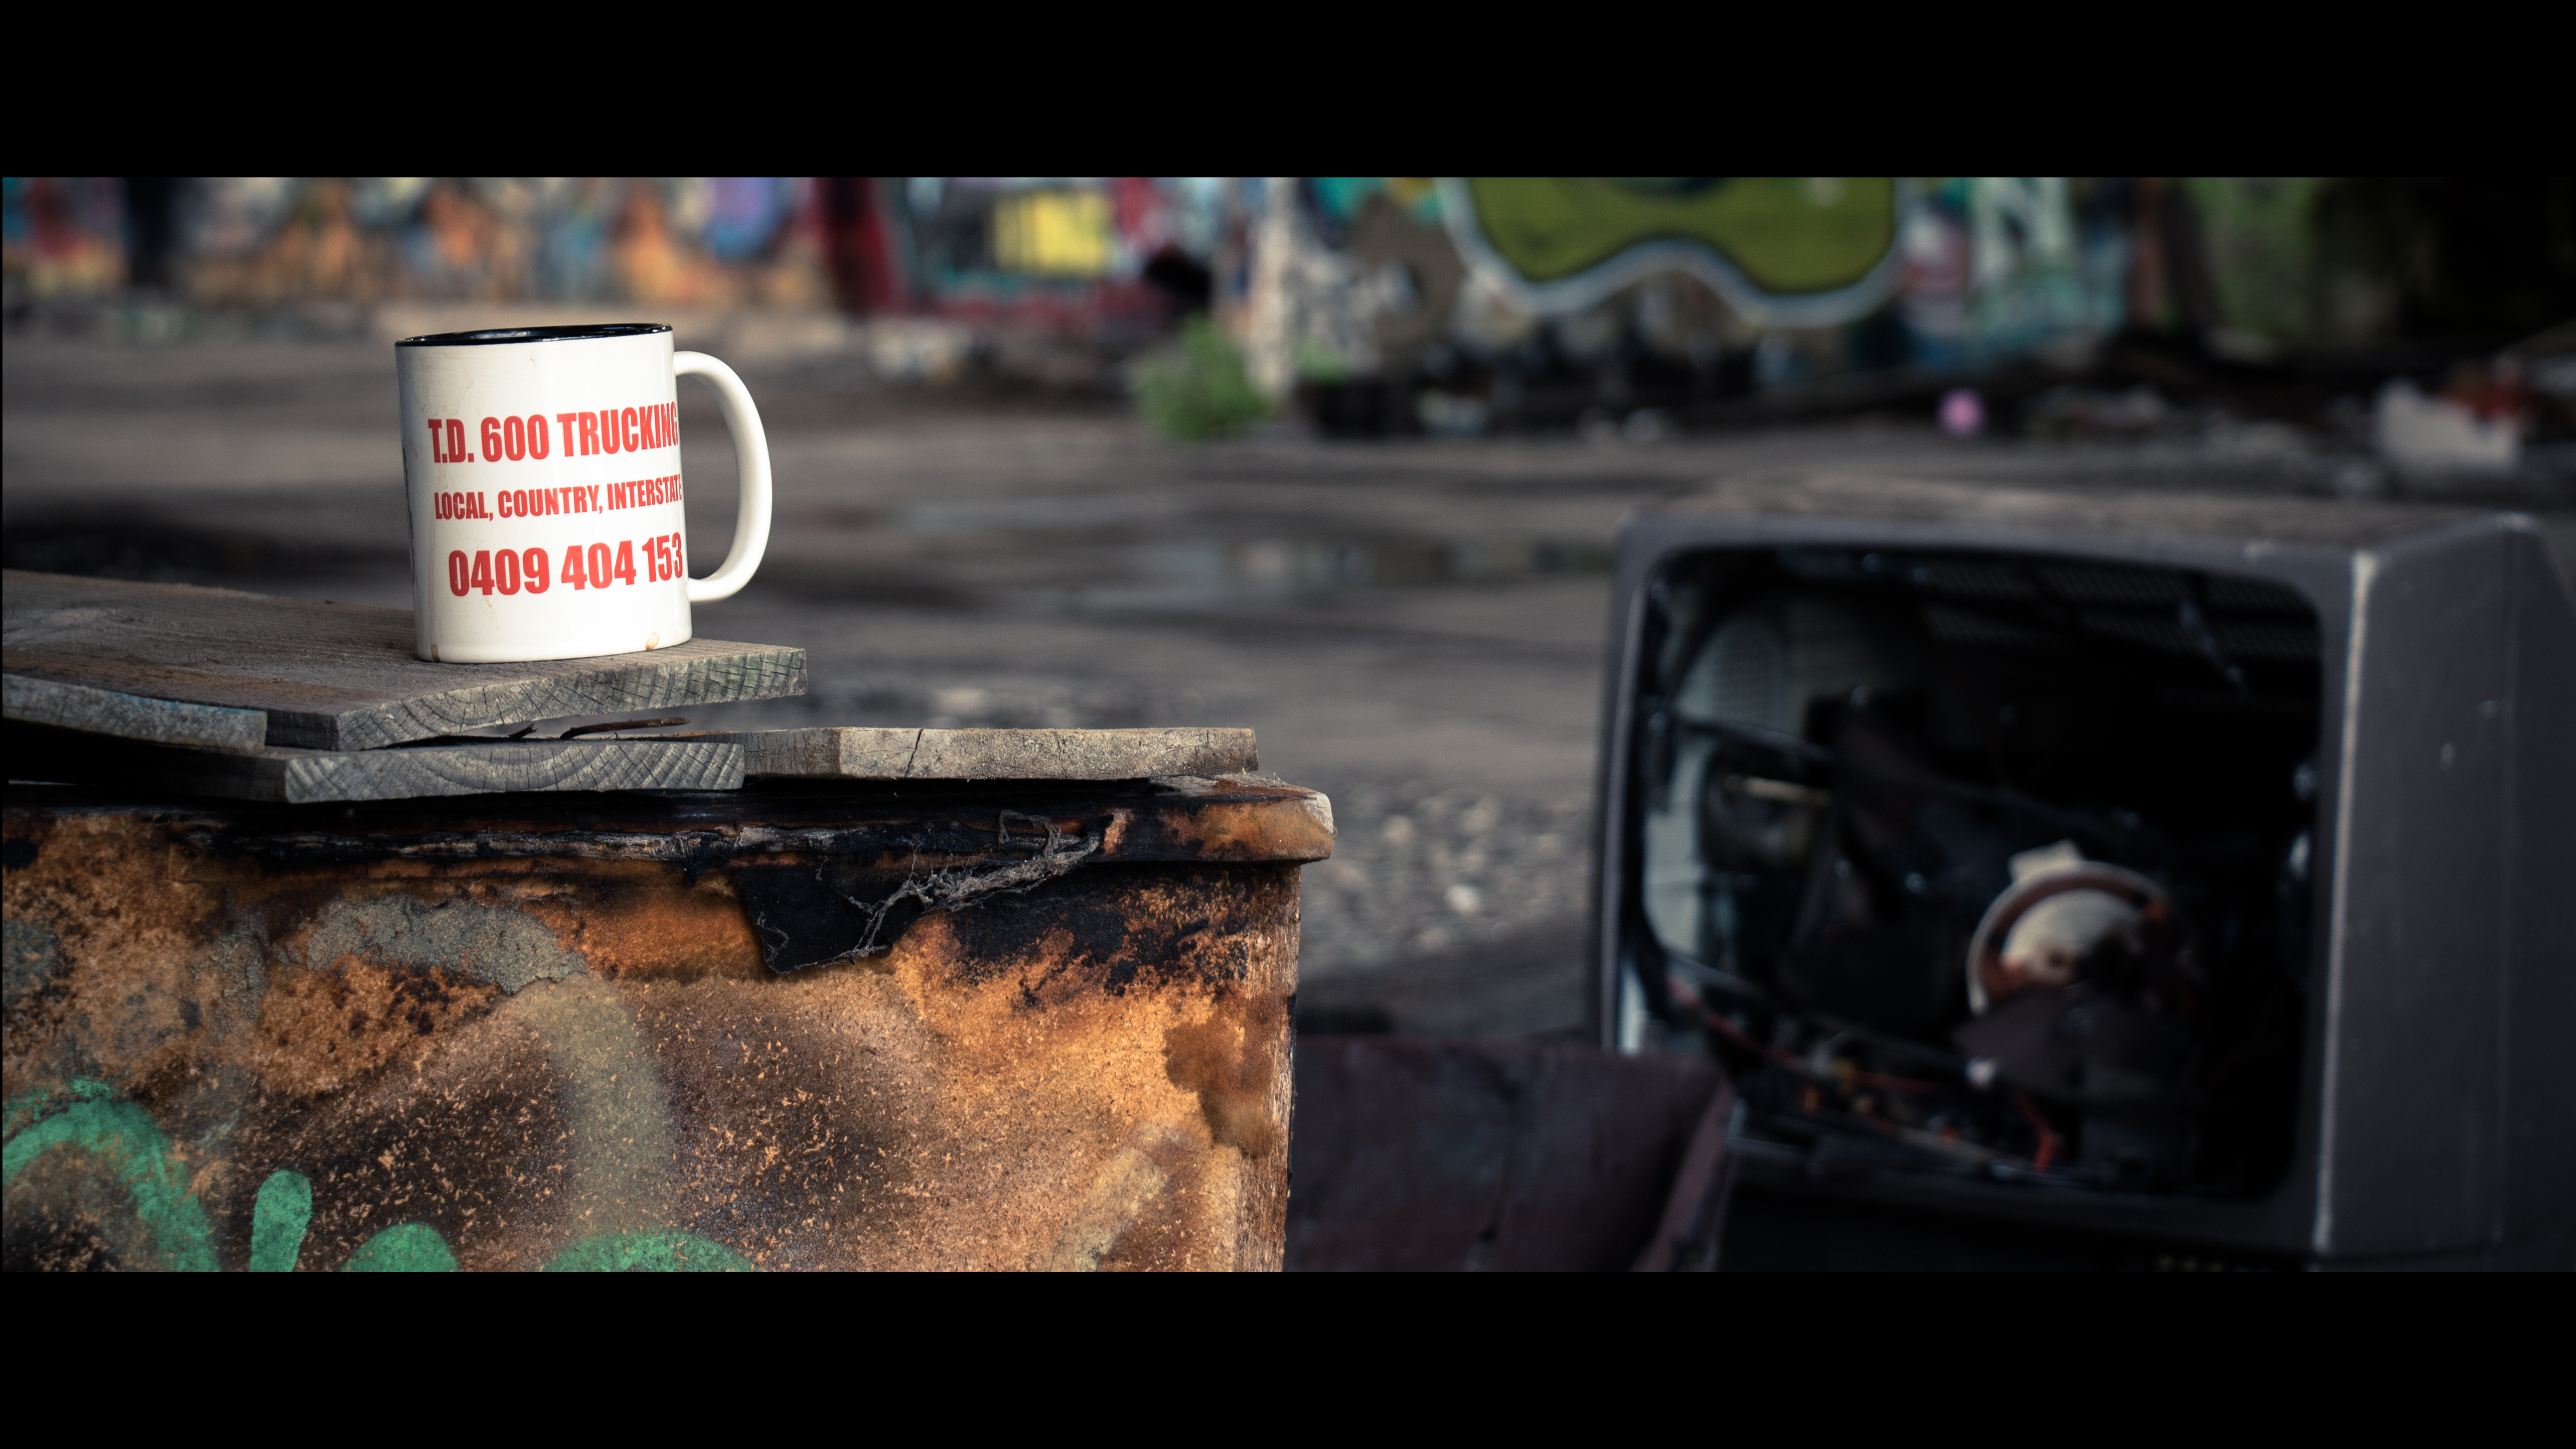
Over the weekend, Reza and I went round the South-west of Melbourne looking for abandoned buildings to carry out our shooting experiments, and we chanced upon this abandoned warehouse in Yarravale.
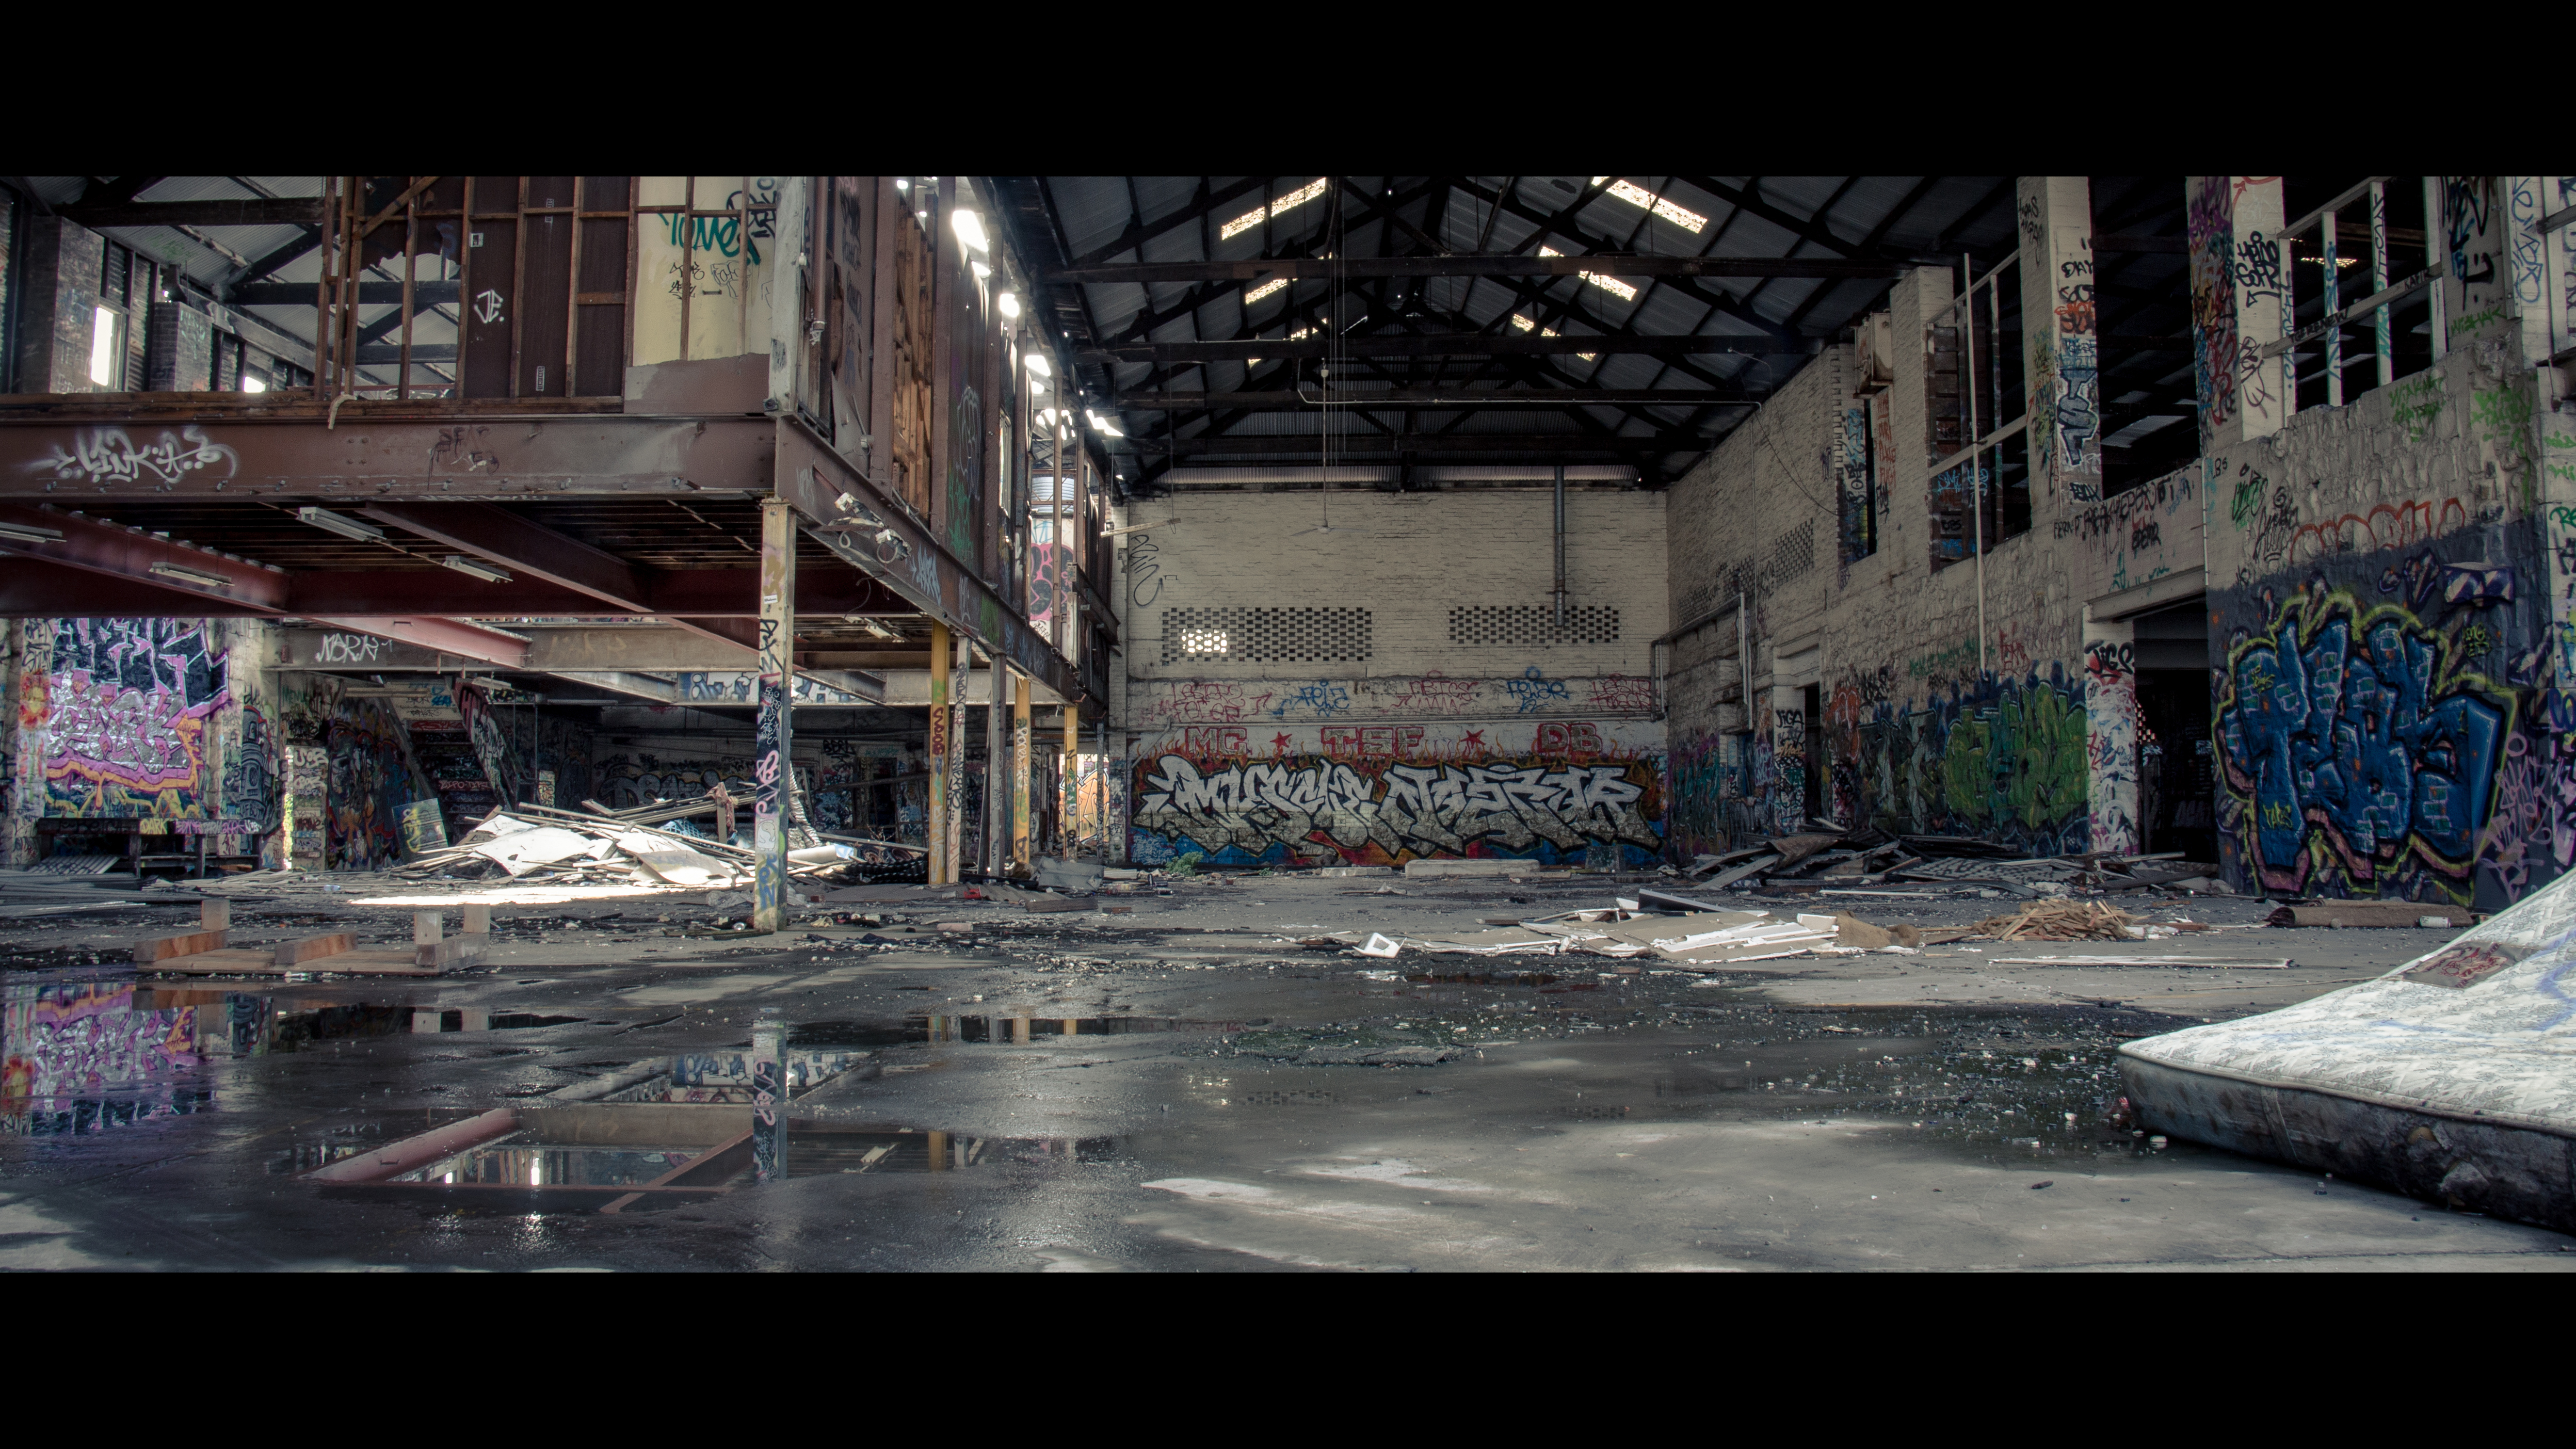
The place was littered with spray cans, rubble from renovation works that might or might not have taken place, old furniture, walls that have collapsed, ceiling that might have fallen down, and there wasn’t a wall that has not been artistically marked with graffiti on it. This was the perfect location for our little experiments to do some chase scenes, fight scenes, or just tracking a subject, as we need a big wide open space to play around with the movement of the camera, as well as the subject.
We spent most of the time taking still images (I’ve uploaded a couple at the bottom of this post) to capture the different pockets of space and area, in order for us to draft a script or storyboard for our upcoming shoots. The building sits on quite a big foot print, moreover, the actual building has several “compartments” and a main warehouse where we have a huge opened space with a high ceiling tattered with holes that allows sunlight to peep through into the building. If anyone has seen the movie Chappie (2015) directed by Neill Blomkamp, the building reminds me a set out of the movie where Chappie, the robot was raised by gangsters taking shelter in an abandoned building.
The above is a little test shoot that we did to see how it looks on camera. Though it’s nothing much, it is a good starting point for us to brainstorm ideas for the next few shoots that we plan to carry out on our upcoming visits back to the place. I did a test grade over the footage as well. Since it was only our recce shoot, we were equipped with only our DSLR and tripods, hence achieving a proper exposure in a dimly lit warehouse with pockets of sunshine was quite a challenge. Therefore, I might consider bringing a couple of lights in our future visits. In the colour grading process, I tried to maintaining a balance mixed of colours, not biasing to any in particular, but generally trying to achieve a more saturated look as compared to the “grey-ish” look out of the camera.
I understand that shooting on a DSLR has its limitations of having the visual compressed into H264 format, and that leaves very little “room” to work with during colour grading as the highlights would have been blown out, and the blacks might be crushed, due to the compression. Hence, in my next couple of experiments and research, I would be looking up how to use Magic Lantern (a free software created for Canon EOS cameras) to shoot in RAW, hopefully losing less details in the compression and maintaining a higher bit rate.
Ultimately, I am happy with the location we have found and we would definitely return back for several more shoots in the upcoming weeks ahead. Feeling inspired by the space and emptiness of the area, if the walls could speak, I wonder the many stories they would tell about this building that now serves as a hideout, shelter, hangout, and now featured in a little student project.
True to Form – The Magic of Magic Lantern – Week #8.2
So I’ve acquired this free software that is written and developed by the good people from www.magiclantern.fm. As the website notes, it is NOT a hack, but it works as an enhancement and operates along side with Canon’s firmware (unfortunately, or fortunately for me, this programme only runs on Canon EOS cameras, so, sorry to Nikon or Sony users out there). This extraordinary programme opens up the capabilities of the DSLR by so much more, taking your photography/filmmaking skills to the next level. It has features such as, onbaord microphone levels, unlike the standard Canon firmware which does not show you any peaking of audio levels, cropmarks/overlay templates for times when you plan to shoot in 2.35:1 or applying the rule of thirds. Even an intervalometer for you to shoot beautiful time lapses, without busting your wallet on a remote control shutter release.
However, all good things comes with its downsides, and this is no exception. One of the key features of Magic Lantern that got me salivating was that it could shoot in RAW video. Yes, RAW. That’s full HD, 1920 x 1080, RAW. Or at least that’s what I thought.
On a standard Canon EOS DSLR, it is capable of recording in HD, 24/25/30fps depending on your camera settings. However, it is limited to only writing in h264 format. This is handy as it’s a compact format, easy to transfer files around, compatible with most video players ie. Quicktime, VLC, Windows Media Player… However, if you’re a colourist, it’s a nightmare to deal with, as it compresses the living sh*t out of the image, hence having the highlights blown out and crushed blacks, not forgetting grainy images in low light conditions when you bump up the ISO by a bit.
Hence, in order to carry out my experiments, it would be optimum for me to shoot most, if not, all of my footages in RAW. Currently, I am still new to this whole Magic Lantern thing despite having it installed in my camera for the past year or so. Therefore, much research has to be done, experiments to be made, footages to be shot. I’m currently going through forums, YouTube tutorials, self-exploration, to understand the workflow of Magic Lantern and how to operate it. On top of that, just getting used to shooting on a DSLR and using a tripod as a counterweight like a steadicam.
Fingers crossed, I’ll device another shoot this weekend, just purely experimenting using Magic Lantern to shoot in RAW, and various camera movement, angles, and getting into the right headspace during a shoot to plan the shots.
True to Form – Shooting in RAW – Week #8.3
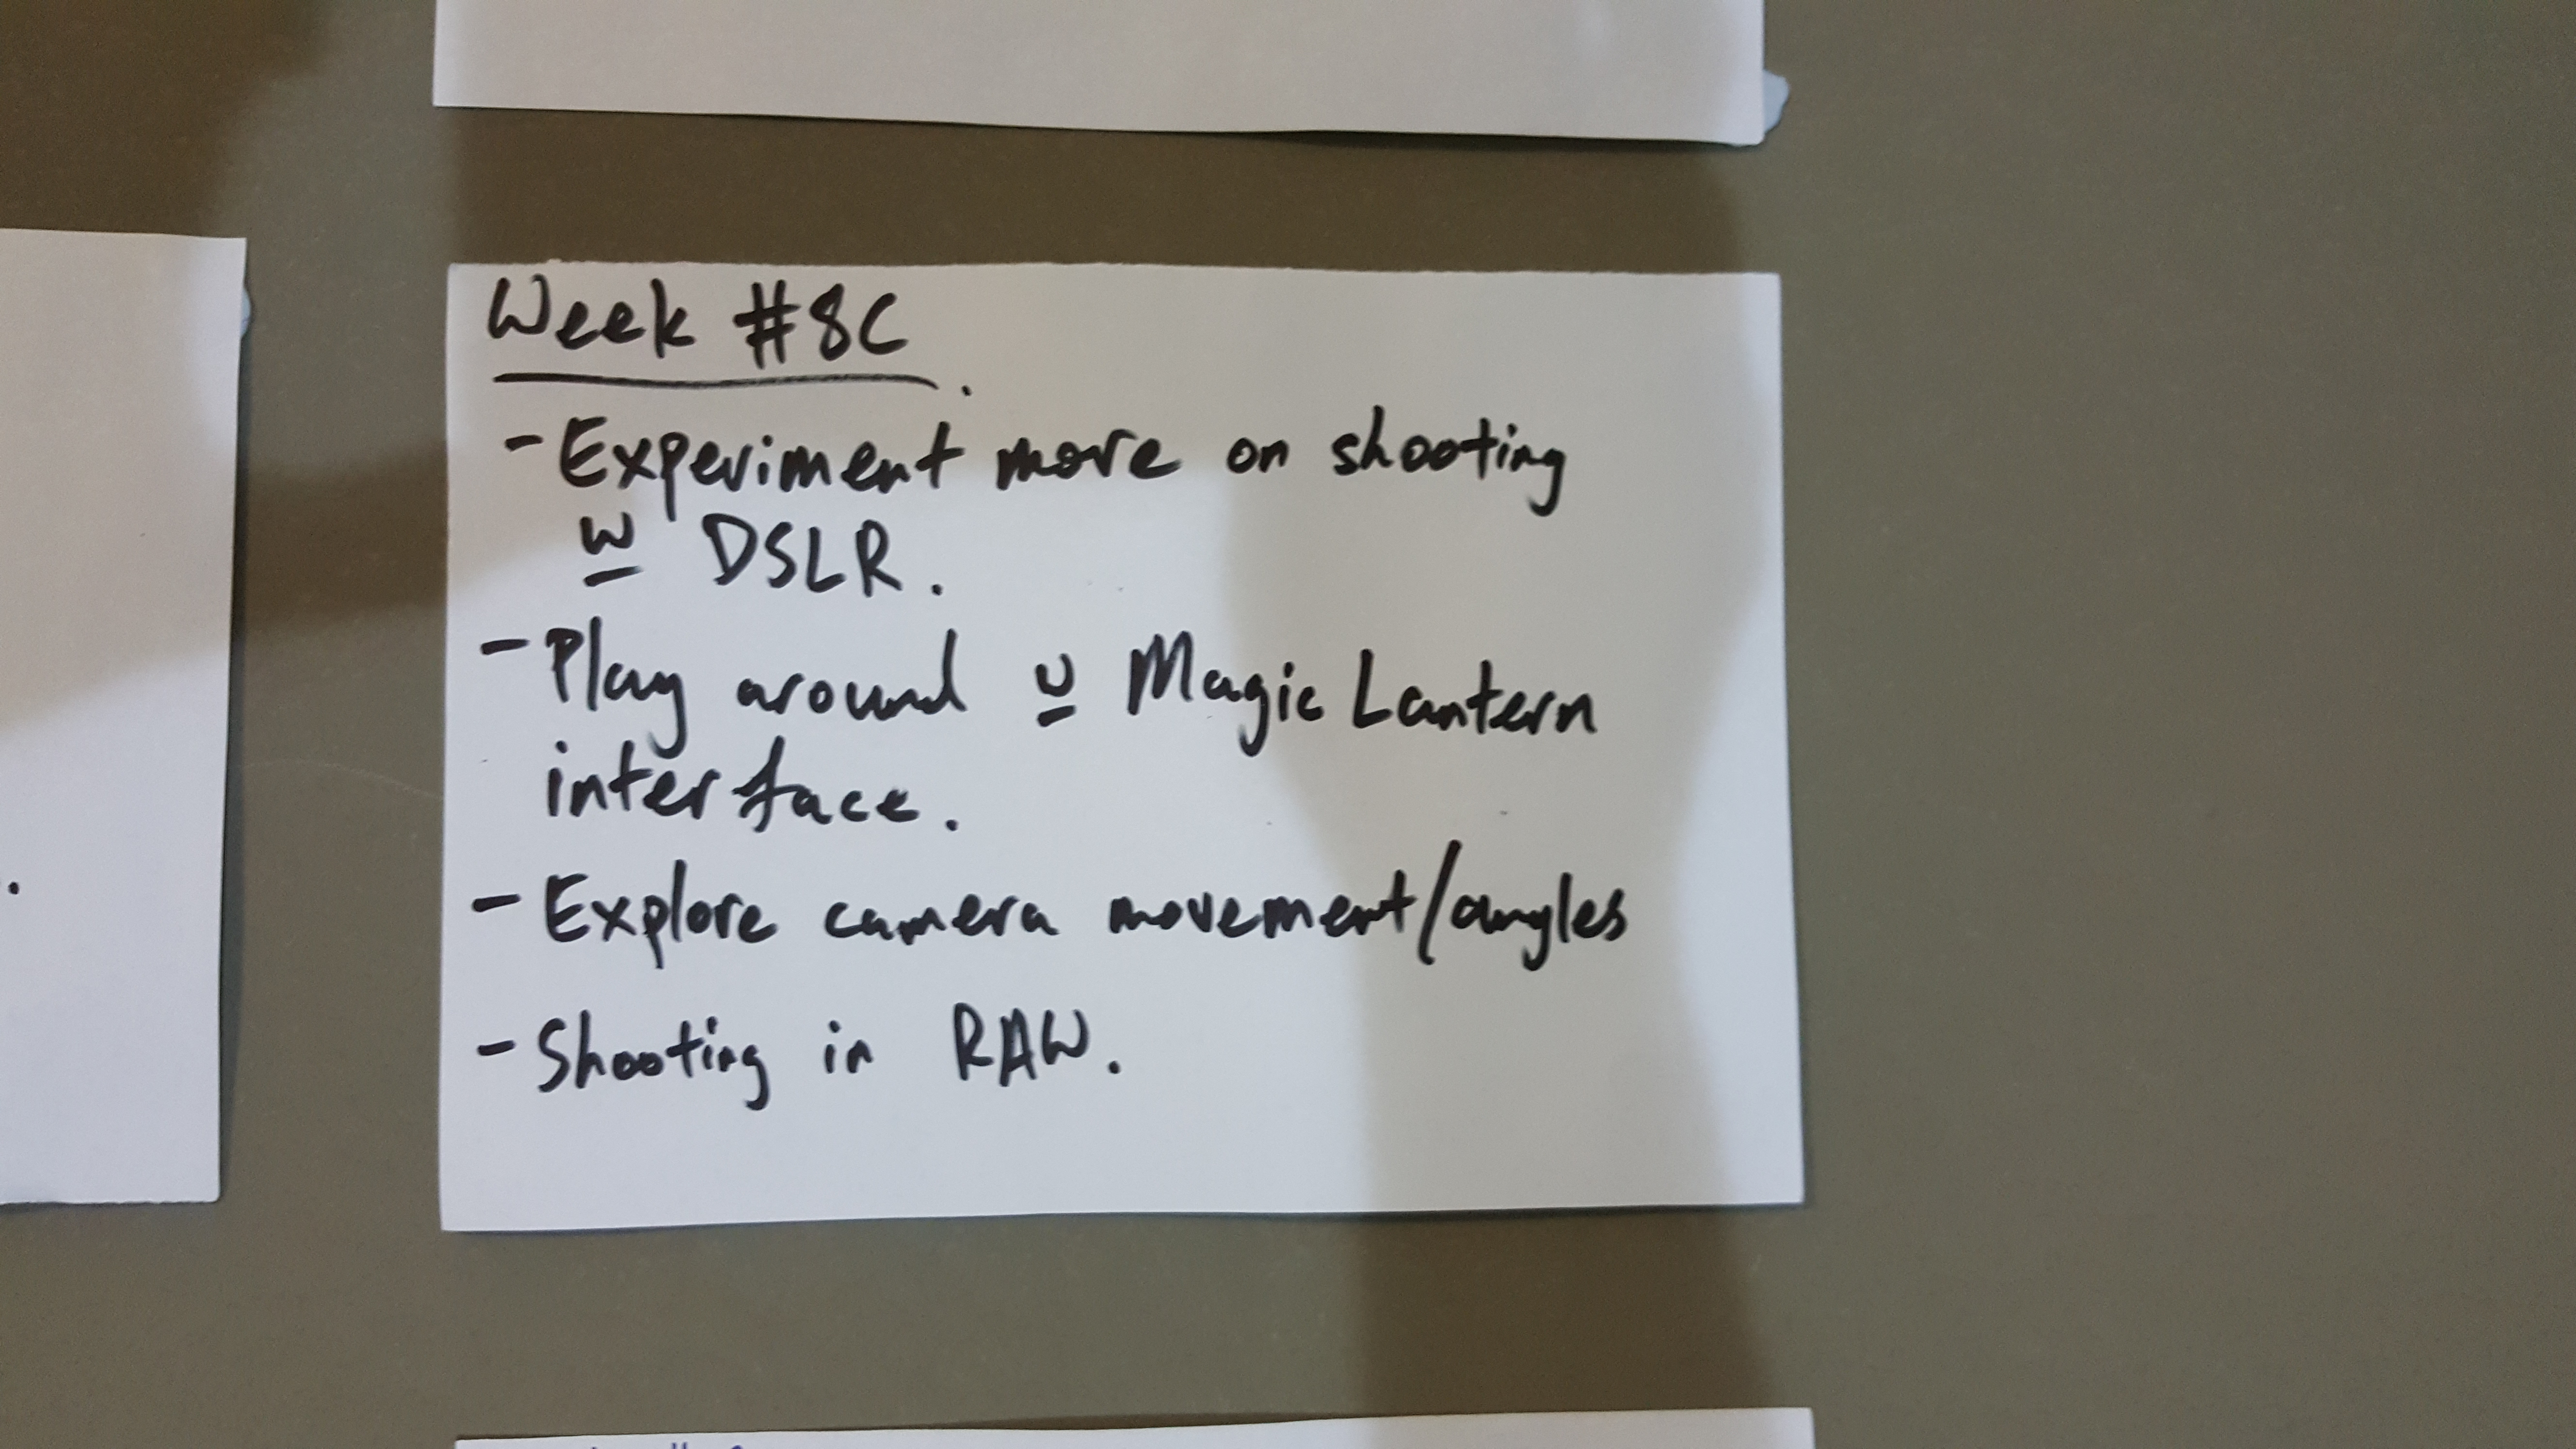
As the picture from my “Wall of True to Form” suggests, (Week #8C), there’s a list of things to be covered in the upcoming test shots with Magic Lantern. I’ve done some self-experiments with my DSLR around my apartment, just trying to familiarise myself with the Magic Lantern interface and functions to achieve proper exposure, follow focus, and shooting in RAW. Now the next step is to actually shoot a sequence and see how that pans out.
I’ve arranged to shoot at one of my mate’s apartment where she will be carrying out a mundane routine and I’ll just keep shooting the same routine over and over again to experiment different types of shots, angles, technique, and maybe even explore the use of lighting. The whole point of this experiment is to see what type of shots work in order to achieve a general cinematic look, and steering away from the “home video” feel. Things to consider in making the look cinematic would be, focal points, exposure, lighting, camera movement… Since it’s a mundane routine, I can rule out any narrative or plot lines that may or may not influence the image of being cinematic, and just focus purely on constructing the shots. I know this might backfire, as the narrative and plot would drive what makes an image cinematic as well, but I would like to focus on the technical side of things first, before diving into the creative writing aspect.
Currently, I’ll put the abandoned building idea on hold first, and roll out the kinks on shooting on a DSLR with Magic Lantern, before returning back to the same place for more shots and experiments. The place is a little out of the way for both Reza and I, therefore, we need to have something solid to shoot and work towards, the next time we’re there. Now that we have a good idea on the location that we are going to work with, we can slowly brainstorm ideas for a storyboard and script for our next shoot at the abandoned building.
True to Form – Week #9.1 – Testing, 1, 2, Three.
So last weekend, I carried out an experiment shooting in RAW and in h264, mp4 that the original canon eos cameras record in.
Unfortunately, due to some technical difficulties, I could not get the camera to record in RAW for some reason. I’ve tried following the steps provided by online tutorials on youtube, forums, suggestions, tech geeks, all over the web, but to no avail, the camera would lag and stop recording after a couple of seconds after I hit the record button.
There are several factors that could lead to this problem. One being the camera’s abilities to cope with the amount of data that’s it’s taking in. In other words, it’s writing speed. From my extensive research, my Canon 650D, has the capability of writing at 40mb/s, and the SD card inserted into the camera is a class 10, 32GB, and it’s able to read/write at 80mb/s. As far as I know, the card is more than capable of doing this, however the camera might be a little on the slow side for recording in RAW especially for a FHD 1080p video. On another forum that I’ve read, it suggests to tweak the video resolution down to 480p while maintaining 24fps. This method works, however, the image is literally cropped down to accomodate the 480p, hence capturing very little visuals on an already very small cropped sensor. And, with very little luck, it would automatically stop recording after I hit the record button for a few seconds, but still longer than the previous settings.
Ultimately, I decided to just go along with recording in Canon’s stock h264 video mode. This format is well known for its notorious compression, though it being able to record in FHD 1080p, you will lose details in highlights and blacks. Another cool feature of the magic lantern interface, is that it allows you to apply zebra patterns on the screen to show you what is getting blown out in exposure. I’ve set the zebra patterns percentage to 75%. And tried to keep the zebra patterns low in the image while I was shooting various shots.
When I’ve imported the footage into Premiere, and did some editing, before moving on to grading the shots, my assumption was right about losing a lot of detail from the heavily compressed h264 mp4 format straight out of the camera. This led to some disappointment, as there was really very little room to grade before the image gets grainy.
The learning point from this whole experiment would be, if you can’t shoot in RAW and your only option is to shoot in the heavily compressed h264 mp4, your exposure has to be dead right to prevent any crushing of the highlights or blacks. It can’t hold a candle to recording in RAW, but I guess that’s the best way to get out of a dslr. Another alternative, that may incur heavy cost would be to record on an external recorder such as an Atomos Shogun, or Ninja. This fine products record in any format you desire from h264 mp4, to Apple ProRes, or RAW formats. From my experience and understanding, people tend to overlook the importance of video codecs and formats and just look at resolution to judge image quality, which is really quite a pity. The container that will be holding all your data and information is just as important as the pixels that goes into them.
The video below would illustrate how bad the compression does to the picture, even with low ISO and FHD recording.
True to Form – Week #9.2 – Problem with Location
So this week, we had little consultation with Paul in pairs and we showed him our little test shoot from our abandoned building. Apparently it is our best interest that we acquire the right permission to shoot in such a venue, or in any other venue for that matter. Safety would be the main reason, if anything happens, who should be accountable or responsible, IF for an unfortunate event were to present itself. And that’s where all the nitty gritty insurance terms and conditions would apply. Of course non of us would want that to happen, and we would like to approach this whole assignment with peace of mind, knowing that everything is covered administratively and artistically. So if any of the two does not meet the requirements, it would mean that we might have to find somewhere else to shoot or go through the right channel and fill up proper paperwork for us to get the green light to use such a inspiring creative space.
Apart from that, we collaborated with another pair who’s area of research is on the zombie genre. This helped open up ideas for storyboarding our chase scene since now we have a good direction and genre. The pair we’re collaborating with would be Helen and Trong on their little Zombie adventure. So Reza and I sat down with the group to see how are we going to work this out combining our ideas together. Basically, Trong was interested in our locations for his Zombie shooting experiments, and we needed some form of narrative or storyboard to shoot at our location to exhibit our experiement (ie. for me, colour grading, and Reza, sound design and foley recording).
Personally, I feel that the group is getting a little crowded. And for an assignment that consists of mostly experiments and exploring of ideas, there might be too much to handle. But I’ll remain open, not shooting down any floating ideas or suggestions that any of the group mates have. Currently our main focus is to secure a location, as I strongly believe it is the most crucial for what we are doing for our little chase scene, or rather a more up to date version, zombie chase scene.
During our discussion, we brainstormed various locations that we can find around the city, and one that came to mind was a multi-story carpark. In substitute of an opened abandoned warehouse, the carpark has ample space to play with, different levels, small stairwells and pockets, hence it would be pretty versatile shooting in that environment. Though not as versatile as the abandoned building, it should be able to pull off our zombie apocalyptic chase. Reza and I planned to do a little recce session later in the week to find a suitable multi-story carpark.
True to Form – Week #9.3 – Area Secured!
Having gone round the city recce-ing various multi-story carparks, Reza and I settled for one along Little Bourke Street. It has good access to the building, and the lift goes all the way up to the roof where there were a few cars scattered around. It didn’t seem too crowded at the time we were there, and it had a very nice view of the city scape from the roof. And, if we were lucky, at the right time, we could get the perfect lighting from the Sun passing through neighbouring buildings, or reflecting off glass panels. We would have to play by ear, or in this case, by our eyes, on the day itself when we’re out here shooting our experiments to see how the lighting conditions will be like.
At the same time, we took the opportunity to brainstorm ideas for our zombie chase scene. I decided to take on the approach shooting this like a trailer. After all, we are required to submit a 30 second screener at the end of this semester to showcase to our fellow studio mates. Hence, I thought the trailer concept would be the best way to exhibit several shots, our areas of interests/research, all in one sequence. For example, I would do a colour grade over this sequence as how a zombie apocalyptic film would look like, and Reza would do his foley and sound design base on the chase scenes. (Ie. Footsteps, zombie grunt, screams, ambient sounds…)
Since there isn’t much told in a trailer, we would not be so tied down on the narrative or a plot, just a basic storyboard of a zombie chasing a person. Maybe if we do get the time, we might do a little background story of why they’re chasing and how the zombie became a zombie, but that is probably as far as we would go in terms of writing a narrative, as we intend to focus on the area where we would like to experiment. As for Helen and Trong, we believe they could have great input on zombie movement, camera movement around the zombie, and the overall mood of the trailer to see if we can achieve the zombie apocalyptic feel overall.
I’m also glad to say that I’ve managed to get a mate of mine who’s in Singapore to do a basic film score over the trailer. My approach to this is to get a proper piece to show at the screening at the end of the semester, and not something rough, hence I believe music is a key element in trailers and teasers to drive the overall look and feel of a film. This overseas collaboration not only boosts teamwork effort, but also bring recognition to people (for what it’s worth) not bounded to RMIT. I am pretty sure in the industry there are instances where local companies collaborate or sub-contract their work out to overseas production houses for a torrent of reasons, budget, production, location, people, or even politics….the list goes on. Of course, this comes with its own set of challenges, such as having to put my point across, it would not be as easy to telling him face to face, I might have to draft a spot list with proper timecode to cue him when to insert music or when to dial it down, if need be. Looking forward to another set of collaboration, with an overseas partner this time.
Happy times are ahead, and we’re slowly but surely drawing closer to the end of the semester. Heat is up (not so much literally, it’s getting cold by the day), and everyone seems to be crunching their way through this time of the semester and very soon that little shimmer of light at the end of the tunnel will eventually blow up into the surrounding.
True to Form – Week #10.1 – ACTION!
This week, we headed back with Helen and Trong to the location where Reza and I scouted last Friday.
We wasted no time and started shooting for a good 2 hours or so. Each of us rotated roles being the cinematographer, camera operator, and director. Since there isn’t any dialogue as this scene was mainly chasing, we didn’t find the need to have a sound man as Reza would be doing most of the sound effects on foley and sound design.
Initially, I found it hard organising the shots that we want. Trying to do too many things at once always lead to nothing positive. Hence, we chiseled down our experiment to our main objective and that was just to have a chase. Don’t really care how many times we were going to shoot it, we were just prepared to shoot multiple takes, from multiple angles, multiple shots and just nailing down all possibilities of shooting a chase scene between a zombie and a human. We had a great location with very little distraction or people (the occasion office worker would walk by to their car and drive off), but other than that, we pretty much had the whole roof top of the multi-story carpark to ourselves. We came up with a short storyboard and just started rolling.
Trong and I brought our DSLR, and this gave us options to shoot 2 different shots at once. I began by shooting Reza as he was looking and searching for a girl, played by Helen, while Trong shot close ups of Helen, as well as shots of her running and hiding. I don’t know if it’s the norm, just because I’ve not been on many shoots as I would like, I’ve always been stuck behind the computer operating Premiere or something, even while on my internship, but it seems like we would start off slow, and then develop some sort of rhythm as the brain juices start to flow. Initially, we’re shooting and reviewing the shots, I’ll be condemning my camera work. “I should have done that, I should have done this…” “Why does it look so bad, why does it not turn out the way I pictured it to be…” Stuff like that… But the more we kept going, the lesser the harsh comments came, it soon turned to, “That’s so cool..how did I do that…” “I’m going to try that shot again on some other experiment/shoot/film”. There were moments where I was actually dumbfounded with myself, like, “Did I actually just did that?”.
In particular, there was a shot in particular where I was tracking Reza’s legs as he was walking like a zombie in search of the girl (Helen). I must stress that, I did not come up with this idea, I was just going through a bunch of tutorials on how to use your tripod as a steadicam, and one of the videos I found online suggested extending all the legs, and opening out 1/3 of the legs, while close the other 2/3. The camera mount should be twisted at a 90 degrees angle. The video below taken by me showing Trong operating his DSLR would illustrate better than me trying to explain it with my lack of vocabulary.
Though still not as steady as a steadicam with counter weights and balance, it still provides a very smooth tracking image. This customisable set up allows you to reach down to low angles, or if you invert the mount of the camera, high angles. And since you could adjust the length of the 1/3 leg that is opened up, you can get a good grip while maintaining stability.
These little moments of “I can’t believe that worked out so good” is what I mean by getting the juices flowing and then realised we actually did something like that. And it just keeps wetting the taste buds for more moments like this when u want to try that same set up on a different shot or a different scene and see how that pans out.
All in all, the group was really happy how the shoot turned out. Looking forward to going through the post-process where then I can actually start exploring more editing/colouring options, something more in my element.
True to Form – Week #10.2 – *Don’t* Fix it In POST!
*CAUTION*
*Long post ahead!*
Coming from a post-production background, I’ve heard this phrase tossed around too many times from the DP, AD, Directors, AP, even Producers saying, “Fix it in post!” This cry for help when it comes to digital processing can solve the problem to a certain extend, but definitely not 100%. While I was still studying for my Diploma in Music and Audio technology, I had a lecturer that goes by this rule when we’re recording anything in the studio, “Sh*t goes in, Sh*t comes out…”. And I’ve stayed by that rule till today, and when I’m out on shoots such as the one we did at the multi-story carpark, I was trying to avoid having Sh*t recording into the camera.
Over these past couple of days, I’ve been working on the edit from the recent shoot the group and I did. Since we focused on just a small sequence, the actual duration of the clip is just slightly longer than 30 seconds. Which isn’t really a bad thing, as the final screener we have to submit is 30 seconds each. I also did a basic colour grading, trying to achieve the post-zombie apocalyptic look by boosting some greens in the shadows to bring out the “hospital” “sick” look, and then boosting a bit of yellow/orange/brown on the highlights to give that dusty, deserted, sandy look you get from sci-fi films such as Elysium, or I am Legend. However, since it was shot on our DSLR, the compression from the h264 mp4 format didn’t really give much room to work with, but I did what I could to achieve an overall grade.
I was in awe to find that I took rather long to colour grade than editing the 30 seconds trailer. Tweaking sliders, colour wheels, adjusting different values and parameters took up a lot of time, especially when you’re trying to match a grade to the previous shot that you have already applied an overall grade. A common misconception I get is that most people think that once you’ve applied a grade to a particular shot, you could just copy and paste the effects setting to the next shot. That is just a lazy and poor quality way of working, as every shot has different lighting conditions. More so that we shot on 2 very different cameras, a Canon EOS 650D and a Nikon (not too sure what model Trong was using), but both manufacturers would debate who’s camera is better in colour and so on. Therefore, I approached colour grading this trailer, shot by shot, trying to achieve an overall balanced piece. I really hoped I’ve done that, and even if I failed, at least, I could go back to the sequence again and tweak a bit more here and there to achieve that. I had to go by eye, as that’s the only way I know how to match a grade from shot to shot. If anyone could suggest any better way, I’m all ears.
Just to sidetrack a bit, I’ve given up on shooting RAW on Magic Lantern, period. As I find myself diving into another world of formats, compression, bitrate, writing speed, resolutions, aspect ratios, and so much more technical geeky stuff, which one day I would love to find out more, but in the duration we have for this assignment, I don’t think I will be able to accomplish everything all before our deadline. It may or may not be my fault in time management for not getting all these covered, but then again, going into this, I didn’t know what lies ahead of me and how much information I had to dig out before I could actually start rolling camera and start recording in the format and resolution I want. It just takes more time, practice, experiments, trial and error. That doesn’t mean that I have given up all hope, it’s just maybe not for this particular assignment. I’m glad I’ve taken on this path, but sad to admit that I didn’t finish what I started, at least not for now. Currently, I’ll just stick to shooting on the stock Canon h264 mp4 format, which means it would limit the headroom I get to play with when colouring in post. As long as I know my limitations and know when to stop pushing the highlights/shadows/blacks, it should be fine.
Sidetracking a little more, in research on newer DSLR cameras, there are quite a few that are able to shoot in AVCHD which is similar to shooting in RAW. (Ie. very little data will be crunched during compression.) Being a student on a “student budget” I know the industry standards, Canon 5Dmkiii, Nikon D810, Sony A7R, Panasonic GH5…. are way beyond my price range, and hence not worth looking at, as ultimately, they are the industry standard for a reason. My main interests would be those of a lower tier, being on the cheaper range of the scale, and seeing what kind of technology comes along with that slightly lower price tag. And I must say, some of this inexpensive cameras are catching up with the industry standard, being able to record in 4k, or in AVCHD format, 120 fps for doing slow motion sequences, and so on. I think it’s safe to say that my interest in photography might overlap with what we’re doing, and it does come to aid in some cases. I just hope that I don’t break the bank even before I get my first pay cheque.
True to Form – #10.3 – Zombie Carpark ver.1.0.1
I decided to call my edits like how software companies label their updates. With every couple of months releasing a new update to fix bugs, glitches, and what have you. I think I could never settle for a “final” edit at my first attempt, heck, maybe even my first 20 attempts. There’ll always be, “This part feels funny, that part needs some tweaking, why does it look so weird….”. Hence, this version I’ve embedded to this post is probably versions that has taken some form of shape, but no where near a solid form.
The team and I decided that we should head back to the carpark to gather more shots, just to establish some context on how the chase begin and experiment more with shooting on my DSLR and then grading it. Overall, I’m happy with how things are going, but I still believe there’s much more to do, much more to learn and acquire, before this reaches it “final” edit. It may be by the end of the semester, or by the end of the year, it’s an ongoing experience, and maybe in the distant future, when I look back at this, it would feel like how I would look back at one of my drawings I did during kindergarten days. It’s not so much of the actual product, but the memories, experiences, and journey it encompasses.
I’ll leave this here to ponder, while I’ll get back to editing more rough cuts until I rid of the “bugs and glitches” in the edits and till I achieve one smooth running OS. But until then, here’s ver. 1.1.2.
ps. There’s no need to restart your computer for this
True to Form – Week #11.1 – Leave Your Comments In the Comments Section
This week is all about getting comments and feedback from peers and tutors.
Having shown my rough edit and grade to the team, we were all pretty contended with what we have so far. Reza would continue with his foley experiments, while Trong and Helen would carry on with their zombie experiments.
I think what needs to be addressed now is our presentations and how we are going to screen our works, as all 4 of us have 4 different opinions on how things should be done, and things can get really complicated really fast. For one, from my understanding, we are required to screen a 22.5 seconds screener for the studio presentation, but since we’re collaborating as a group of 4, do we screen just 1 video with all our works? Or do we submit 4 individual versions of our work? The latter runs the risk of people seeing the same shots 4 times, just used differently at different lengths or in a different sequence.
I might have mentioned in my earlier posts about collaborating with people comes with a tricky set of challenges and it’s all about compromising and accomodating. Seeing what can we give, or take. And I dare say I am really fortunate to have the most accomodating group mates, who have been such a blast to work with. I don’t think there was a point where either of us felt like we were being out of place or not having enough say in the matters. I’m not speaking on the behalf of everyone else, but it’s just my personal opinion.
Having said that, we did have our challenges. Trying to come up with a date that can fit everyone’s schedule was quite a challenge, half of the group have work 5 days a week, and the other half has other commitments outside of this studio. But, we managed to pull through and squeeze in a good 3 hours block for our second shoot at the carpark for some establishing shots prior to the zombie chase. Since we’ve already got the main bulk (the actual chase), we just need a few more shots of how our zombie started chasing the girl. Which we should think of how to compose the shots, now that we have gathered a little bit more experience shooting and playing our roles.
As for the rough edit, I gathered feed back with some of the shots looking a little out of place, and might need to continue tweaking the in and out points, before and after cuts, and several other kinks that should be rolled out. With the extra footage that we’ve planned to shoot, I think we’re getting closer to an actual piece of work we can say we’re happy with. Of course, I wouldn’t want to jinx it, just yet.
True to Form – Week #11.2 – More ACTION!
We went back to the multi-story carpark and with haste we commenced shooting, as one of us had to rush off to work after.
You might think it’s really easy to act as a zombie or mimic one, but when it comes to directing, plotting, or choreographing how a zombie should move, act, walk, maybe even talk, it requires quite a lot of thinking. Personally, I’ve not seen enough zombie films or The Walking Dead episodes to act, let alone, direct someone to be a zombie. Thankfully with Helen and Trong on board, they gave some really relevant details on how Reza should move, walk, or stand. In our previous shoot, there wasn’t much directing, since it was just merely a chase and I think Reza pulled off the zombie chase pretty convincing. However, for this shoot, we had to think how a zombie would act, react, how did the 2 interact or come into contact…
I know all these should have been figured out in pre-production, but since this shoot was planned like just 2 days before the actual day of the shoot, we had not much time to work with in terms of the story board. What we did cover though, was the shots we needed to add on to the current chase scene we have. Hence, that was our main motive, and gave us a list of questions that should be answered on screen. The video below might illustrate our little discussion on how we went through things. Of course, we had to go through a couple of rehearsals before actually going for a take.
- How did the chase begin?
- What was Helen doing?
- What was Reza doing?
- How did the both of them meet?
- Are there other people?
- How did Reza become a zombie?
Some of these questions got omitted, as we think it would have been obvious or we just couldn’t afford the time to explain it on screen due to the 22.5-30 seconds screener. Since each of us are entitled to 22.5 seconds, we decided to submit two, 45 seconds to 1 minute videos from our group. Trong and Helen will be screening their experiments done at Trong’s apartment with the beautifully shot of dirty dishes, gory hand movements and more, while Reza and I would be concentrating on this chase scene sticking to our initial concept, with the help of Trong and Helen, of course.
Back to “how to direct a zombie”, we had to brainstorm how Helen discovers Reza is a zombie and we came up with two approaches. Either Reza stalks Helen, and the chase begins, or Helen sees Reza just idling at a corner being “zombie-like” and approaches to offer help, and then the chase begins.
We settled for the latter, as it would establish both characters best under the short given amount of screen time. Recounting back to the days when I was playing Left4Dead, zombies are usually idling, stoning, or doing nothing much until somebody startles them or approaches them, and we were trying to remake that, but instead of being a computer game, it was in film.
On a side note, I think music plays heavy with this particular sequence. The suspense of Helen approaching Reza, unaware of him being a zombie will be amplified even more with some suspense music to thrill and excite the audience. I’ll be liaising close with my mate in Singapore to compose a piece that would fit the sequence.
True to Form – Week #11.3 – 讲华语 (Speak in Chinese)
Growing up, my family never really spoke Chinese (Mandarin to be exact, they are fluent in their respective dialects) in the household. We were more accustomed to English, as both my parents were English educated from Malaysia. Chinese lessons back then were pretty much just storytelling or teacher addressing the class in Mandarin. Nothing too formal with exams or tests like we have today. Hence, that minute Chinese vocabulary was then passed down to my brother and I who struggled, a lot, in our primary school days where Mandarin, or in broader terms, our Mother Tongue language was compulsory for all students to study, and pass.
Having a group mate who’s from mainland China has some consideration, worth exploring. During our shoot, I suggested to Helen speaking in Mandarin (her first language) or in Cantonese (her dialect that she was raised with), and I’ll add subtitles on screen with both English and Chinese characters. I figured it’ll be more natural for her to speak in her native language, and it would translate (no pun intended) into her acting. Something that she would be more familiar and comfortable with. Although it’s just a small role, or even line, where she’s on the phone with a friend, before she bumps into the zombie, I could imagine it playing in my head if she’s speaking in English, it just doesn’t seem natural, like eating a banana with a pair of chopsticks.
Also, I thought it’d be a good opportunity to brush up on my Chinese as well, while I’m doing the subtitling, I tried as much not to refer to google translate. With technology literally right at our finger tips, it’s always so easy to revert to some sort of translation back to a language you’re more familiar with. Mind you, my speaking and listening is slightly better than my writing and reading, in other words, I had no problem understand what Helen said, it’s just putting it into the subtitles and finding the right Chinese characters.
Having moved to Melbourne for more than a year now, I finally found an identity and have learned to appreciate my background. I’ve learned to view things at the bigger picture and understand things with a slightly different perspective. Also, learning to appreciate the little things back home such as having fresh laundry done everyday, or home cooked meals on the table (done by someone who’s actually experienced in frying with a wok) and not just microwave food for students on a tight budget. And it’s all these little things that helps you get by day to day, and overall, in life.
This post might seem a little far fetched from filmmaking, but again, it’s such experiences and lessons that inspires filmmaking. Only when we’re pushed to our boundaries do we see results that we wouldn’t even dream of.
At the beginning of the semester, Paul introduced us to this quote saying, “Filmmaking isn’t about making film, it’s learning about filmmaking.”. And there’s a Chinese proverb that goes, “活到老,学到老。” which translates to, one is never too old to learn. Like my basic conversational level in the Chinese Language, which I would one day hope to re-connect and bring it up to certain standards to be proud of, I’d like to see my filmmaking techniques and ideas not just improve, but evolve with the times, as no one can predict what’s in the future for such an ever-changing landscape like the media industry.
True to Form – Week #12.1 – Grading for Good Grades
At this stage, I think I’m all into post-production right now. We have pretty much shot all the necessary footage we need, it’s just the matter of us going back to our research idea and developing it. In my case, I started out from working with the uses of letter boxes, and realise there isn’t much to experiment in that field, and then moved on to colour grading and everything the revolves around it. Camera, exposure, resolution, file format, all plays a part into grading footage. And then there’s the creative approach of making something look good or making something look a certain way, or cue a certain emotion.
I’ve been experimenting with different grades to the footage, and as I mentioned in one of my earlier posts, the thing I found most challenging was to match grade from shot to shot. My research shows various methods used by professionals in the field. I gathered that, there’s no hard and fast rule into colour grading, everyone has their own method around it, so long as it achieves a particular look the director or filmmaker is going for. Some resort to using LUT (another realm worth exploring) as a base platform and then working their way up from there, while others just worked from scratch doing a basic balancing, correcting, and then to the actual grading.
For me, I approached it the old school way, starting from scratch and then work my way up to colour grading. It might not be the best method, but for someone who’s never done this before, I think it’s a good starting point. I did a bit of research with using LUT and it got a little complicated when you have to take note of the various cameras and model that you’re shooting for the LUT to compensate for the colours straight from the camera. I do, however, would intend to use that approach maybe in my future projects for sure. Just not this particular one. For me, I approached it the old school way, starting from scratch and then work my way up to colour grading. It might not be the best method, but for someone who’s never done this before, I think it’s a good starting point. I did a bit of research with using LUT and it got a little complicated when you have to take note of the various cameras and model that you’re shooting for the LUT to compensate for the colours straight from the camera. I do, however, would intend to use that approach maybe in my future projects for sure. Just not this particular one.
During my internship as an assistant offline editor, I’ve managed to pick up a thing or two during my down time with the colourist working in the company. And he gave me some tips and tricks on getting proper exposure in post. One of the things I took away was to set my contrast in black and white, eliminating all colours from the picture. This takes away some distraction from the eye which might play some bias to some colours, hence making you think that region is brighter than other. It’s quite an old school trick than very few colourists use today, but an essential one to getting a proper exposure to the picture. It works for both video and still images, like how you would do colour grading or matching on Lightroom or Photoshop.
Also, the limitations of shooting on a DSLR really shows when you’re in post-production, as the grain would be substantial the moment you start cranking up some of the dials such as the blacks, or saturation, or even some of the colour wheels. But we have to work within our limits, and I’m a person of “less is more” kind of thinking, so I guess it’s good to work with some limitations before you go into the full blown RAW experience (pun intended).
True to Form – Week #12.2 – How to make your friend look like a Zombie
I taken on the challenge to change the skin tone of Reza to a more pale looking, cold blood, flesh eating zombie. I had no idea what I was putting myself through.
I am pretty sure there’s a much easier way to going about doing it, but I’ve not dug deep enough into researching or finding how it is done, but I did it by manually keying out and masking the face, legs, and arms of Reza and then applying a colour grade to his skin to make it look like that of a zombie, and here’s the meanest part. Frame by freakin’ Frrrame…
Apparently most of the tutorials online are mostly teaching people how to achieve flawless skin tone, or perfect skin, or proper colouring techniques, which is cool and all if I’m learning how to grade for a TV commercial, but there isn’t one on how to change the skin colour of an actor. Either no one has done it before, or everything is usually done with makeup (which is my guess). So, I think I’m travelling into unchartered waters here, or it may very well look like it.
There was definitely a learning curve to it, and it took me all afternoon picking it up, and the rest of the day (and night) to colour change Reza into the zombie for the entire length of the video. There’s is the tracking function for the key mask, but it’s not accurate, and I would have to eventually adjust the points again as shown in the video I’ve recorded my screen. It’s been fast forward at 300%, so you could imagine how long it actually took to do the entire length.
I’m not merely as done as I would like, as some of the key point are still bleeding, and the discolouration is spilled onto the surrounding visuals around Reza, making him look all heavenly or in some ways radioactive with a glow around him. Definitely got to fix that.
True to Form – Week #12.3 – End is Near
Day by day, the light at the end of the tunnel seems to get brighter and brighter.
Everything seems to be taking its shape, I’ve managed to change the colour of Reza’s skin to make him look like a zombie, and tried matching grades across all the shots. My mate, who has been a legend this whole time, has sent me a couple of tracks of music for me to mess around with to elevate the sequence, adding some elements of suspense and thriller. Reza seems to be doing well with his foley and sound design, we have a couple of issues with the audio levels, but nothing too major.
I’m just trying to put everything together, hoping that it won’t fall apart. You know the feeling of making a sandwich or a hamburger that’s been stacked with layers and layers of patties, bacon, lettuce, and what have you, and the finishing touch of a sesame sprinkled bun on the top. Your main goal now is to put that burger in your mouth without all of the middle crumpling and falling out. Yes, that’s how I feel, maybe in a much less dramatic manner, but I have all the ingredients with me now, and it’s just matter of shifting things around, adjusting audio levels, fine tuning colours, fine tuning Zombie Reza’s colour, and just keeping everything together now.
It’s often overlooked where the “finishing” happens, and that’s where all the work of various department go to, to be put together in one final timeline. Sound from audio post, graphics from visual effects department, coloured visuals from the colourist, and maybe more? And usually, the editor would be the one assembling the final product before it goes out to the cinemas, or broadcast, or whatever mediums the client requested for. And I feel like I’m right in that seat right now of assembling one final burger to be served up on the Thursday/Friday of week #14.
In terms of production, I think the team and I have put in the hours to achieve what we wanted. I couldn’t ask for better group mates to work with. Looking forward to what’s to come ahead.
FINAL ZOMBIE CARPARK CHASE