Everyday Media

An everyday blog about media by everyday blogger Louise Alice Wilson.

Category: Film Light (page 1 of 2)

Practical Project #2

After completing our test shoot, we all felt pretty confident as to what we had to do for the upcoming shoot. We booked out numerous pieces of gear: 3 x battery powered LED light panels with coloured gels (plus some red gel from Robin), 1 x battery powered ENG fresnel, 1 x Canon 5D Mark III, 1 x 50mm f1.2 lens, 1 x 24-70mm f2.8 lens, 1 x black cutter, 1 x white core-board and 1 x reflector. We had our table at Magic Mountain booked for 9:30, giving us time to do the car scenes beforehand whilst he restaurant is busy, then the restaurant scenes later once it had quietened down. Originally we had planned to shoot the car scenes at the Wilson’s carpark next to Magic Mountain, but Darcey called and asked for permission, but they said an adamant no. I’m not usually one to ever bother asking for permission, but I guess its good to do things ‘by the book’. Ella luckily had a car park beneath her building that she said we could use. It certainly didn’t look as interesting or well lit as the one next to Magic Mountain but we decided that we’d make do. However, once we got there and began setting up the equipment we got told by the building manager that we weren’t allowed to shoot their either. This then led to us wasting another hour deciding what we should do and trying to look for somewhere to park the car that was legal but not in a busy location as we had one too many crew members to be legally considered a low impact shoot by the Melbourne city council, meaning we needed to ask for permission to shoot anywhere in the CBD. We managed to find a little car park near Ella’s building where we could shoot, however it was severely less interesting visually than either of the other two carparks, but we had to make it work.

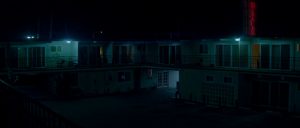
The carpark next to Magic Mountain:

Originally I was meant to DOP the shoot, but then Darcey said she wanted to use footage from this shoot for her reel, so I said I was happy to let her DOP and I could do something else, like direct. Darcey said we should try and share the roles and both DOP and direct, which I was happy to do. However on the day of the shoot Quinlan said he was directing and Darcey was doing DOP, which left me doing lighting and various other odd jobs. I was pretty happy to do lighting, but it was much less interesting than DOP as once you have your lighting setup and begin the take, theres really not much left for you to do but stand there. I prefer to be in a role where I’m constantly engaged with whats actually happening, rather than being like 2 metres away trying to be engaged from a distance.

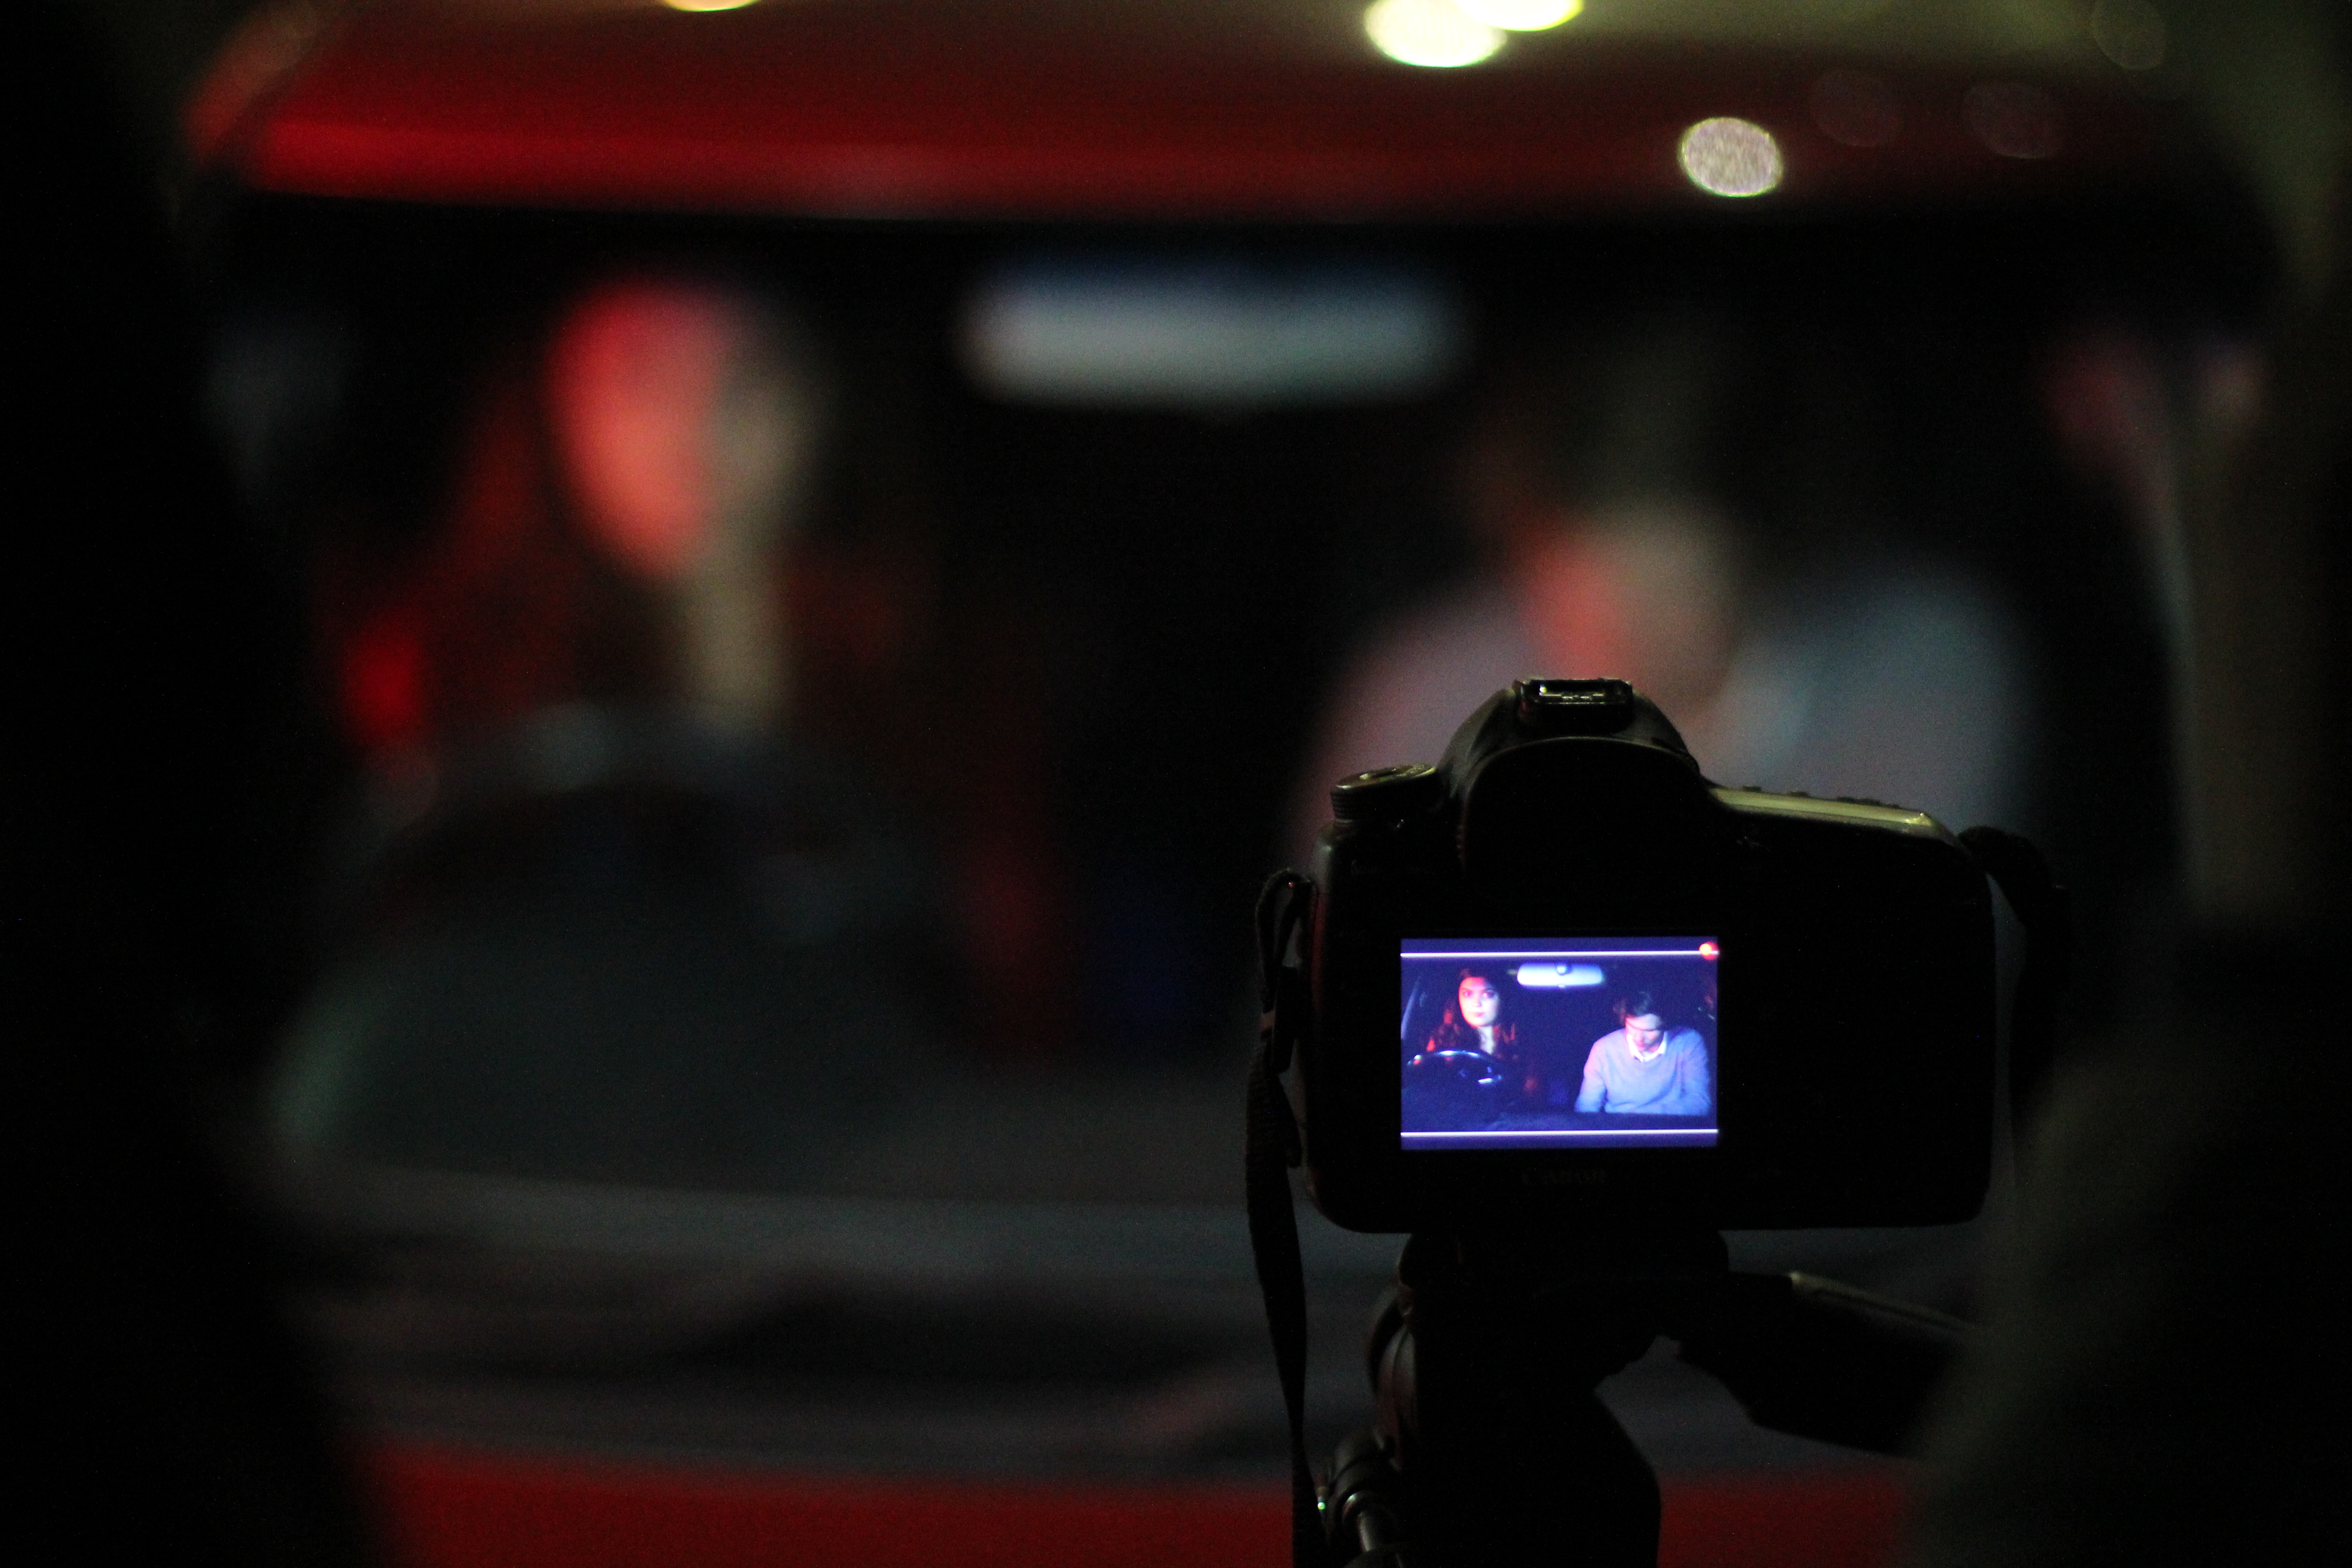
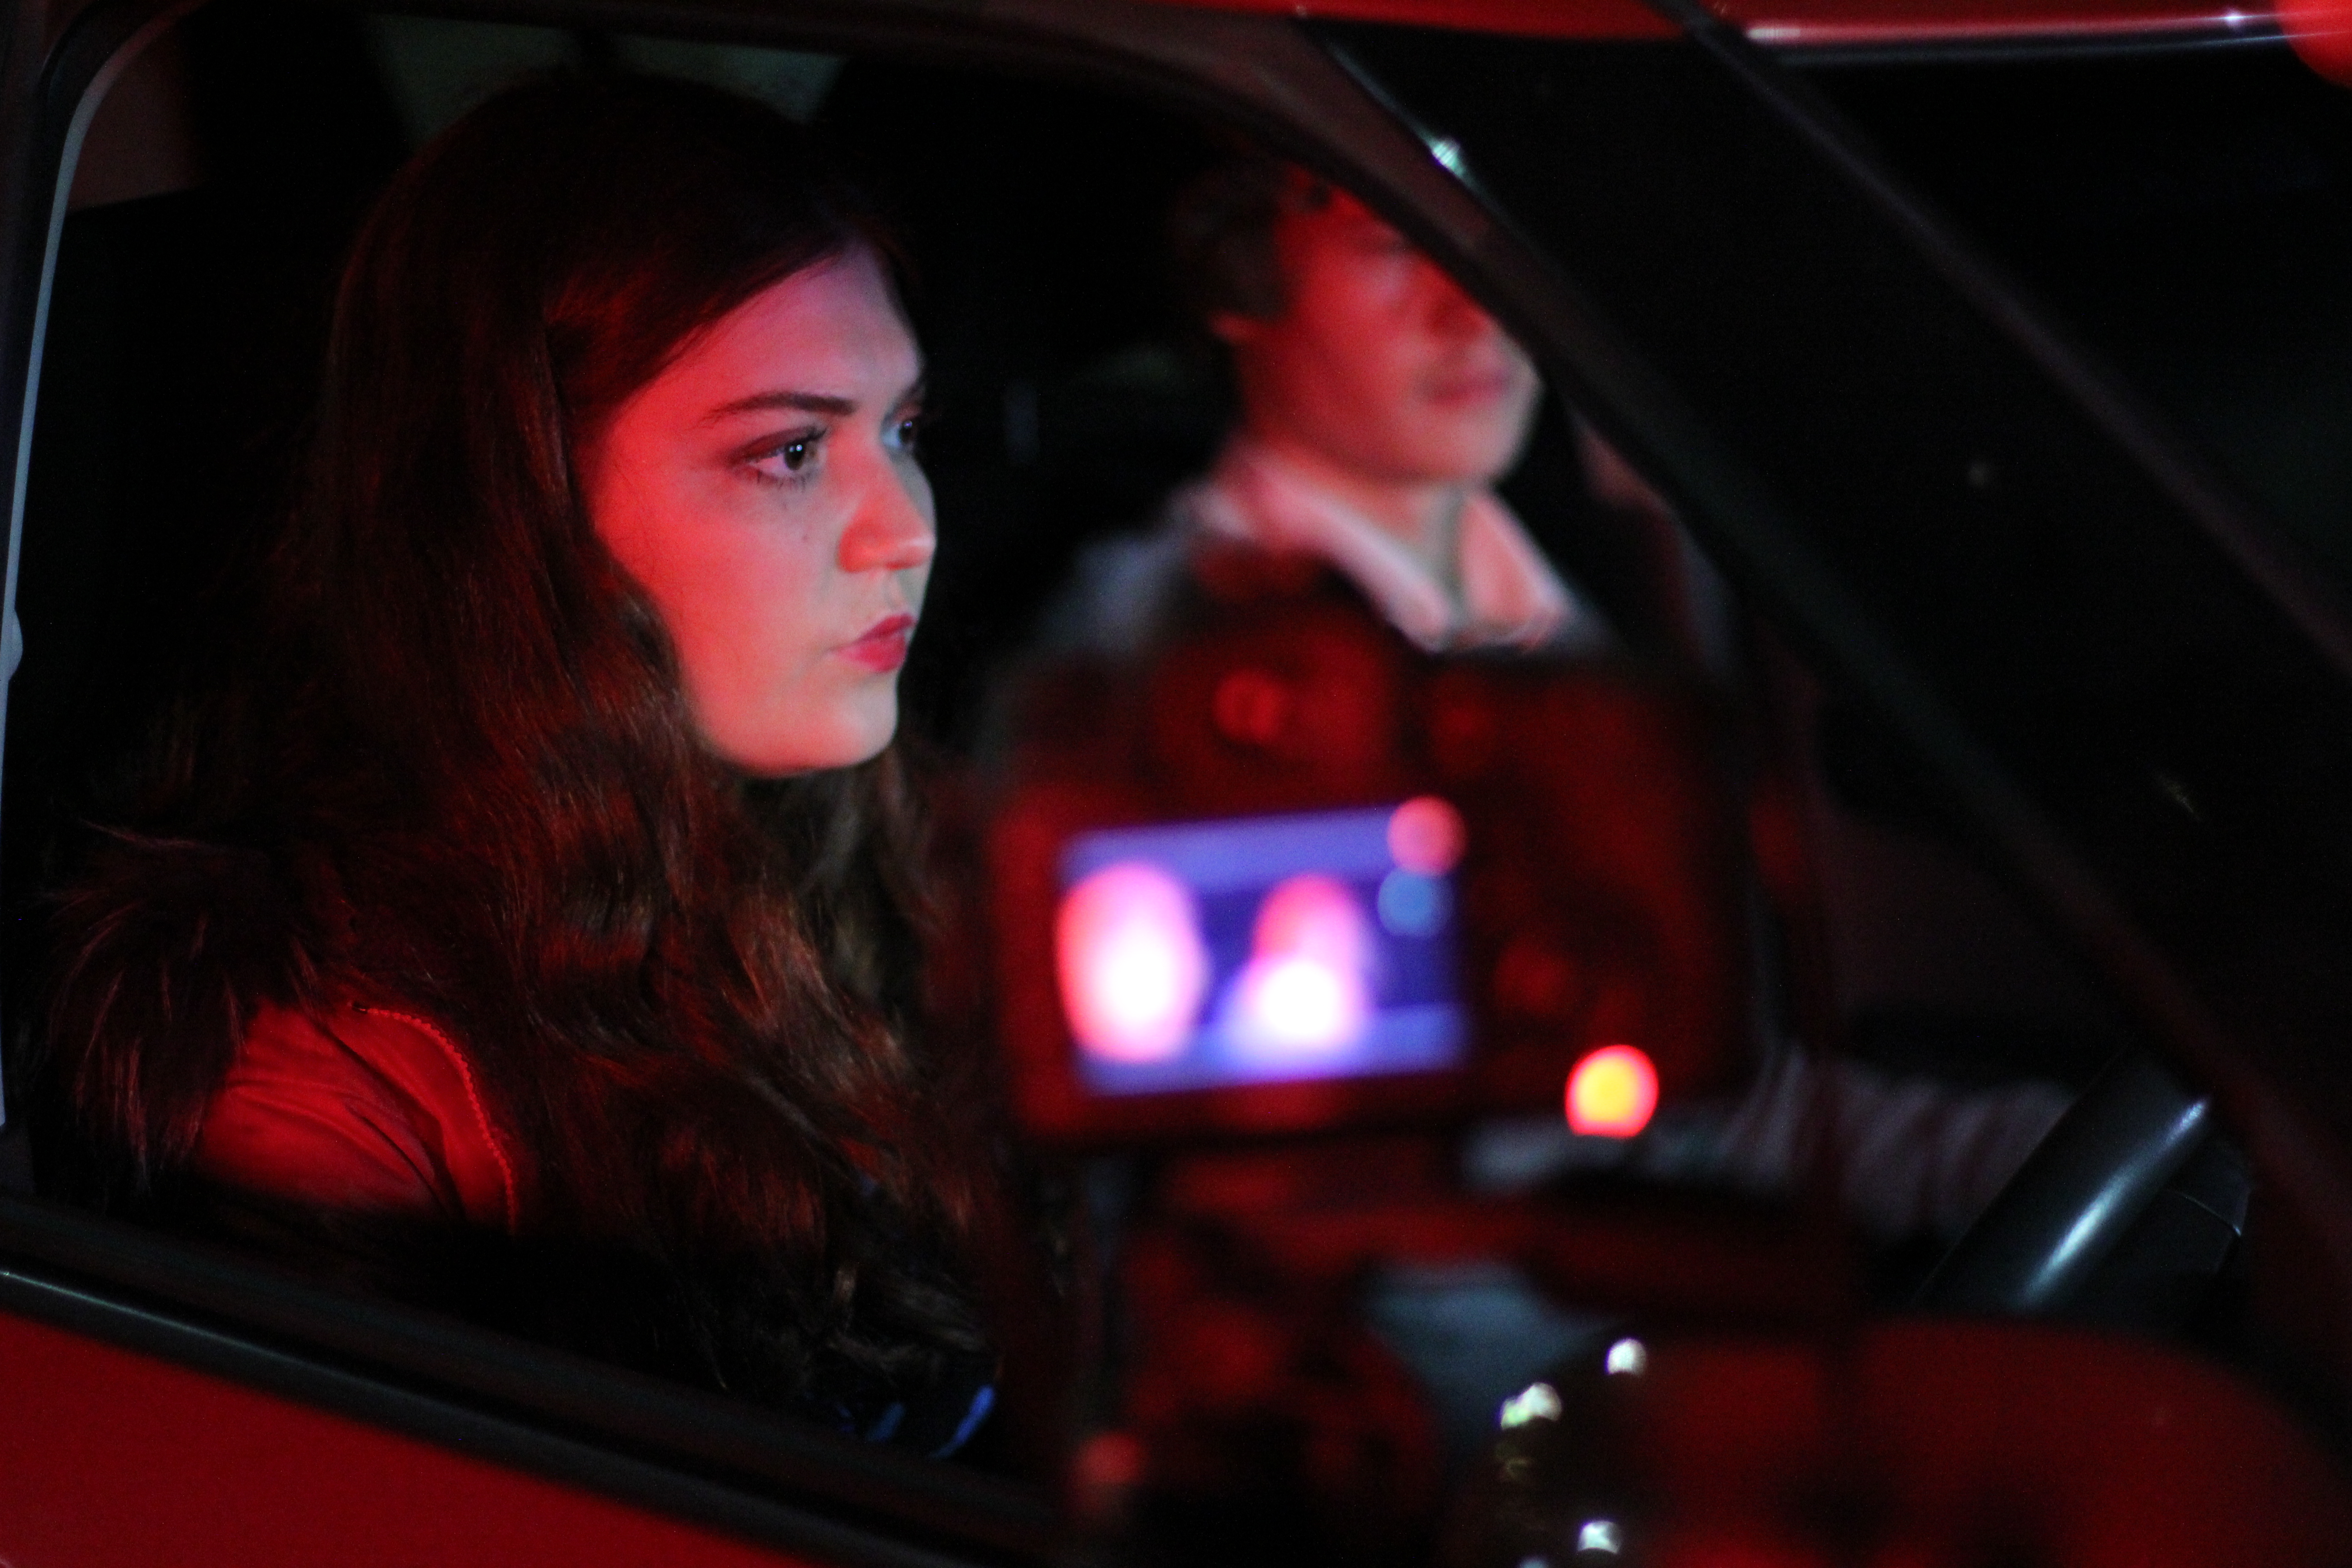
Behind the scenes shots:

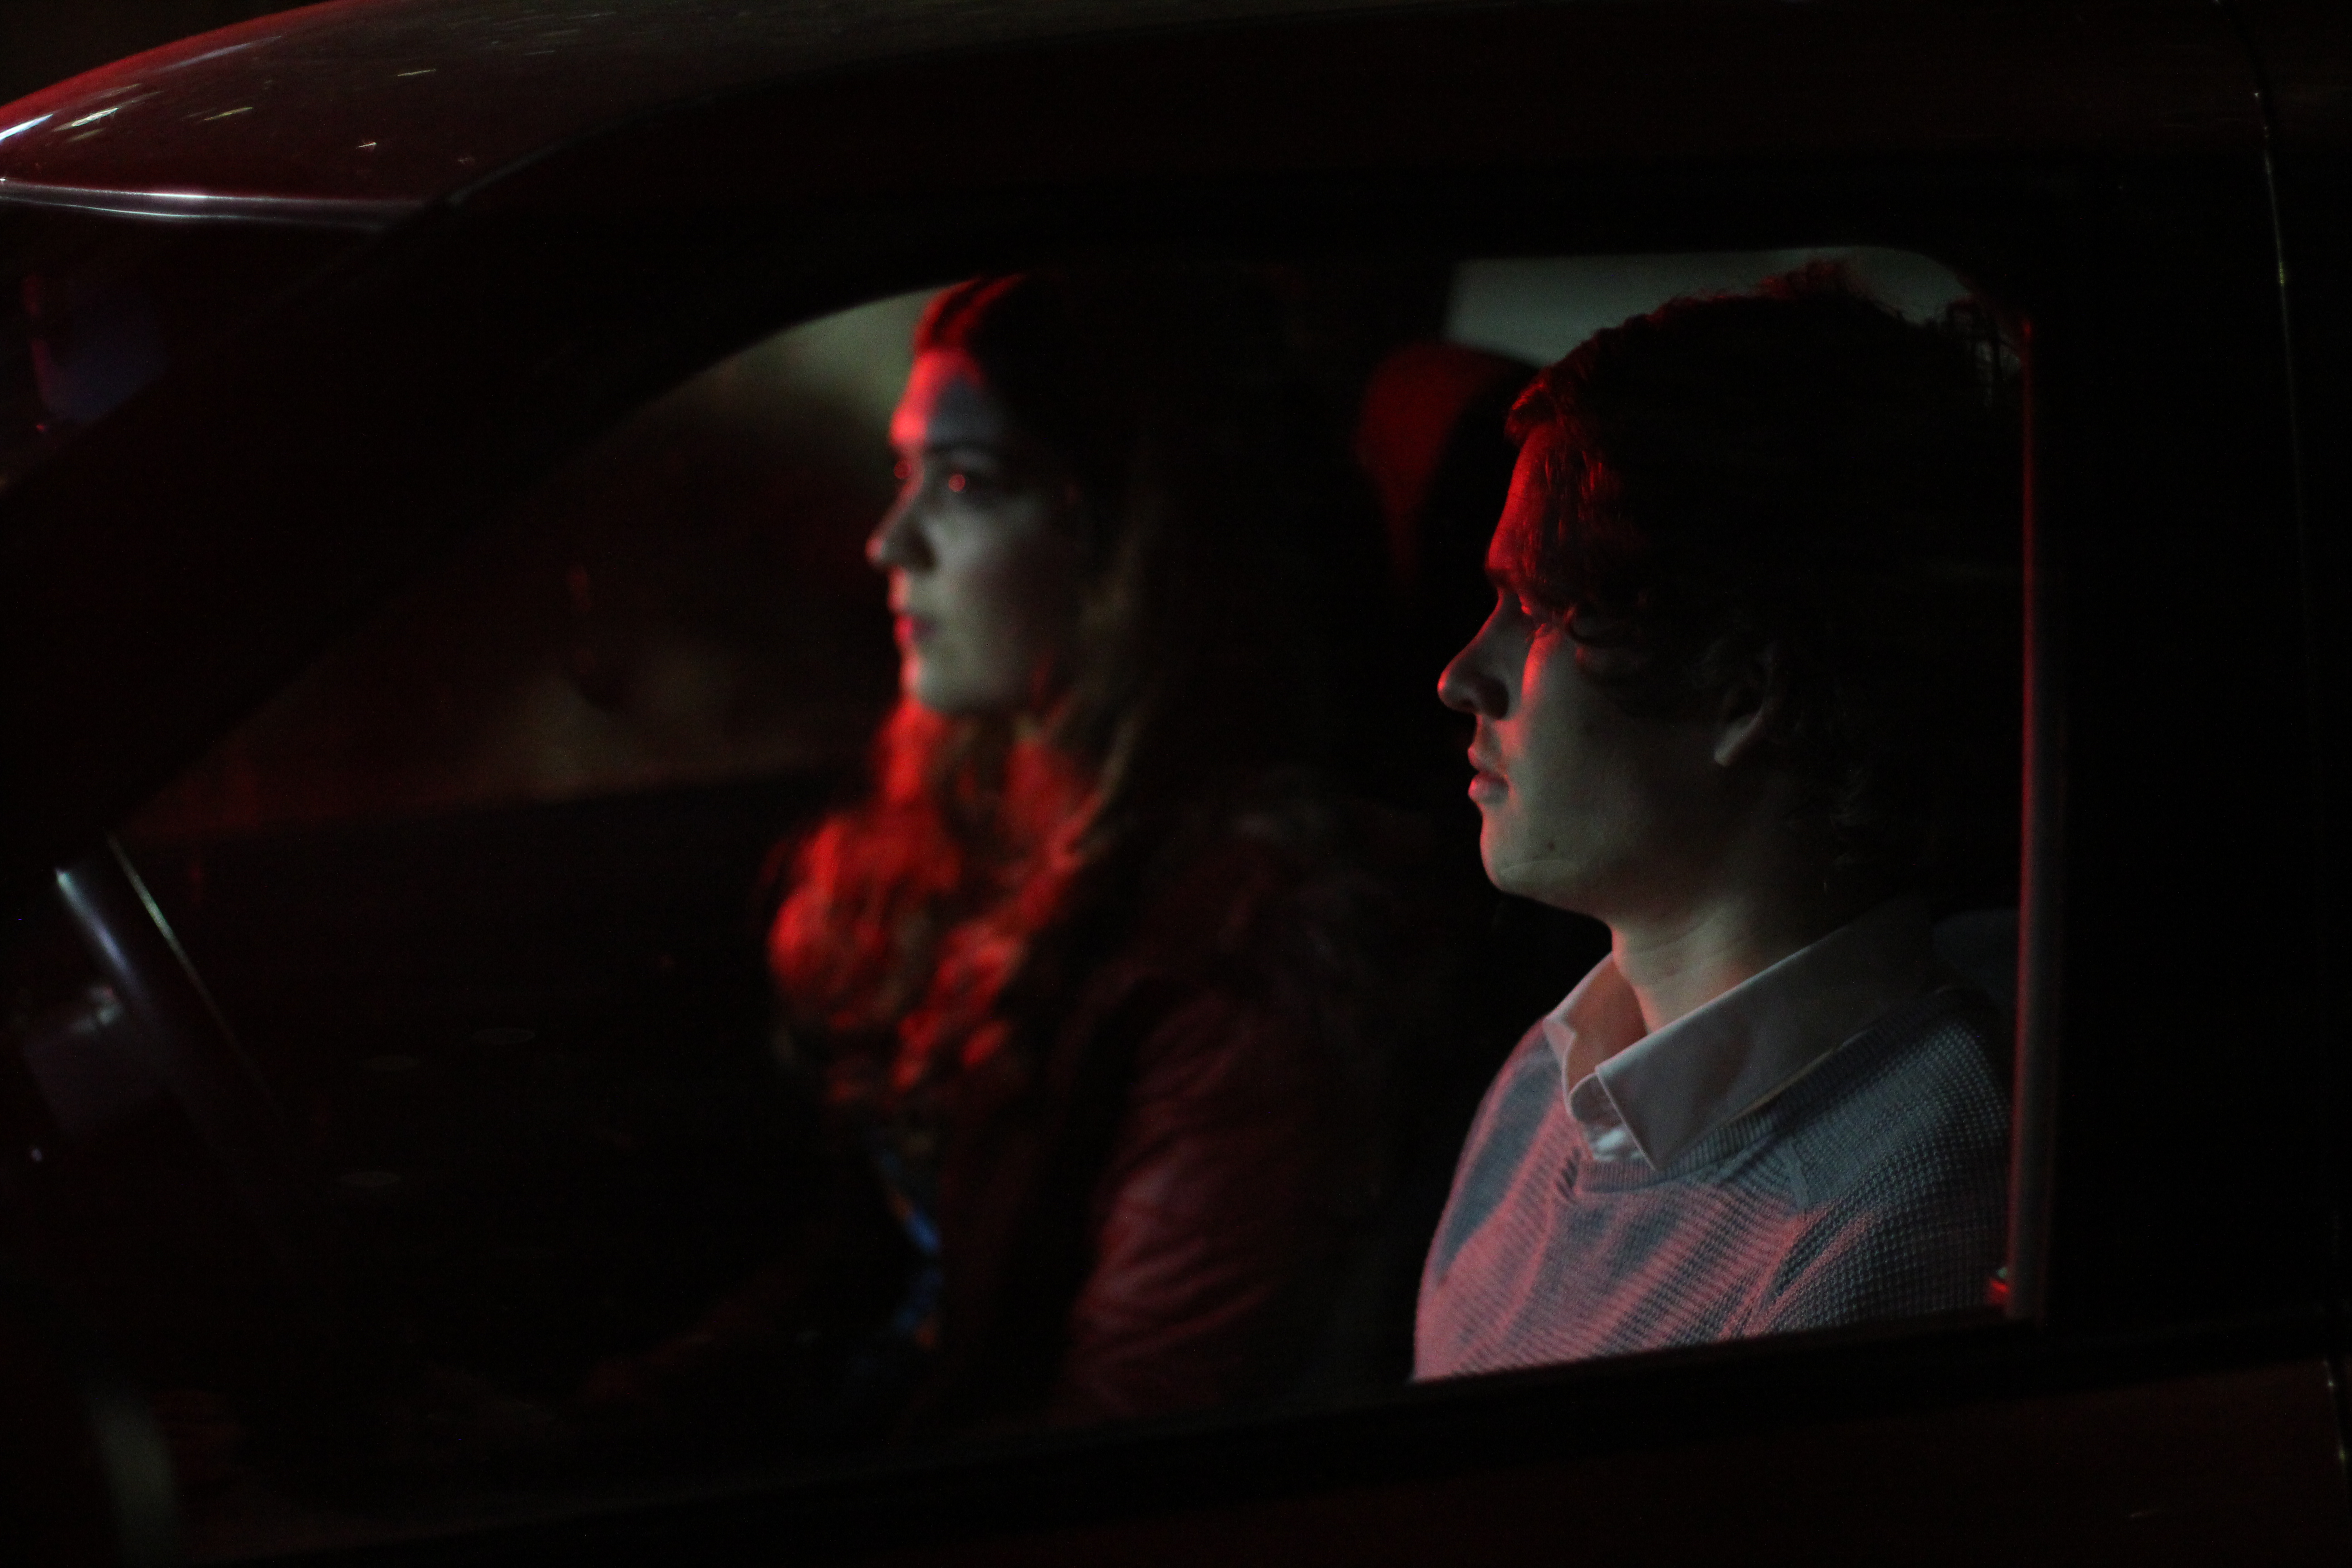
Once we found a good car park we began setting up the lights. One advantage to this non-ideal location was that it had ample space around the car for us to set up the light, unlike the car park next to Magic Mountain. We chose to have the red Magic Mountain neon light as a key light coming from the right hand side of the car, whilst a white fill light acting as a streetlight also came from the right hand side of the car, we then used the spot from the left hand side of the car to add more light to Ella and Taylor’s faces as they were getting a dark shadow across there foreheads from where the roof of the car meets the front window. Originally we had the white fill light set up on the opposite side to the key light, but we thought it looked much more ‘natural’ when they were both coming from the same side. I’m not sure exactly why this occurred, maybe because it looked less obviously lit and contrasty between the white and red light.

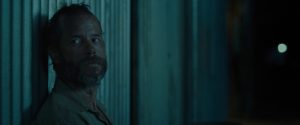
The lighting setup for the car scenes:

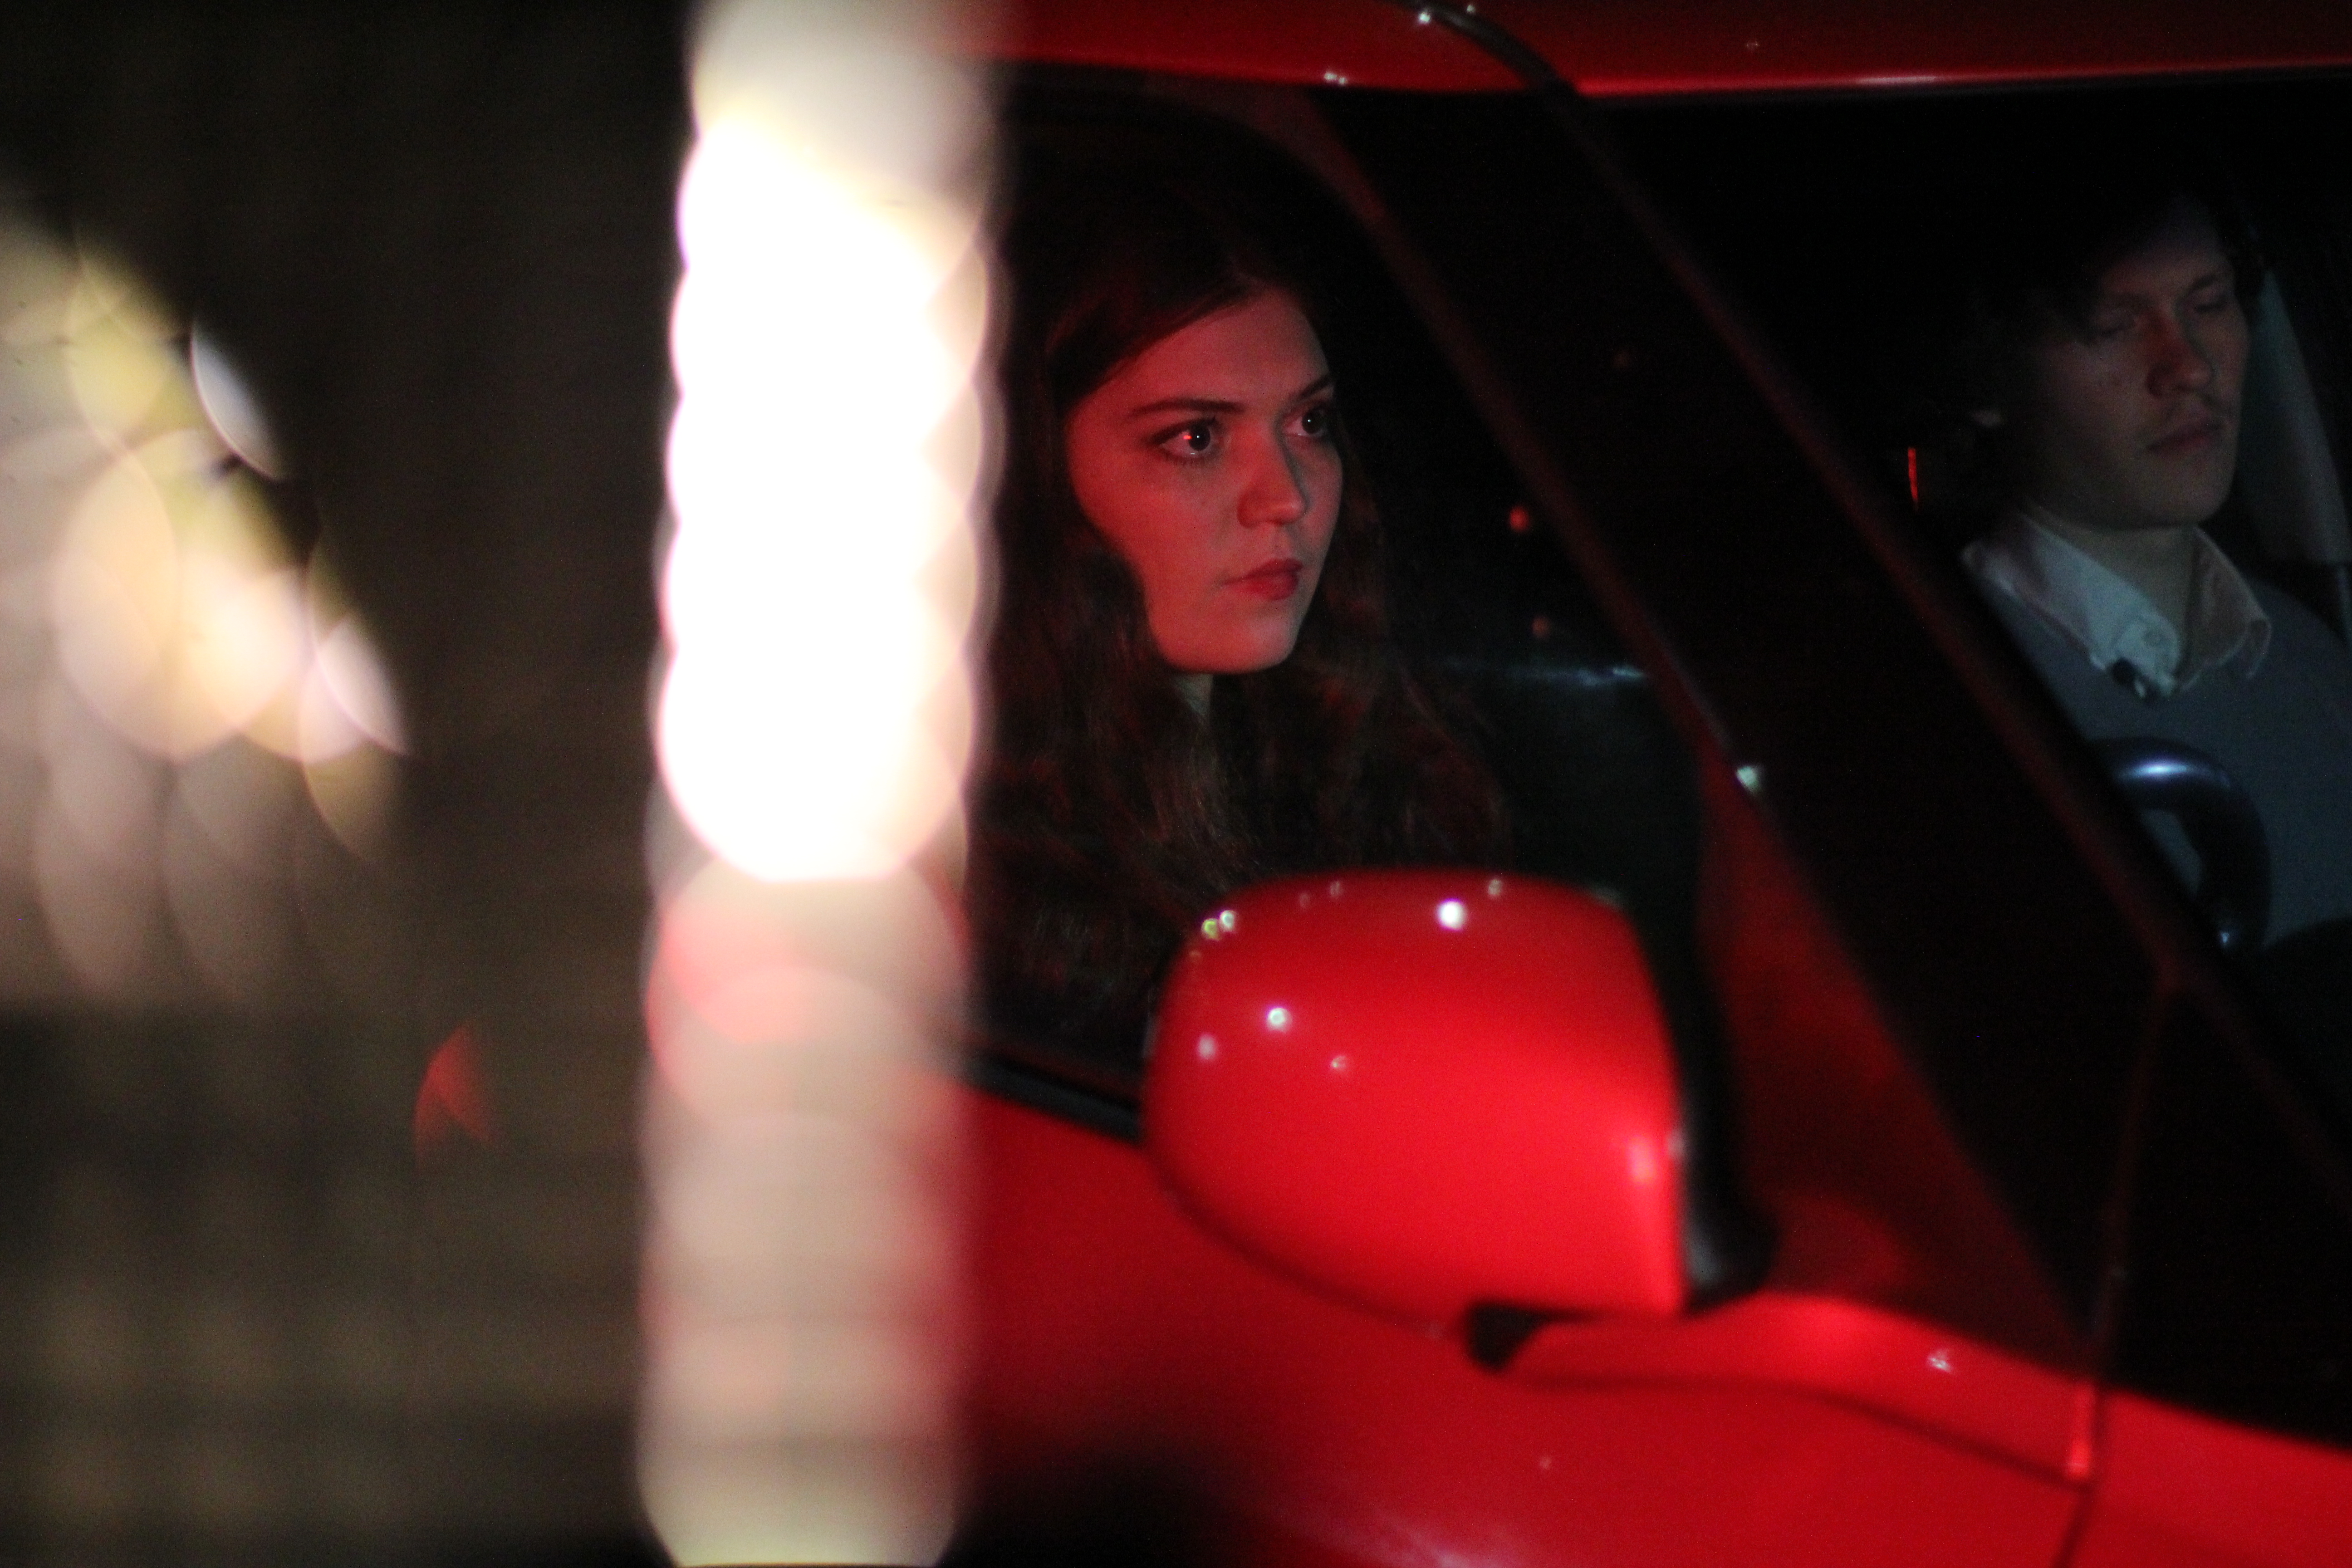
The camera setup for the car scenes:

Overall I think the lighting ended up looking pretty good, apart from the spill of light that ends up hitting the rear view mirror, which somewhat draws your attention to how ‘lit’ the scene is. We did try cutting this light, but it kept affecting the light that was meant to hit Taylor and Ella’s faces so we had to leave it. It is however a pretty convincing dupe of the lighting at Magic Mountain, making for an extremely interesting lighting challenge! For the sound in these scenes we had lapel mics, whose cords weren’t long enough to reach the actual camera. This meant that we Aine had to plug them into her phone to record the dialogue. This became a serious issue when we had to edit the footage as I tried to auto-sync the dialogue up for the two takes, but they wouldn’t auto sync as the two sound tracks (the camera’s and the dialogue) were completely different as the camera didn’t really end up capturing any of the audio from the dialogue, just nearby street noise. Aine ended up trying to sync the audio files to the video files, I’m not sure how she ended up doing it, but it turned out pretty good! Next time wireless lapels would definitely be preferred! Taylor’s wireless lapel also ended up being visible in frame, which none of us realised at the time. Next time we’d definitely have to pay closer attention to details such as this.

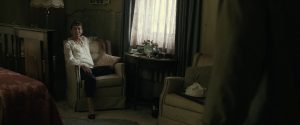
Completed final project:

After the car scene we ended up moving on to Magic Mountain scene, which is featured in the first shot of the completed video up above. I’m not sure which take Aine ended up going with, but the take used has quite different blocking to the one originally intended. Originally we had planned to have a wide shot that turns into a mid shot as the cameraperson walks towards the actors, that take almost does the opposite starting out closing then walking backwards. We had quite a lot of trouble with this shot as the stabiliser that Darcey had was not the best. I’ve used the Zhiyun Crane before which is super easy to use and very stable, Darcey’s stabiliser however had consistent shake to it, meaning you kind of had to recorrect for this by holding the camera in place. Overall I don’t really like the look of the first shot, I think the best way to resolve this would be by hiring out a better stabiliser such as the Zhiyun Crane and doing a number of rehearsals with the actors to ensure that their pacing matches the pacing of the cameraperson.

Overall, considering the minimal amount of time and planning that went into the shoot I think we didn’t a pretty good job. Even though there was some confusion with roles, I really enjoyed working with Darcey, Quinlan, Sam and Aine. They’re extremely friendly and diligent people, who definitely put in the effort when it’s to get to work. I would love to work with them again, but perhaps plan out or project a lot more before beginning to film it. The one thing I was actually impressed with most during the shoot was the quality of acting! Taylor and Ella completely blew me away with how good they are and how patient they were. They essentially spent 6 hours on set with us, having to entertain themselves for most of that time whilst we worked out what we were doing. I think they did an amazing job and wouldn’t be surprised if they got very big in the near future!

Until next time,

Louise Wilson

Practical Project #1

Last week my group – Aine, Darcey, Sam and Quinlan – presented our film project concept to the class, receiving a lot of great feedback and encouragement from the class. As one of our main ideas for the project was to utilise a bright red neon light and various car shots we decided to shoot our project at Magic Mountain Saloon, which has both neon lights and a nearby car park. Darcey knew of this location from working as part of their hospitality corporation and got some test footage for us so we could see exactly what the location looked like.

Film Light Test Footage for Practical Exercise #1 from Darcey Taylor-Morrison on Vimeo.

We decided to organise the shoot for the following week however in class we decided that we simply weren’t ready for the shoot as we hadn’t booked equipment, organised a shot list, nor decided on specific roles yet. I suggested to the group that we still do a run-through of the scene because we’d already booked a table and organised the actors, so we may as well utilise this and start deciding on specific shots we want and specific lighting we wanted to utilise. In my last studio with Paul Ritchard he often suggested that rather than try and spend a heap of time nutting your project out before you’ve been to the location, you may as well just do a complete run through of whatever you need to shoot and then learn from this experience. I found this an extremely useful way to work, so suggested we do that again for this project.

We all met up at Magic Mountain and started deciding on shot compositions with Darcey’s own camera. I suggested that we start with a wide shot of the building, that captures the carpark in the right hand side of the frame (as they’d later walk here) and then slowly zoom in to a tighter shot of our actors sitting at the table. The actors are having an argument in the scene, so I decided it might be a cool shot to track them as they attempt to walk out of the restaurant, with the various walls, chairs and obstructions disallowing us to see the actors at all times adding tension to the scene that aligns with the tension the characters are feeling. The camera then eventually meets up with the actors, only getting a proper clear shot of them as they walk out the front of magic mountain, stopping there to watch the characters angrily walk off and then turn the corner to the carpark. I thought it was very important that the actual blocking of the scene, match the emotion of the scene itself. I like how we the viewer can see this argument unfolding as they slowly walk towards the building, trying to make sense of whats going on. We then try and follow them as they walk towards the door, waiting for them to appear out of it, but as they burst out they’ve already finished their argument and are in too much of a hurry to get to the car for the viewer to keep up, so we simply stand there in awe as they turn the corner. This first scene as well as the rest of the test shoot footage can be seen in the embedded video below:

Test Shoot #2 from Darcey Taylor-Morrison on Vimeo.

Originally we had planned to shoot the car scenes out the front of Magic Mountain, but it turns out that those car spots are essentially always full and don’t get much spill from the neon lights. However the car park next to Magic Mountain is – in my humble opinion – extremely beautiful, with all its bright white fluorescent lights, yellow painted accents and industrial doors and railings. Because of how beautiful this location is I suggested that we film the car scenes here, this way we could also utilise the spill from the bright fluorescent lights to light the car scene. I think the next shot, after the shot of the actors turning the corner is really beautiful – the yellow railing, the dirty white wall in the background, the way Ella is angrily walking ahead being followed by Taylor but then stops to have a go at him, and he just keeps walking past, allowing us the viewer to pause on her and witness her anger and see his shadow move on the wall behind her. Even the slope of the walkway they walk up makes the scene look even more interesting as the actors move about the entire frame.

For the next shot I wanted to shoot Ella walking towards the car showing Taylor already standing there angrily waiting for her, but after some group discussion we ended up shooting a shot reverse shot over the car bonnet. I do really like the look of the magic mountain sign in the background, but I think it would have made a lot more sense to shoot this next shot on a different angle, attempting to still get the sign in the background but feature more of the character movement. The movement of the characters through the space is what adds tension to the argument and makes the scenes look really interesting. We’ve all seen shot reverse shots of characters standing still and theres only so much you can do to make these shots dynamic.

I thought the next couple of shot reverse shots from the back seat of the car worked out really well and do look visually interesting even though its a pretty simple shot setup and a widely used technique for filming dialogue scenes in cars. I really don’t however like shot that looks straight out the front window from the back seat, it feels overly staged and takes you out of the scene as it directs your attention away from the actors and to the various uninteresting things in the background of the frame. Hopefully when we do the real shoot, we’ll find a more interesting way to shoot that shot. It’ll also be really interesting to work with extra lighting for the car scene, adding more red neon light as a key and potentially some blue or white as a fill, to make the shots look even more interesting. Overall though we did get a detailed breakdown of specific shots we wanted to use as well as blocking for each of the shots.

Until next time,

Louise Wilson


A Look Back

For my week 12 reflection I’ve decided to reflect on the studio as a whole even though Robin said he doesn’t expect some kind of ‘studio summary’ from us, bey hey imma do it anyway.

I guess when I first started this studio I didn’t really know what to expect from it. I did assume that it would be hard and quite technical as I’m not super experienced with lighting for film and am aware of how technical the process of lighting is. Completing this studio just made me realise that lighting is even more technical than I thought, however it can be quite easy! Maybe this makes no sense, let me explain. In order to be a great cinematographer it is important to have a great amount of knowledge regarding what different lights are capable of, what their colour temperatures are, how consistent they are etc, how much light you need to get the exposure you want (when working with film), how adjusting aperture, iso and shutter speed will effect your shot, plus 6000 other things.

However, even if your not on top of all these various pieces of information you can still create great lighting for film, you just need to give it a go. Grab some lights and just start trying to work it out, go through the motions, keep trying things until something works. We did so many exercises in class like this, where we just had a bunch of lights and various cutters. Rather than have some overarching plan of how to setup the lights we just kept trying different setups until the lighting was reminiscent of something that we wanted. When it comes to approaching a new skill, half the battle is feeling comfortable enough to even try and the only way to build up that confidence is by exposure. You just need someone to throw you in the deep end, til you begin to realise it’s not so deep. These in class exercises really helped me understand that there’s always more information for you to learn which will help you become a better cinematographer, but ‘doing the thing’ is much more important than standing back because you feel like you don’t know enough.

I also really enjoyed watching all of the various clips that Robin showed us in class. I now have a long list of films I need to download. I think every time Robin showed the class a clip we never wanted the clip to stop, when it did we had just been so drawn into the film that we wanted to watch the whole thing. These clips were really great ways to visually absorb ways of lighting a scene for different lighting conditions and to help you realise that even though it may look obvious at the time, its often not obvious whilst watching the film. Overall I’m really glad that I picked this studio as I feel like I’ve developed a much greater understanding of how to light a scene, as well as how to analyse lighting within film and then apply that approach to my own work.

Until next time,

Louise Wilson

Week 10 – Reflection

Today we had Rory, a professional gaffer come into our class to physically introduce us to some important pieces of lighting equipment and share his expertise with us. Like all Scot’s he was a very practical, honest, assertive, no bullshit kind of person – which me being a fellow Scot quite appreciated. I could see how such an attitude would get you far in the gaffing industry. He quite literally had a truck load of stuff, which was very interesting to see. Alike much of the film industry it seems that he has a preference for LED lights and being a practical man who’s had to work with this equipment for decades, I can see why. He first took us through some of the old-school lights like the Inky – used mainly in the 1960s’ – which are extremely emotionally compelling, albeit inconsistent and much harder to adjust and less energy efficient than their modern LED counterparts. When you see a light like an Inky in person and you realise that people had to rely on those inconsistent and hard to adjust units to light their sets, you develop a greater appreciation for the work of cinematographers and gaffers alike. All lights need numerous amounts of equipment to adjust the actual light source themselves, LED’s included – such as cutters and cuculoris’. But when you see a light like the Arri Sky Panel where you can simply turn a nob to dim the light or press a button to change the colour rather than grab another diffuser or another gel it really hits home how far we’ve come, but also how lazy we’ve gotten. In the hands of great people, such finely tuned equipment would make for a better lighting setup. However, it is this ease of use, that creates a culture wherein people no longer need to understand how such an effect could be achieved and how to intricately manipulate such an affect. Reflected by Robin in his musings on how modern camera’s lack of requirement for an exposure has to lead to a lack of attention to detail, when it comes to how films are actually lit. This modern invention that was meant to make life easier – the digital sensor – has indeed made us lazier and less knowledgeable on the art of lighting for film.

Until next time,

Louise Wilson

Week 9 – Reflection

For this weeks Wednesday class we had to complete an exercise where we attempted to light a scene that looked like a darkened study. We ended up using a Dedo light to simulate the light coming from a lamp, by bouncing it off white core-board and cutting any of the excess spill light. Overall the lighting ended up looking quite realistic and also lit our actor Kerry quite well. After completing this exercise I became interested in how other people attempt to light dark scenes for film, so naturally I consulted Youtube. From here I acquired a number of tips for lighting a dark scene, that I intend to use within my own film projects outside of uni.

Tips for Lighting a Dark Scene:

  • Don’t bump up the ISO to compensate for lack of light as the image will get grainy.
  • Use a ‘fast’ lens that can stop down to a lower number, to maximise the amount of light hitting the sensor.
  • Rather than use direct light, bounce light off a wall, ceiling or other nearby surface. This will help you replicate ambient diffused light, thats often found in dimly lit situations with no strong light sources. If you want greater control of this bounce use a core-board or other movable object.
  • Bouncing light from a ceiling will create a down light effect, which often won’t simulate naturally found ambient light such as that from a window or under a door. So think about the ambient light your attempting to mimic, before choosing where you bounce the light from.
  • The colour of the object upon which you bounce the light will control the colour and intensity of the light.
  • You can add contrast to a darkly lit image by having your subject in front of a light coloured background, such as a white wall.
  • Add further contrast to the image by adding a dim fill light. Potentially using a blue gel to simulate moonlight, or a piece of brown cardboard for a more subdued fill light.

Until next time,

Louise Wilson

Week 8 – Reflection

For this week’s reflection rather than reflect on class I decided to look into one of the cinematographers that is inspiring my group for our upcoming film project, Natasha Braier the cinematographer responsible for the beautiful neon light in Neon Demon. Natasha not only creates beautiful images utilising neon light but she also creates beautiful images utilising daylight and ambient light as can be seen below.

Daylight:

Ambient Light:

Neon Light:

I decided to look at another one of Natasha Braier’s films The Rover (2014), to see how she utilises natural light, as it was largely filmed in the Australian outback rather than the neon-lights of LA.

The Outback – Daylight:

Car Scenes – Daylight:

Interior Scenes – Ambient Daylight:

Interior Scenes – Ambient Practical Lights at Night:

Exterior Scenes – Ambient Practical Lights at Night:

Until next time,

Louise Wilson

Week 7 – Reflection

This week my group – Aine, Quinlan, Sam and Darcey – presented our ides for our film project to the class. The basic premise for the shoot was to shoot at night, to utilise bright neon lights, to light scenes within a car and to have characters leave on location and move to the next. Darcey suggested that we shoot at Magic Mountain Saloon in the city as it has beautiful neon lights as well as plenty of car spaces out the front of the venue and a carpark next door. Darcey having worked for Magic Mountains parent hospitality company has connections to people that work there and could get approval for us to film at this location, as well as book a table for the nights we wanted to shoot there.

Essentially the scene will begin with our characters inside Magic Mountain Saloon exchanging dialogue, they will then leave this location and move to their car. For the scenes at the car we will have to recreate the lighting present at Magic Mountain by adding various lights with coloured gels, such as an LED light with a red gel to use as a strong key light and perhaps another LED light with a blue or white gel as a subdued fill light that could imitate either moonlight or streetlight. My group was extremely influenced by the work of Dario Argento and Nicholas Winding-Refn or should I say their cinematographers Luciano Tovoli and Natasha Braier who worked on Suspiria and Neon Demon. Creating extremely dramatic and dynamic looking images with bright neon lighting. Somehow both these cinematographers have managed to create images that look extremely overdone (in terms of colour) but do not take you out of the reality of the film, which is a hard task to master. In line with the scene of Suzy (Jessica Harper) sitting the car, we were interested in adding texture to the windows such as rain or snow, to make the shoots look even more interested and blur the background even more. However it might be unwise to do just that, as it could mean we’d need all the other shots to also look rain or snow effected which may add to much extra work if it doesn’t happen to rain on the day. To align with Robin’s idea to film another version of our projects under different conditions, we suggested that we could film the same scene at daylight comparing how we lit the night scene to the day scene as they would both be extremely different.

Suspiria, 1977 directed by Dario Argento and DP’ed by Luciano Tovoli.

Neon Demon, 2016 directed by Nicholas Winding-Refn and DP’ed by Natasha Braier.

I really love the idea of working with Neon light as I love the films of Dario Argento and Nicholas Winding-Refn so I’m really looking forward to getting a storyboard together and working out how we’re gonna shoot this thing.

Until next time,

Louise Wilson

Week 8 – Reflection: http://www.mediafactory.org.au/louise-wilson/2018/05/27/week-8-reflection/

Week 9 – Reflection: http://www.mediafactory.org.au/louise-wilson/2018/05/27/week-9-reflection/

Week 10 – Reflection: http://www.mediafactory.org.au/louise-wilson/2018/05/27/week-10-reflection/

A Look Back – Reflection: http://www.mediafactory.org.au/louise-wilson/2018/05/27/a-look-back/

Practical Project 1: http://www.mediafactory.org.au/louise-wilson/2018/05/27/practical-project-1/

Practical Project 2: http://www.mediafactory.org.au/louise-wilson/2018/05/27/practical-project-2/

Week 6 – Reflection

This week was an interesting week, as rather than work through specific activities we ended up discussing what it was we wanted to work on for the rest of the term, which certainly was a very interesting experience. I guess its rare for a teacher to ask you – “what do you want to learn about?”.

Essentially Robin got each of us to tell him what we would like to focus on for the rest of the semester, or what we were enjoying and from that he could gather a deeper understanding of what the class collectively was interested in exploring next.

Lots of people had plenty of good ideas about what to do, a few people suggesting we attempt to recreate a shot we liked, in order to learn from it – which I am really interested in doing and thus said that very thing. Others suggested they wanted to create something they felt was worthy of a ‘showreel’ – though I guess thats a big ask from a studio, but I certainly would love to create a piece of work which I am that proud of. Some people wanted to do things that were a bit more radical, such as explore more ‘abstract or artistic’ lighting, such as the use of coloured gels to light a scene. Or to explore how different genres utilise different lighting setups, which of course would be dramatically different depending on the genre, as ever genre has their own rules. It’d be interesting to see how something would never be done in a certain genre, but would be pushed to the extreme in another genre.

From that we somewhat deduced a plan for the rest of the studio which essentially involves us getting into groups and filming a small scene of whatever we wanted, leaving it up to us to choose. I’m in the same group as I have been for most of the semester – minus a few of the usual suspects – and am pretty excited to see what we come up with.


Until next time,

Louise Wilson

Week 5 – Reflection

This week, again like last week we were hands on filming more scenes. However, unlike last time the scenes we shot this time were a lot simpler, or maybe they just felt a lot simpler?

We were given the exercises ahead of the day, but this time our group (which was the same as last time) didn’t plan the shoot out prior to the exercise but rather worked it out on the day. Our group however got to shoot in the second half of the class, as everyone else was out shooting in the first half of the class, so in a way we did get a little extra time for planning.

For the first half of the class Robin gave us a mini lesson going through cinematography terms that we’d learnt thus far, grouping related terms together and adding new terms to the ones we already knew – thoroughly expanding our cinematographic vocabulary. Then Robin also showed us numerous clips where we got to visually explore the terms we were learning, as well as simply appreciate some brilliant filmmaking such as Orson Welles’ ‘Citizen Kane’ and a number of other classic examples.

At the tail end of this lesson we quickly planned out which group member would do what in the scenes we were shooting and we decided to switch roles around, to drastically different roles than the ones we were used to. As we’d worked out that even though we are encouraged to switch roles or try new things, often people that were comfortable or interested in particular areas kept doing the same roles. For example I’ve always been very interested in doing camerawork so I always offer myself as DOP or camera assistant, Darcey quite loves directing, so would often take on that role and Sam has discovered that she makes a great First AD so she kept offering herself for that role.

This time we decided to switch it up, so I was an actor along with Alex and Aly, Sam was on camera, Quinlan was directing and Darcey and Alaa were doing the lighting and sound. Having radically different roles was great, it was nice to sink into the role of ‘actor’ and just be told what to do and where to stand. I just focussed on practising my lines and making my ’emotions’ feel genuine, rather than being fixated on getting ‘the best shot’.

I remember Robin saying that he kept rewatching our clip as the acting was quite – I can’t remember the exact word – but somewhere along the lines of engaging? When I watch the footage back I guess I tend to agree, both Aly and I attempted to be as genuine as possible, mimicking the emotions that someone would feel, in the situation we were in. Which was essentially bumping into someone you thought didn’t like you, and realising they did. I guess we all can relate to that?

It was very interesting also to see how someone else deals with the problem of getting the right framing, or avoiding showing specific objects in frame, or dealing with locations with starkly different exposures. It meant I could learn by taking a step back, rather than being right in there – which was a new experience for me.


Until next time,

Louise Wilson


Week 5 Reflection: http://www.mediafactory.org.au/louise-wilson/2018/04/27/week-5-reflection/

Week 6 Reflection: http://www.mediafactory.org.au/louise-wilson/2018/04/27/week-6-reflection/

Basic Research Project: http://www.mediafactory.org.au/louise-wilson/2018/04/27/basic-research-project/


Reflection – Film Scene

The Good, The Bad and The Ugly (1966) – When you have to shoot, shoot scene.

The Good, The Bad and The Ugly is a great film, and often regarded as one of the greatest films of all time. I never much paid attention to how the film was lit, but on examination I don’t know what I think of the lighting. Maybe i’m totally wrong, but the lighting seems quite obvious when you pay attention to it, which makes me thing it could have been done better? Certainly the lighting is masterfully done, in the way it properly exposes the characters faces and splashes off and around certain props and objects, adding a great deal of dimension to many of the shots. But it does look quite obvious, once you pay attention to it, especially when you can see multiple shadows coming from a single character. All that said, the lighting is still pretty masterful and I’m very intrigued to properly analyse it.

The first shot of the scene has extremely beautiful (even though it is obvious 😉 ) lighting. As the cowboy stands in the hallway you can tell that there is a strong key light coming from the left of the frame, that will light his face once he steps out of the shadows. It seems like there is another light, maybe coming from high up near the roof, lighting the right hand side of the frame, near the back of the hallway. Most likely facing towards the character to light him from his right hand side, to seperate him from the background. The lighting setup of this shot is extremely beautiful the way it enhances the various pieces of wood and props within the frame, and how they’ve managed to keep the cowboy drenched in shadows as he sneaks around, even though there is quite a lot of light within the frame. It looks like they may have used a cutter to achieve that effect as its a very specific area, essentially just the top half of the cowboy thats drenched ins shadow. Theres also this curious black circular shadow which exists at the very top of the door near the cowboys head which permanently stays extremely dark, much darker than the rest of the shadows in the frame. I wonder how they achieved this effect? Maybe a very specifically located circular cutter.

As we switch to the frame of Tuco and the bathtub we can clearly see his shadow defined on the wall, telling us that there is a strong key light coming from the right hand side of the frame, probably just above head height which is why his shadow is slightly downcast. We can also see a slightly lighter shadow against the wall on the left hand side making it obvious to us that there is also a slightly dimmer fill light coming from the left hand side of the frame. The shadows are relatively defined, which makes me think the light is somewhat hard and I assume the lights were relatively close to Tuco on set.

As the cowboy moves through the frame we see him walk into that key light coming from the left hand side of the frame, as he makes his way towards Tuco, assumedly the lighting setup was designed for exactly that to happen. The next shot of Tuco in the bathtub shows another key and fill light setup, with the key coming from the right of the frame and the fill from the left, coming from a height slightly higher than the actor. Once we see the reverse-shot this actor is suddenly slightly in shadow as the lighting setup priorities the face of the cowboy, lighting him with a key and a fill in the same fashion as the previous shot.

I love the wide shot that follows as we see the cowboy stumble out of the bathroom. The lighting looks so great, even though its so obvious and maybe even because its so obvious. The room very much looks like a stage setup with pools of light coming from the bathroom, a strong light on the front of the bed frame and another light highlighting the fireplace in the back of the room. It’s hard to imagine how many lights they used to light this shot, but it must have been quite a few!


Until next time,

Louise Wilson

Older posts

© 2024 Everyday Media

Theme by Anders NorenUp ↑

Skip to toolbar